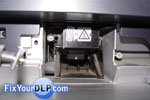
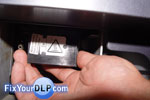
How to replace Sony XL-2200 lamp enclosure for your projection TV.
Sony XL-2200 Lamp Enclosure.
Step 1.- Before you start doing anything, unplug the TV from the wall outlet. There are a few thousand volts going through your ballast, be very careful! It’s also a good idea to let the TV cool down for at least 15-20 minutes as the bulb itself can get extremely hot and you can severely burn your hand.
Step 2.- In the front of your TV there is a bottom panel where you can access the lamp enclosure door.
Remove it by uninstalling two screws on each side of the panel with your Flat tip screwdriver.

Step 3.- Now go back to the front and you’ll see a metal security bar across the enclosure.
Use your screwdriver to remove it.
Step 4.- Inside you’ll be able to see a hex toped screw that holds the enclosure in place.
Use a Hex key to release it.
Step 5.- Pull it down and you’ll be able to extract it with ease.
Step 6.- Pop in your new enclosure the same way you took out the old one.
Screw it back in with your hex key.
Place & reinstall the metal bar back again.
Step 7.- Take the bottom panel and place it back in the front of your TV.


I have a Mitsubishi DLP. How do I replace WD57732 lamp?
Thanks,
Don
I am replacing a lamp for a sony KDFE55A20, but when the old one was removed we notices that one of the onectors has melted and stayed on the other part of the tv, how can we replace that part?