
Replace your Sanyo PLV-75 projector lamp
Sanyo PLV-75 projector
When your Sanyo PLV-75 projector lamp nears end of life, you’ll see the Lamp Replacement Indicator on the top panel turn yellow. Replace the lamp immediately with model Sanyo POA-LMP99 (service parts no 610 325 2940).
STEP ONE: Purchasing the correct projector lamp
Prolong the life of your Sanyo PLV-75 projector and save money by installing an original Sanyo POA-LMP99 (service parts no 610 325 2940) projector lamp. Generic lamps look like a great bargain but these knock-off lamps are created with inferior materials making them susceptible to explosions when installed. They also have a shorter life span and can damage the precise components in your Sanyo PLC-PLV-75 projector.
Buying authentic guarantees a projector lamp created with genuine, non-hazardous materials by the original manufacturer. These lamps come with money-back guarantee and warranty covering. It’s worth the few extra dollars to eliminate potential problems and have a lamp built to work properly with your Sanyo PLC-PLV-75 sensitive mechanisms.. Go with an authentic Sanyo POA-LMP99 (service parts no 610 325 2940) projector lamp and make life easier. Learn more about spotting dangerous projector lamps by reading our article: 7 tips for spotting counterfeits.
Eco-friendly alternative
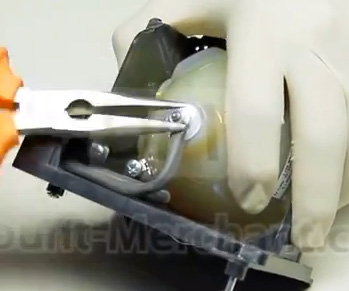
Looking for a green alternative? Try replacing only the bulb and re-using the same plastic cage. Watch this Sanyo POA-LMP69 replacement guide to find out more.
STEP TWO: Installing the new Sanyo POA-LMP99 lamps
- Wait until the Sanyo PLV-75 is cool to the touch before installing the new lamp. Turn off the projector, unplug the AC cord and allow 45 to 60 minutes. These projectors operate under high heat and there is a possibility of being burned, if the projector is not fully cooled before changing the Sanyo POA-LMP99 (service parts no 610 325 2940) lamp.
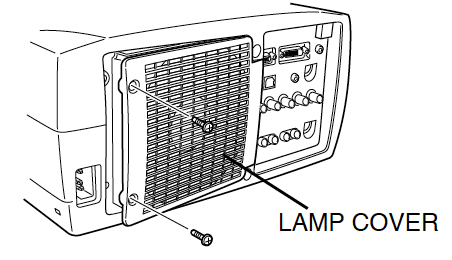
- The lamp cover for the PLV-75 projector is located at the back of the projector. Turn the projector around and loosen the two screws holding the cover in place. Place the cover to one side.
- Inside you’ll find the Sanyo POA-LMP99 (610 325 2940) lamp cage. Loosen both screws holding the lamp cage in place. Grab the lamp handle and gently lift the lamp out of its socket. Place to one side. Be sure to dispose of the used lamp through a local recycling program. Don’t throw this lamp into the regular garbage as it contains mercury.
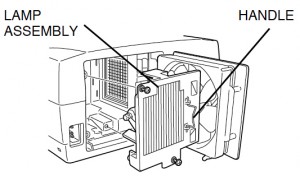
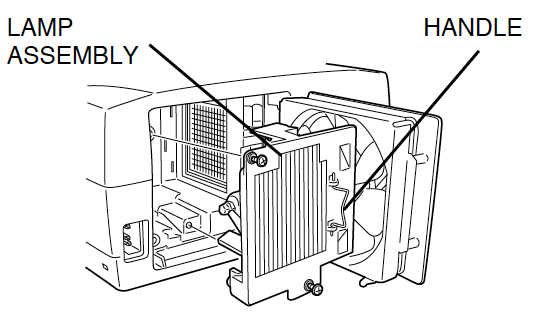
- Taking the newSanyo POA-LMP99 (6103252940) lamp assembly by the handle place it into the slot. Avoid touching the actual bulb as the oil from your fingers can burn a black spot on the lenses or you can accidentally break the bulb. Don’t force the lamp into place — it should slide into the slot easily.
- Once the lamp is in, tighten both screws on the Sanyo POA-LMP99 (service parts no 610 325 2940) lamp assembly. Make sure the screws have been tightened properly or the Sanyo PLV-75 projector will not turn on.
- Replace the Lamp Cover and tighten the screw. Re-connect the power cord and turn on the Sanyo PLV-75 projector. If the Sanyo POA-LMP99 (610 325 2940) lamp does not turn on after the warm-up period, try re-installing the lamp.
- Reset the Lamp Replace Counter by following the instructions below.
NOTE: Your old Sanyo POA-LMP99 (service parts no 610 325 2940) lamp should be properly recycled. These lamps contain mercury and can’t be placed into common garbage.
STEP THREE: Reset the Lamp Replace Counter
The Lamp Replace Counter for the Sanyo PLV-75 will track the correct age of your newly installed lamp and trigger the Lamp Replace Indicator. Failure to reset the counter may result in the projector not tracking the end of life for the Sanyo POA-LMP99 (service parts no 610 325 2940) and letting the projector inadvertently use the lamp past its normal life cycle which may result in you Sanyo PLC-XP40 suddenly stop working.
NOTE: RESET the Lamp Replace Counter ONLY WHEN the lamp has been REPLACED.
- Press the MENU Button to display the MAIN MENU.
- Press the POINT LEFT/RIGHT button and scroll right to select SETTING.
- Press the SELECT button to display the SETTING DISPLAY menu.
- Press the POINT DOWN button (a red arrow will appear).
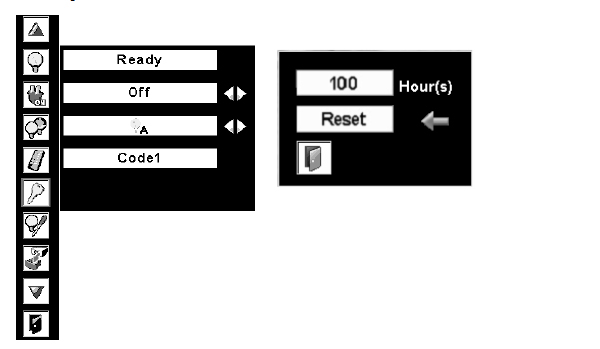
- Move the red arrow to the LAMP AGE and then press the SELECT button.
- Select the RESET option.
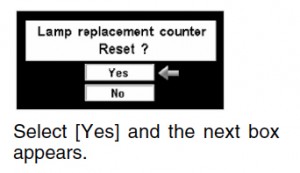
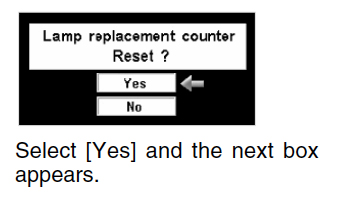
- The message “Lamp replace counter reset?” appears. Move the arrow down to YES and press the SELECT button.
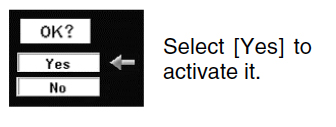
- The message “OK?” appears. Click on YES.
- Move the arrow to QUIT and press the SELECT button.
Extend the life of the Sanyo POA-LMP99 projector lamp
Extend the life of your newly installed Sanyo POA-LMP99 (service parts no 610 325 2940)9 by following these helpful tips:
- Wait at least five minutes before turning the Sanyo PLV-75 projector off.
- Don’t operate the projector continuously without letting it stand for at least one hour turned off every 24 hours.
- Cleaning the air filter regularly will also prolong the life of theSanyo POA-LMP99 (service parts no 610 325 2940) and prevent the Sanyo PLV-75 projector from overheating.
I replaced a bulb several months ago and it has worked well, but the projector won’t turn on now. No LED is turned on even if power cable is OK. I don’t remember exactly if I reset the counter or not. Is this because I didn’t reset the counter and it expired? Then how can I reset the counter when it won’t turn on? Otherwise, does it simply indicate that the replaced bulb is off again?
Hi Won,
You must reset the counter when you change the lamp. Otherwise, the projector assumes that old lamp is still in use and keeps counting the old hours. Your projector doesn’t realize it’s a new lamp with many more hours. Hope this helps.
Cheers,
Shelagh