
How to replace the NEC NP110 projector lamp
- NEC NP110 projector

This guide shows you how to replace the NEC NP110 projector lamp.
When its time to replace the NEC NP13LP lamp, the Lamp Indicator on the NEC NP110 projector will blink red. The lamp will continue to work for an 100 additional hours but will immediately go into standby mode when it hits the 100th hour. Using the lamp past the recommended time may cause it to overheat and shatter inside the lamp case.
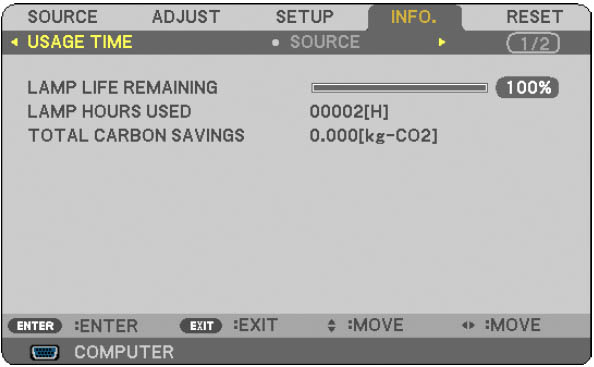 You can also determine the status of your lamp by referring to the Usage Time screen. Press the HELP button on the remote to display the INFO screen. The progress indicator shows the percentage of remaining life for the NEC NP13LP lamp. When the remaining lamp reaches zero, the LAMP LIFE REMAINING indicator changes from 0% to 100 hours and starts counting down.
The importance of authentic lamps
Always invest in a genuine NEC NP13LP lamp in order to keep your NEC NP110 projector working. Your original manufacturer (OEM) has created these lamps to fit your NEC NP110 projector and keep the sophisticated components working properly. While generic lamps may be sold at discount prices, their inferior workmanship and cheap materials often result in damage to the interior of projectors. They are also prone to explosions which can release toxic heavy metals into the air as well as damage your projector beyond repair. Read more about the 7 Ways to Spot a Counterfeit Lamp.
Installing the NEC NP13LP lamp
NOTE: Before installation allow one hour for the NEC NP13LP lamp to cool before replacing.
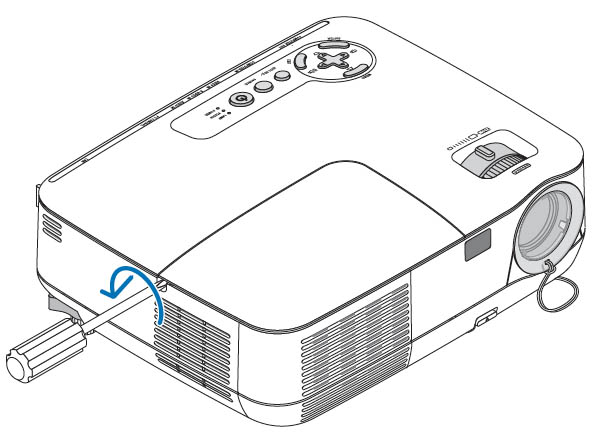
Loosen the screw
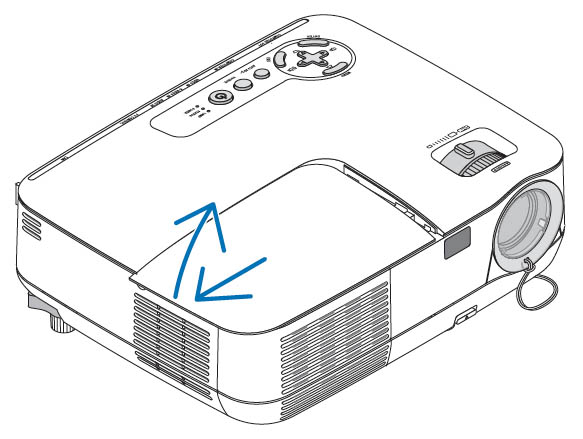
Slide the cover o
The front cover is found at the top of the NEC NP110 projector. Loosen the side screw to release the cover. Push the cover off the tack and place it to one side.
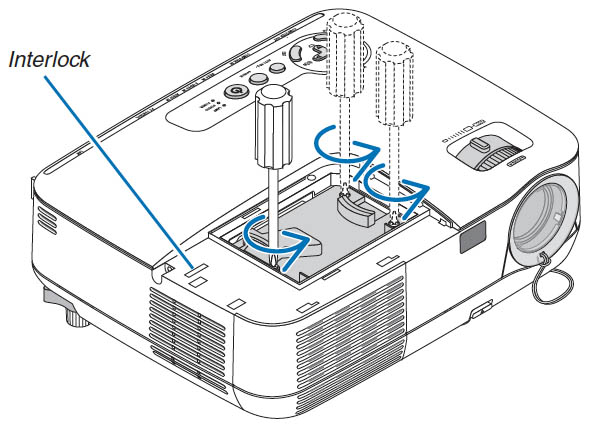
Loosen all three screws
Loosen the three screws holing the NEC NP13LP lamp in place. The three screws can’t be removed only loosened.
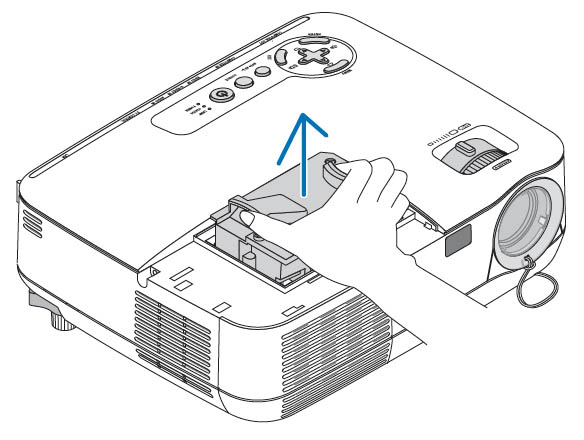
Grasp both sides of the lamp
Leave the interlock on the side untouched as this prevents the risk of electrical shock.
Remove the NEC NP13LP lamp housing by pressing both sides of the handles on either side. Be sure to dispose of the used lamp through a local recycling program. Don’t throw this lamp into regular garbage as it contains mercury.
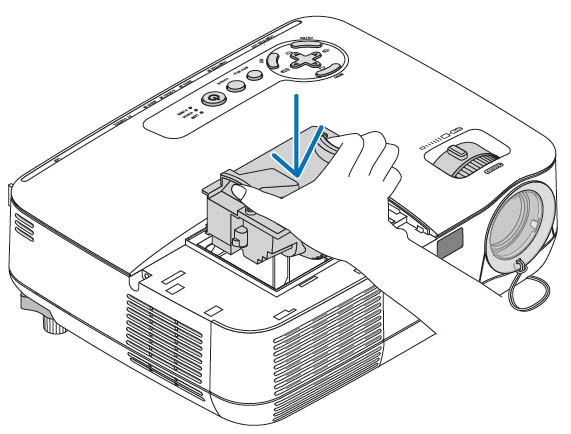
Place lamp into projector
Insert the new NEC NP13LP lamp into the socket. Gently push the top center of the NEC NP13LP lamp to ensure it’s in place. Be careful not to break the glass in the lamp. Don’t touch the glass surface on the NEC NP13LP lamp as this can cause an unwanted shadow on the lamp and dark spots resulting in poor picture quality.
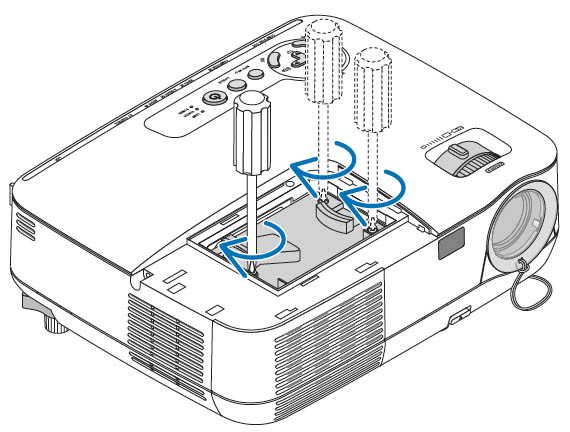
Tighten all 3 screws
Tighten all three screws holding the lamp in place. Slide the NEC NP110 lamp cover back in place until it snaps shut. Tighten the screw. Now, you’re ready to reset the Lamp Hour Meter.
NOTE: Your old NEC NP13LP lamp should be properly recycled. These lamps contain mercury and can’t be placed into common garbage.
Resetting the NEW NP100 Lamp Hour Meter
After installing the new NEC NP13LP lamp, you must reset the lamp clock back to zero.
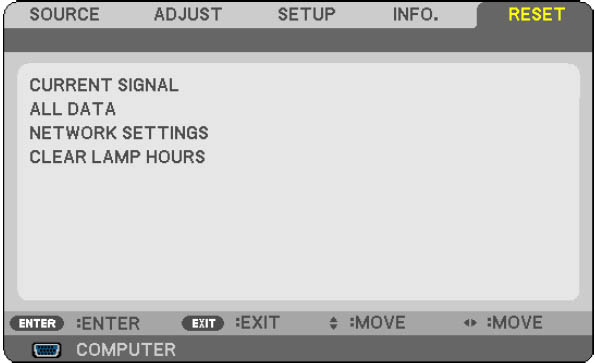
- Using the remote control, click the MENU option.
- Move to RESET menu.
- Move down to CLEAR LAMP HOURS.
- Select YES.
- Press the ENTER button. Lamp life will be returned to zero.
Extending the life of the NEC NP13LP lamp
The NEC NP110 projector has an ECO option that extends the life cycle of your newly installed NEC NP13LP lamp.
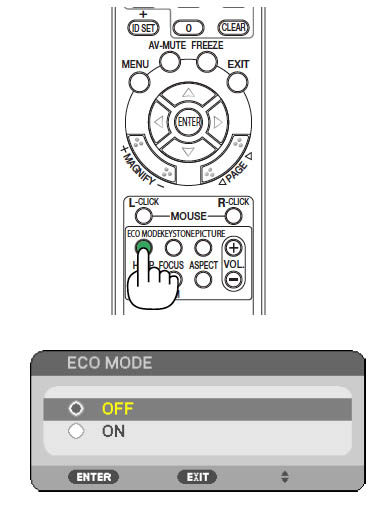 To activate ECO MODE using the remote control:
- Using the remote control press the ECO MODE button
- Use the up or down arrows to select ON
- Press the ENTER button
To activate ECO MODE from the projector screen:
- Press SETUP
- Move to the GENERAL option
- Scroll down to ECO MODE
- Turn ECO MODE on
- Press the ENTER button.
NOTE: The POWER indicator will blink green when ECO MODE is on and the brightness of the screen will decrease.
If the projector becomes overheated, the Forced ECO MODE will automatically switch on and a thermometer symbol will also turn off. When the projector cools down the Forced ECO MODE will turn off.
I have replaced the lamp as explained in your instructions above but when i come to turn the projector back on the lamp light is still on solid red and the projector won’t turn on. Can you help me with this please or advise me on where i can go.
Thank You
I have also replaced the lamp as explained in your instructions above but when I come to turn the projector back on the lamp light is still on solid red and the projector won’t turn on. Can you help me with this please or advise me on where i can go.
Thank You
Hi James,
Did you reset the lamp timer? It sounds like the projector still thinks the lamp is out of life and is waiting for a new lamp to be installed. You can also check that the lamp was installed properly and all the screws are connected properly. You could also join our forum at fixyourdlp.com/forum/ where there are experts who can help you out. Hope this helps.
Regards,
Shelagh
With the NP110, you have to reset the timer by remote because it will not let you turn on the projector if you have exhausted all available hours.
If all three lights on the projector are on (power, lamp and i forgot the other one),
Hold the “Help” button on the bottom of the remote for 10 seconds and it was reset.