
10 Steps to a ceiling mounted projector
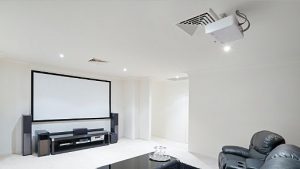 A ceiling mounted projector offers theater-style viewing if installed properly!
However, installing a ceiling mounted projector can be a bit of a challenge unless you do your homework first.
Follow our 10-step guide to help you install your DLP projector onto the ceiling.
1. Start with the ceiling
The ceiling height controls the screen heights and width, which then controls how far back your projector, must go. What kind of ceiling are you dealing with? There are three basic types:
- Cathedral: Any tall, high rise ceiling resembling those found in a church.
- Structural: The main ceiling, usually flat and at least eight feet high.
- Suspended: Also known as a drop or false ceiling, this is a secondary ceiling hung below the main ceiling. This is most typically found in an office setting.
After determining what type of ceiling you have, buy the appropriate ceiling mount adaptor kit.
2. Flush or extended mounting
Flush mounting to the ceiling allows four to six inches between the ceiling and projector. You won’t be able to do flush mounting with a cathedral ceiling but can be used on structural and suspended ceilings. There must be enough airflow around the projector to allow it stay cool.
3. Mounting kit
You’ll need to buy the proper mounting kit for your projector. There aren’t really any generic mounting systems that work properly. Each projector has different placements for its mounting holes and ventilation units so it’s crucial to buy the correct kit for your projector. Most projectors are mounted upside down and the image is then inverted using the menu options. Don’t substitute your mounting unit.
4. Screen height
Your screen is an important part of the whole scenario. You need to have the right placement as well the correct height. Take your ceiling height, subtract three feet and that will give you your maximum screen height. Minimum height is three feet off the floor.
5. Screen width
You’ll also need to figure out the maximum width of your screen. If you’re using the projector for predominantly business presentations you want to install the 4:3 aspect ratio screen and the 16:9 aspect ratio screen for watching television or movies. For the 4:3 screen, take your maximum screen height and multiply it by 1.33 and if installing a 16:9 screen, take your maximum screen height and multiply it by 1.78—that number will be your maximum screen width.
6. Throw Distance
After figuring out the screen dimensions, you’ll need to determine how far back to install the projector. This is known as the “throw distance.” Your throw distance depends on your particular model; each projector throws a different image. Consult your manual for the manufacturer throw chart listing image size based on distance from the screen. This will determine exactly where the projector should be mounted.
7. Ventilation
Your projector must have enough airflow so its cooling system will operate properly. A projector too close to the ceiling will overheat causing it to shut down or have a shorter lamp life. Most manufacturers recommend a three-foot radius for proper ventilation.
8. Mount the Projector
Locate the ceiling stud (use a stud finder to locate the appropriate beam). Your ceiling mounting kit will have instructions and all the necessary hardware for mounting your projector.
9. Adjust the Image
After making sure the projector is level on the mount you’re ready to adjust the picture. Align the picture using the zoom, horizontal and vertical lens shift controls. Adjust the focus. If your projector doesn’t have the vertical lens shift you will have to adjust the height of either the screen or projector. Your specific user manual will have more information.
10. Stay patient
Getting your projected mounted on the ceiling and everything working takes a bit of time. Stay patient knowing that once you have everything working, you won’t have to do any more adjustments. Your ceiling mounted projector will give you a great image and enhance your presentation or viewing enjoyment.
I purchased a projector and it only says rear projection in the discription. Will I be able to use it with a ceiling mount?
Hey Tommie,
it all depends on the projector model. You can technically mount a rear projector on the ceiling if your model allows you to reverse and invert the image — which is the orientation needed for projecting from the ceiling.
Regards,
Shelagh