
Prevent screen burn on the Samsung HP-R5052
 Keep your screen crisp and clear by preventing screen burn on the Samsung HP-R5052.
Your Samsung HP-R5052 TV has a simple, easy-to-use menu system that makes it convenient and fast to use. There are some important features you need to set up to ensure your Samsung HP-R5052 keeps it crisp screen and clear images.
Viewing the Menus
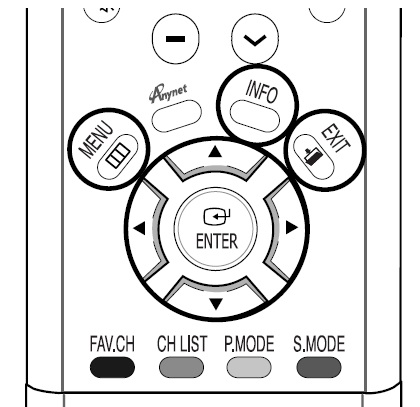 You can view the on screen menus using the input MENU button on the Samsung HP-R5052 remote control. Use the arrow keys to scroll up and down/ left or right through sub menus. Press MENU to choose the options. EXIT to close the menu. To access:
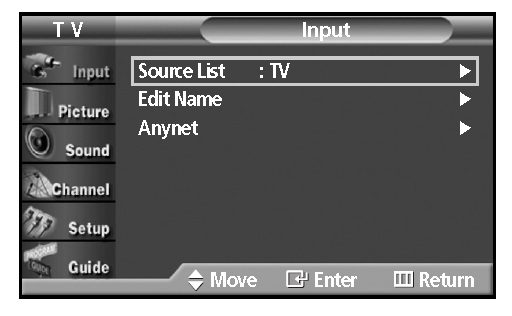
- With the power on, press the MENU button on the remote control. The main menu appears on the screen.
- Select the INPUT menu choices.
- Press the up or down button to move through the menu items
- Press the left / right / ENTER buttons to display, change, or use selected items.
- Press the ENTER button to enter items
NOTE: The on screen menu will disappear from the screen after two minutes. Press MENU to open up the menu again or EXIT to leave the menu area.
To get info on your settings: Press the INFO button on the remote control.
Preventing Screen Burn-in
The wide screen format on your Samsung HP-R5052 TV is designed for a 16:9 aspect ratio. Watching films from DVDs or video games can result in dark side-bars on the screen. Side bars as well as stationary images on the screen such as computer graphics and logos or patterns and can create an uneven aging of the PDP display.
The result is image retention, images burnt into the screen creating ghost images on the screen. To reduce image retention, the Samsung HP-R5052 TV is equipped with screen burn prevention that allows you to move the picture around the screen.
To access the screen burn-in prevention:
To get info on your settings: Press the INFO button on the remote control.
- Press the MENU button.
- Press the up or down button to select SETUP.
- Press ENTER.
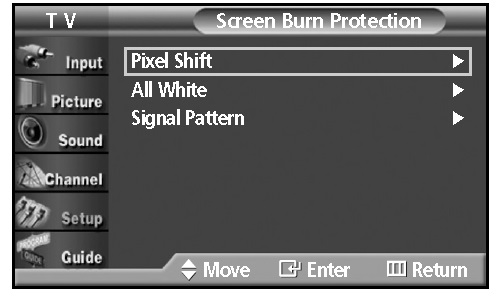
- Press the up or down button to select SCREEN BURN PROTECTION.
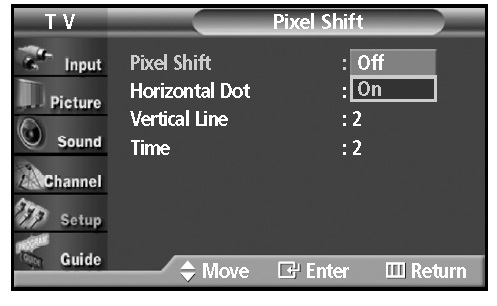
- Scroll down to PIXEL SHIFT.
- Press ENTER.
- Options available include:
- Horizontal Dot: Move picture side to side
- Vertical Dot: Move picture up and down on the screen
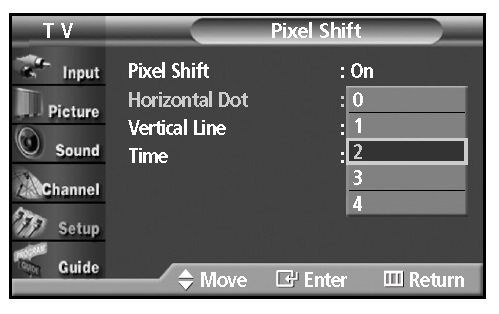
- Time: Program the time between movement of the picture in minutes
Optimum condition for pixel shift;
- Horizontal Dot: 2
- Vertical Line: 2
- Time: 2
NOTE: Pressing the up or down button alternates between ON or OFF for this option.
Reducing the effects of screen burn
 If screen burn has occurred, you can select a white screen or signal pattern (rolling screen) to help remove screen burn artifacts.
- Press the MENU button.
- Press the up or down button to select SETUP
- Press ENTER.
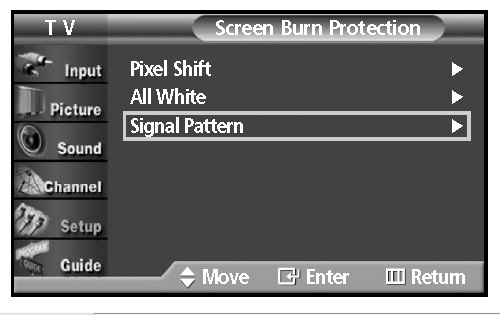
- Press the up or down button to select SCREEN BURN PROTECTION.
- Scroll down to select:
- ALL WHITE: Removes after-images on the screen by changing coloured pixels to white.
- SIGNAL PATTERN: Removes after-images on the screen by moving all the pixels on the PDP according to a pattern. NOTE: Signal Pattern is the more effective of the two.
NOTE: This after-image removal function has to be executed for a long time (approximately 1 hour) to effectively remove after-images on the screen. Repeat if after-image is not removed.
Using the Energy Saving Feature
 This feature adjusts the screen brightness automatically depending on the surrounding lighting conditions.
- Press the MENU button.
- Press the up or down button to select SETUP
- Press ENTER.
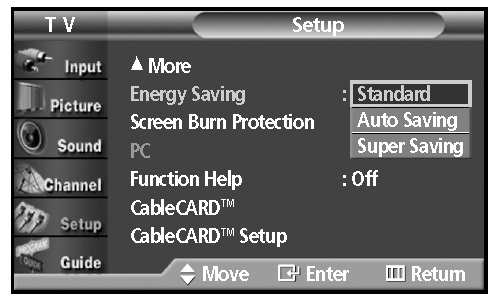
- Press the up or down button to select ENERGY SAVING.
- Press ENTER to bring up the submenu:
- Standard: Operates in standard mode regardless of the surrounding lighting
- Auto Saving : Automatically adjusts to the surrounding lighting.
- Super Saving : Enters maximum power saving mode regardless of the surrounding lighting.
- Press the MENU button to exit.
Leave a Reply