
Replacing the Optoma EP7199 projector lamp
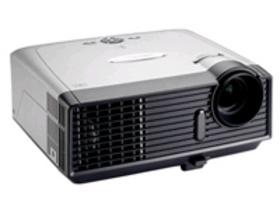 No need to panic when it’s time to change the Optoma EP7199 projector lamp.
Step 1: Avoid generics
Before you replace the Optoma EP7199 projector lamp make sure you have bought an authentic lamp. Look for the seal of approval.
Six good reasons to avoid generics:
- inferior workmanship which translates to an inferior product,
- they can’t last the full 3000 hours.
- improperly calibrated so seriously damage the optics in your Optoma EP7199
- present a health hazard due to their toxic materials.
- installing a generic lamp will void the warranty on the Optoma EP7199
- offer no guarantee, technical or customer service even after the lamp has been purchased.
Buy this lamp on Amazon sold by these authorized dealers:
- Optoma BL-FU180A Projector Assembly with High Quality Original Bulb Inside
- Optoma BL-FU180A, UHP, 180W Projector Lamp (Discontinued by Manufacturer)
- Optoma Replacement Lamp (BL-FU180A) –
Step 2: Be prepared

You’ll start to see the following warning signs when the Optoma BL-FU180A projector lamp is approaching end of life:
- A screen that is gradually dimming or deteriorating.
- Colour in the image appears dark or off colour.
- Projector lamp light flashing a steady orange.
- The following warning sign will appear on screen:
Step 3: Replace the Optoma BL-FU180A projector lamp
Follow these important safety steps before installing a new Optoma BL-FU180A projector lamp:
- The used Optoma BL-FU180A projector lamp contains mercury and should be properly recycled. Don’t throw it into regular garbage.
- Switch off the power to the Optoma EP7199 projector by pressing the Power/Standby button.
- Disconnect the power cord.
- Allow the projector to cool down for at least 30 minutes. If should be cool to the touch. These projectors run using high temperatures and you can burn yourself badly if you don’t allow the projector to cool down.
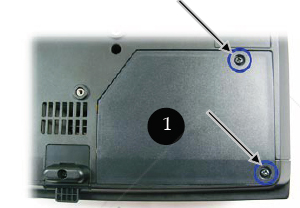
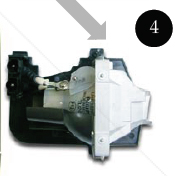
Place something soft underneath the Optoma EP7199 before turning the projector onto it’s back. Remove the two screws holding the cover in place.
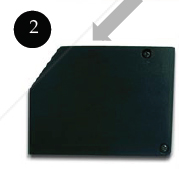
Push the cover up to remove it.
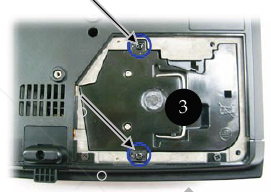
Use a screwdriver to remove the two screws holding the Optoma BL-FU180A projector lamp module in place.
Lift up the wire handle and slowly put out the old lamp. Be careful not to bang the projector lamp against the projector as this may case the bulb to break. Learn what to do if the projector lamp has exploded inside the projector.

Place the new Optoma BL-FU180A (SP.82G01.001) projector lamp into the Optoma EP7199 projector. Tighten the two screws on the lamp. Replace the lamp cover and tighten its two screws.
You must now reset the Lamp Replacement Timer.
Step 4: Reset the lamp timing on the Optoma EP7199 projector lamp
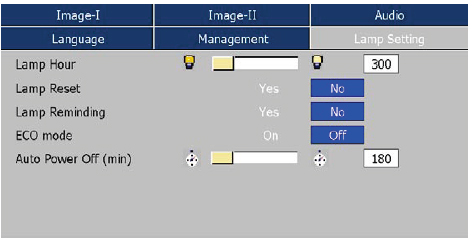 The Optoma EP7199 projector has an automatic lamp reset timer that tracks the life of the projector lamp and triggers the projector lamp replacement warning. You need to reset the timer each time the lamp is replaced.
- Press the Menu option on either the remote or on the projector.
- Scroll over the Lamp Setting. Press enter.
- Select Reset Lamp Hours. Press Enter
- The Execute/Cancel command line will appear.
- Scroll over to choose Execute. Press Enter. The lamp hours is reset to zero.
Get the Optoma BL-FU180A projector lamp longer life:
- Turning on the Eco Mode to lower power consumption and extend the lamp life by 130%.
- Keep your air filters clean to avoid overheating the projector.
- Turn off the Optoma EP7199 projector and let it stand for at least one hour ever 24 hours.
- Make sure there is enough airflow around the projector particularly if it’s been permanently mounted.
- Top tips for extending DLP projector lamp life
Leave a Reply