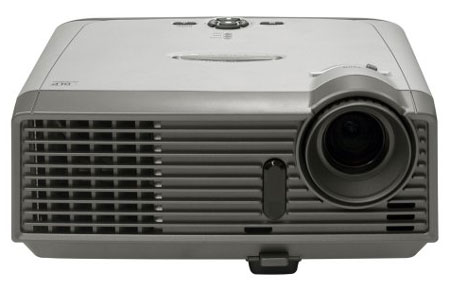
3 Steps to a new Optoma EP747H projector lamp
 Replace the Optoma EP747H projector lamp in three easy steps.
Be sure to buy an authentic an Optoma EP747H projector lamp. Scroll down to learn why authentic lamps are so important for your projector.
At 30 hours, when the Optoma EP747H projector lamp is reaching end of life, you will see the Lamp Replacement message. Replace immediately!
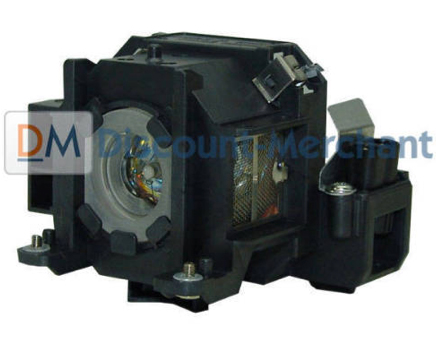
Find this lamp from the following OEM manufacturers on Amazon:
- Optoma BL-FP230H, P-VIP, 230W Projector Lamp
- Optoma Projector Lamp Part BL-FP230H-ER Model Optoma GT GT750 GT GT750-XL GT GT750E
- SP.8MY01GC01 / BL-FP230H- Lamp With Housing For Optoma GT750, GT750E, GT750-XL Projectors
- Optoma BL-FP230H Projector Brand New High Quality Original Projector Bulb
.
Replace the projector lamp
Step 1:
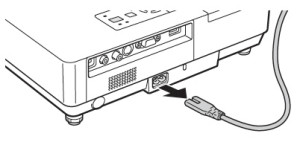
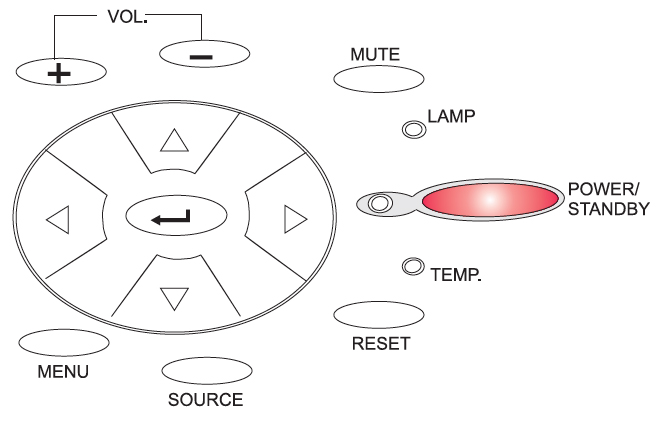
 Switch off the power to the Optoma EP747H projector by pressing the Power/Standby button.
- Allow the projector to cool down for at least 30 minutes. If should be cool to the touch. These projectors run using high temperatures and you can burn yourself badly if you don’t allow the projector to cool down.
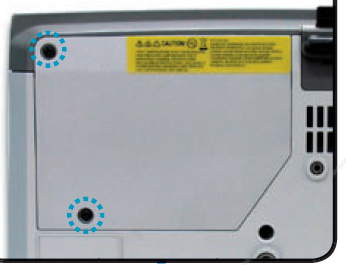
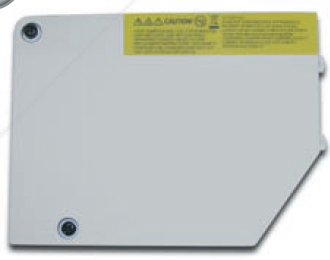
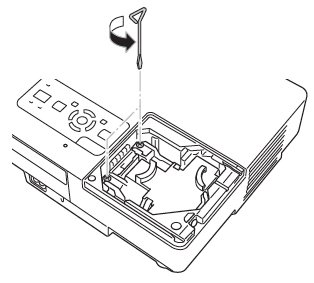
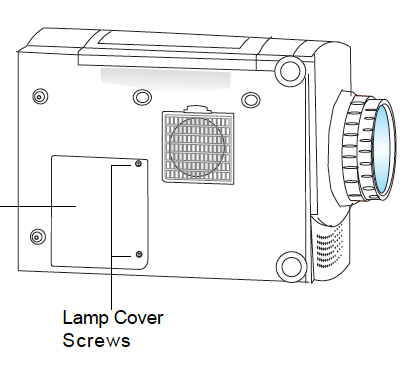
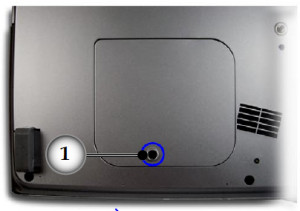
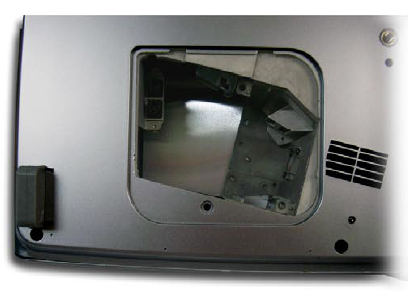
- Disconnect the power cord. Using a screwdriver, remove the screws holding the cover in place.
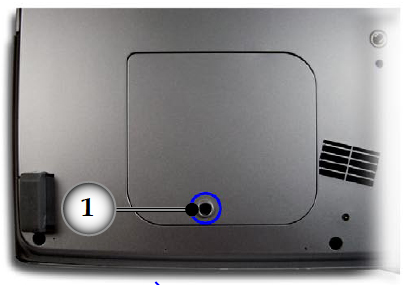
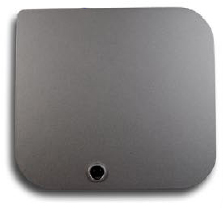
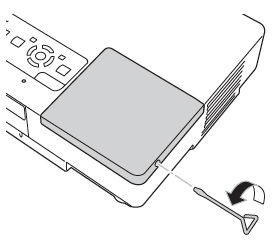
Push the cover up to remove.
Step 2
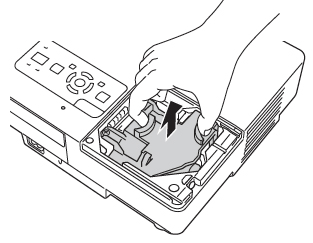
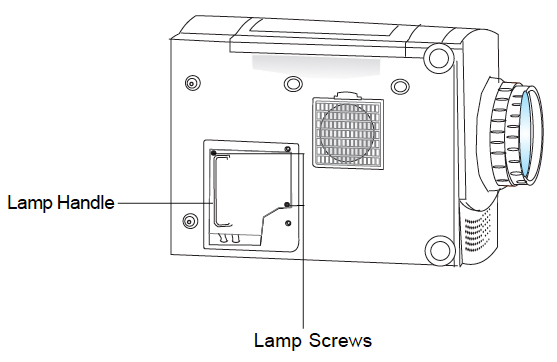
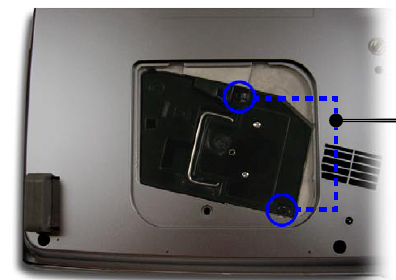
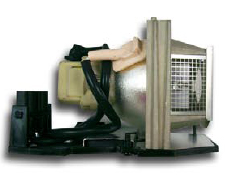
- Use a screwdriver to remove the two screws holding the lamp module in place.
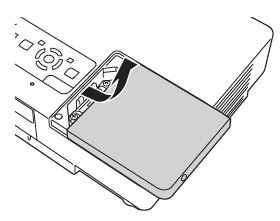
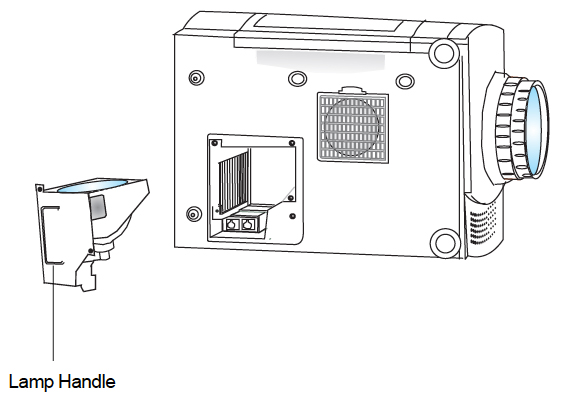
- Slowly put out the old lamp by grabbing the edge of the lamp. Be careful not to bang the lamp against the projector as this may case the bulb to break. Learn what to do if the lamp has exploded inside the projector.
- Note: The used Optoma BL-FP230A contains mercury and should not be thrown out with regular garbage and should be recycled.
Step 3
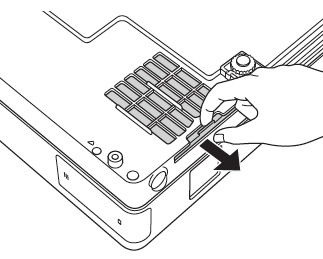
- Place the new Optoma BL-FP230A (SP.83R01G001) into the Optoma EP747H projector. Tighten the two screws on the lamp. Replace the lamp cover and tighten its two screws.
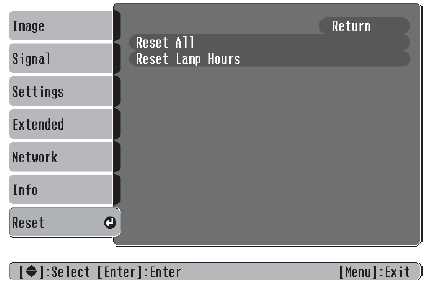
- You must now reset the Lamp Replacement Timer.
Reset the lamp timing on the Optoma EP747H
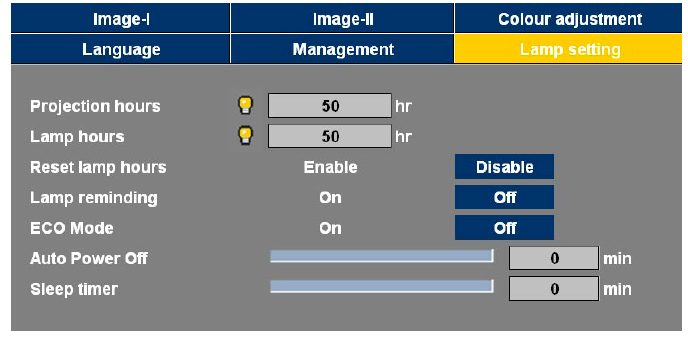
- Press the Menu option on either the remote or on the projector.
- Scroll over the Lamp Setting. Press enter.
- Select Reset Lamp Hours. Press Enter
- The Execute/Cancel command line will appear.
- Scroll over to choose Execute. Press Enter.
- The lamp hours will be reset to zero.
Turn on the Eco Mode to lower power consumption and extend the lamp life by 130%.
Why buy authentic lamps?
 There are lots of choices out there on the Internet. Since selling online has few regulations, it’s easy to get duped into buying an inferior knock-off lamp posing as an authentic Optoma BL-FP230A.
The tell tale sign is a price that seems too good to be true. These counterfeit manufacturers will advertise their lamp as “compatible.” However, it’s anything but compatible.
Why avoid generics:
- generic lamps have a much shorter life so are actually more expensive in the long run
- Krypton-85 and other toxic chemicals are used to create counterfeit lamps
- compatible lamps are more prone to overheat and explode
- copycat manufacturers don’t know how to properly calibrate their lamps to work with the sensitive electronics in projectors
- copycat manufacturers offer no guarantee or refunds
- the warranty on your Optoma EP747H projector will become void.
Learn how to spot the copycat fake lamps with 7 Ways to Spot a Counterfeit Lamp.