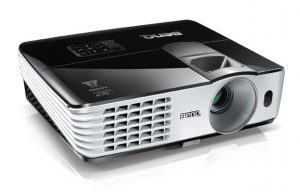
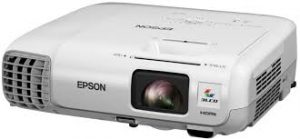
Changing the Canon LV-LV-8235 projector lamp
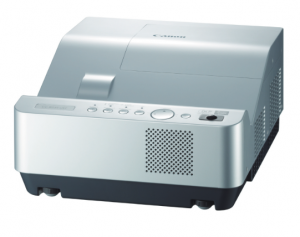 Learn how to replace the Canon LV-8235 projector lamp.
Invest in authentic
When it’s time to replace the Canon LV-8235 projector lamp you’ll see a lamp replacement icon appear on screen and the LAMP REPLACE indicator will show yellow. Replace the lamp immediately and don’t wait. 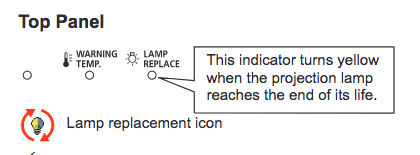
Be sure to always install an authentic Canon LV-8235 projector lamp. Avoid counterfeits — even if the price seems like a great deal in the long wrong it will cost you more. Most counterfeit lamps have:
- shorter life
- no safety guards to protect your eyesight,
- are prone to explosions inside projectors
- can damageyour projector optics beyond repair
- have carcinogenic materials
Find this lamp at Amazon from these authorized dealers:
- 275 Watt Lamp for LV-8235 Ust,replacement Lamp LV-LP36
- Canon LVLP36 Projector Assembly with High Quality Original Bulb
Install the projector lamp
Your Canon LV-8235projector uses the Canon LV-LP36 projector lamp. Before changing the projector lamp follow these important safety procedures:
- Unplug the electrical cord on the Canon LV-8235 so there is no chance the projector could get turned on during the installation.
- The Canon LV-8235 operates under high temperatures so give it at least one hour to cool down before opening the projector to change the projector lamp.
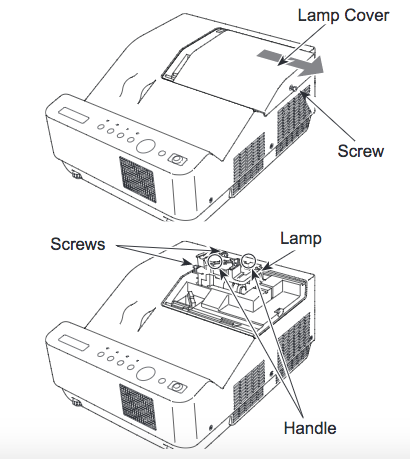
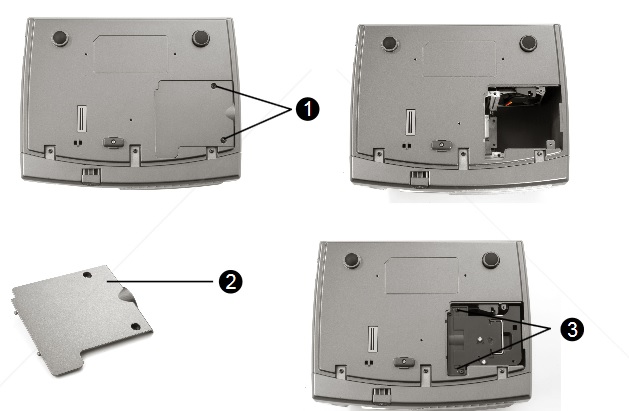
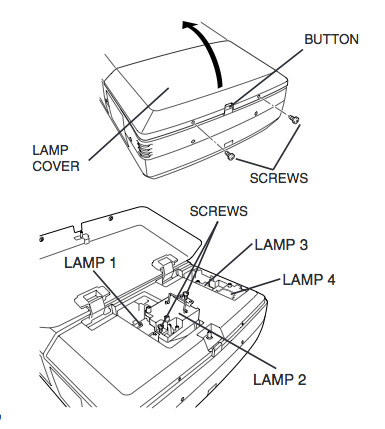
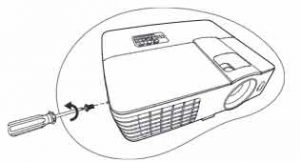
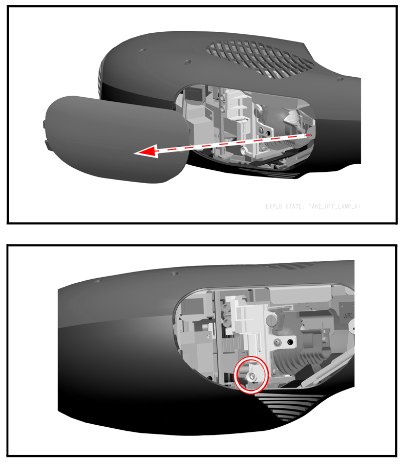
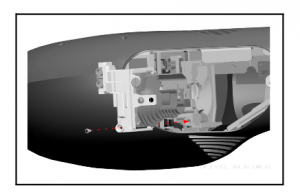
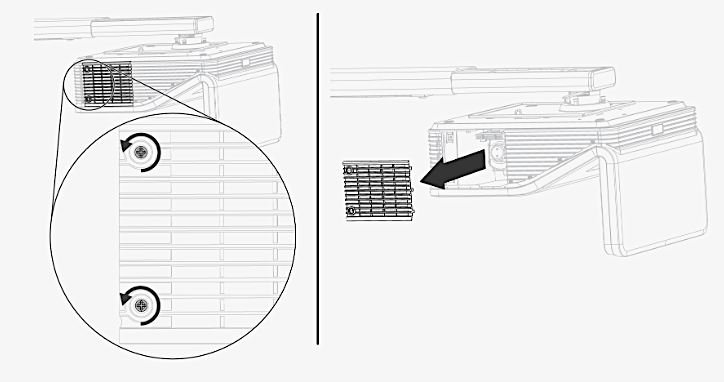
- Loosen the screw holding the Canon LV-8235 projector lamp cover in place. Place the cover aside.
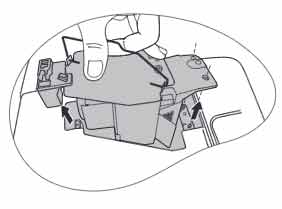
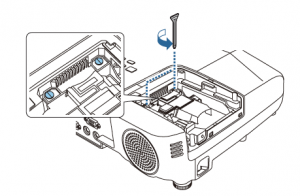
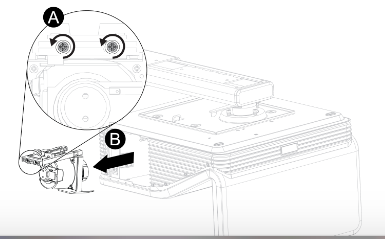
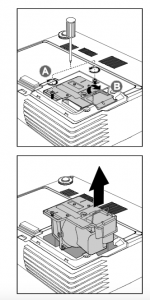
- Loosen the two screws on the projector lamp and slowly pull out the Canon LV-LP36 projector lamp assembly by using the built in handle.
- NOTE: The used Canon LV-LP36 contains mercury and should be properly recycled. Don’t throw it into regular garbage.
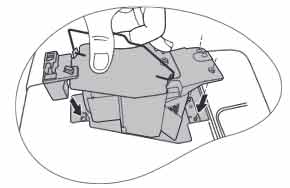
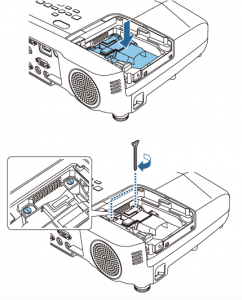
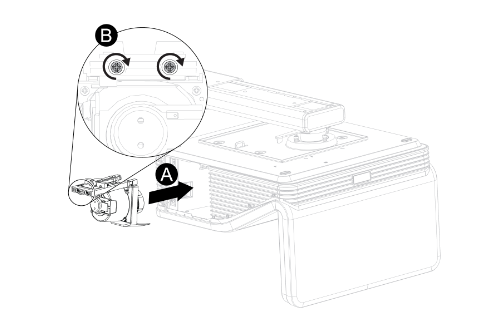
- Replace the lamp assembly with a new Canon LV-LP36 projector lamp. Be careful not to touch the actual bulb as oil from your fingers can leave black marks on the lamp.
- Tighten the two screws on the lamp.
- Put back the lamp cover and tighten its two screws.
- You are now ready to reset the lamp time.
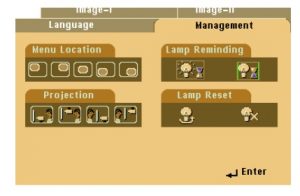
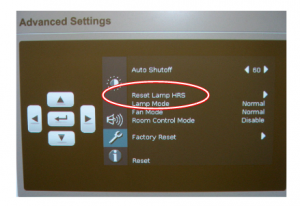
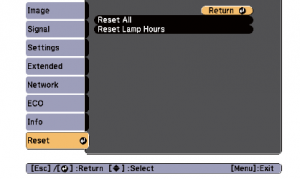
Resetting the lamp timer counter
After replacing the Canon LV-8235 projector lamp, you’ll need to turn off the LAMP REPLACE indicator by resetting the LAMP REPLACE COUNTER in the Canon LV-S2. This counter tracks the number of hours the lamp has been used by the Canon LV-S1 and triggers the warning light when the lamp is reaching its end of life. Not resetting it after may stop your projector from turning back on.
- Turn the projector on and press the MENU.
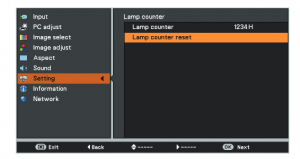
- Using the arrow buttons, scroll down to SETTING menu icon. Press OK.
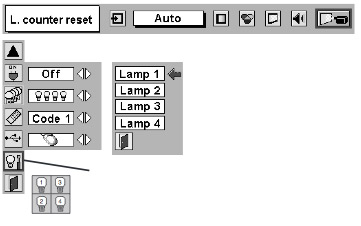
- Press the up/down buttons, move to the LAMP COUNTER option.
- Press OK to open up as the LAMP COUNTER RESET.
- Click on the SET option to open a confirmation window.
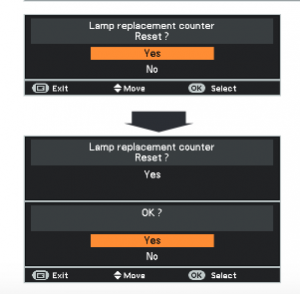
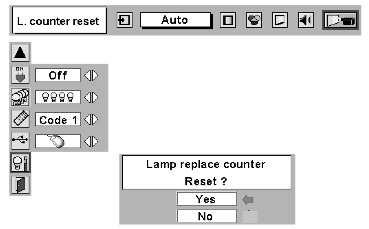
- The message “Lamp replace counter reset?” is displayed.
- Click on YES.
- Press OK.
- The lamp hours will be reset to zero.
- Learn how to prolong lamp life with Top tips for extending projector lamp life.
 This guide shows how to replace the Christie RoadRunner LX77 projector lamp.
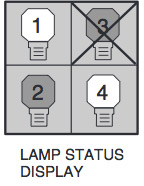
 Follow these instructions to replace the BenQ MX615 projector lamp.
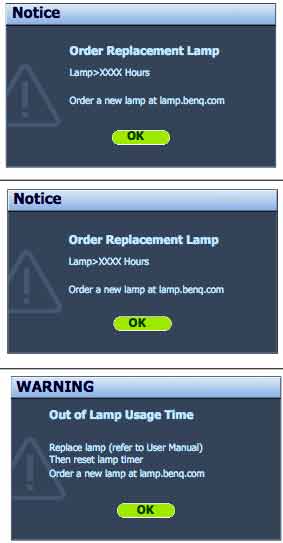
 Q MX615projector.
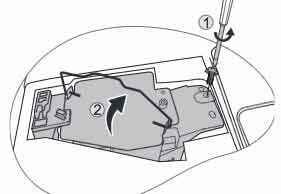
 Insert the new
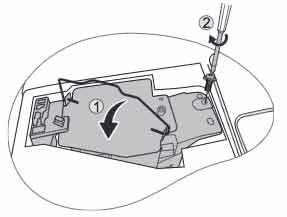
 When it’s time to replace the Epson EB945 projector lamp follow this guide
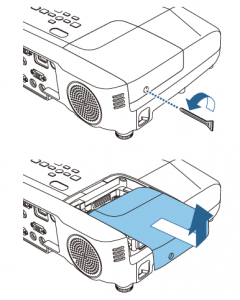
 Remove the two screws on either side of
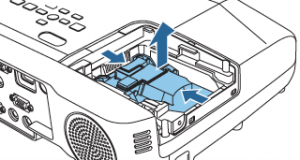
 Remove all packaging from the new
  To replace the Epson EMP-5500 projector lamp follow this guide.
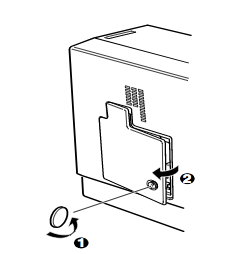 Use the screwdriver provided loosen the screw holding the Epson EMP-5500 projector lamp cover in place. Slide the Epson EMP-5500 projector lamp cover off and place it to one side.
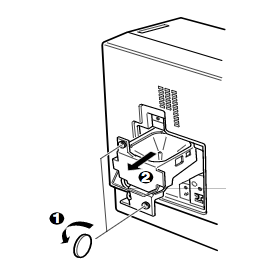
 How to install a replacement Infocus IN1126 projector lamp
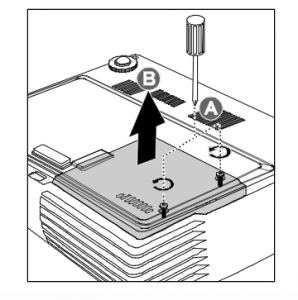
 Remove the two screws from the lamp module.
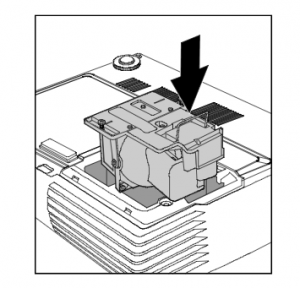
 Follow this step-by-step installation guide for installing a new Optoma W501 projector lamp