Install a replacement NEC M403W projector lamp
 We have you covered when it’s time to change the NEC M403W projector lamp.
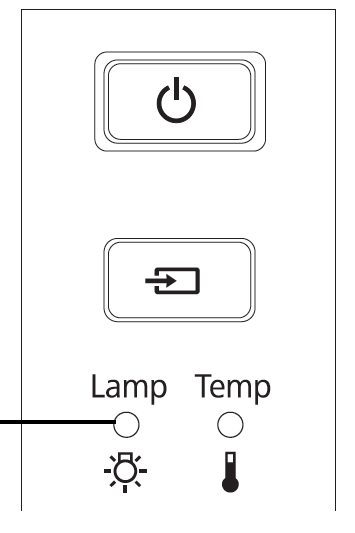
When it’s time to replace your NEC M403W projector lamp you’ll see the following warning signs:
- message on screen reads LAMP HAS REACHED THE END OF ITS USABLE LIFE. PLEASE REPLACE THE LAMP AND FILTER.
- the LAMP indicator begins to blink red
- color looks off or has deteriorated
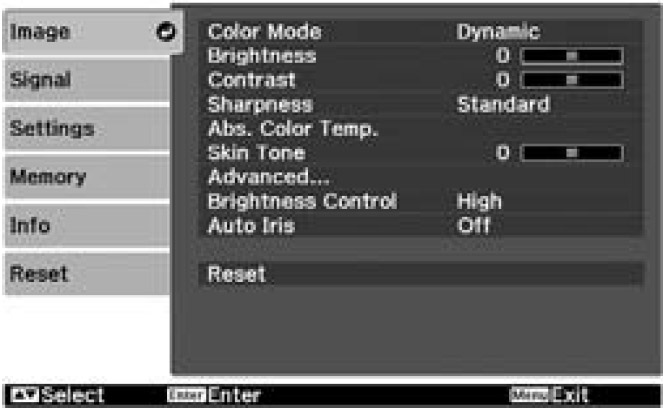
Track the life of the NEC M403W projector lamp from the Usage Time menu.
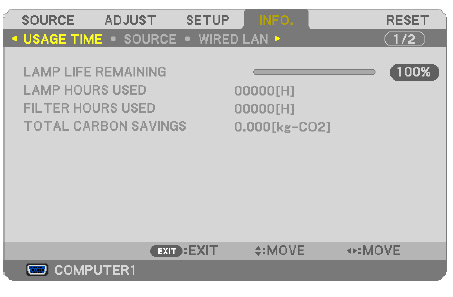
- Go to INFO menu
- Scroll down to USAGE TIME to display the LAMP LIFE REMAINING and LAMP HOURS USED.
- The progress indicator shows the percentage of remaining bulb life:
- When the lamp usage reaches 0, the Lamp Life REMAINING starts a count down from 100 hours
- When the count down reaches 0, the projector will turn off and not turn on.
Be sure to invest in an authentic projector lamp.
Find this lamp on Amazon sold by these authorized dealers:
- NEC NP27LP Projector Housing w/ High Quality Genuine Original Philips UHP Bulb
- NEC Replacement Lamp For NP-M282X NP27LP
- NP27LP NEC Projector Lamp Replacement. Projector Lamp Assembly with High Quality Genuine Original Philips UHP Bulb Inside.
Changing the NEC M403W projector lamp
The NEC M403W uses the NEC NP30LP projector lamp. Follow these important safety instructions before installing the new NEC NP30LP projector lamp.
- turn off the NEC M403W projector.
- unplug the projector from its power source.
- unplug the power cable.
- wait until the projector is cool to the touch to avoid getting burned.
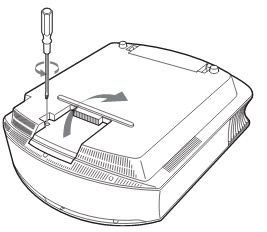
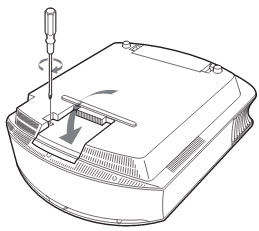
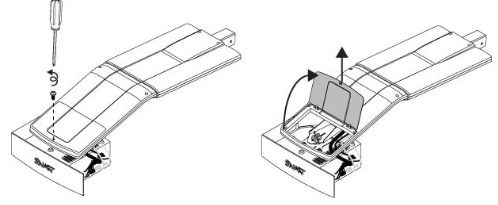
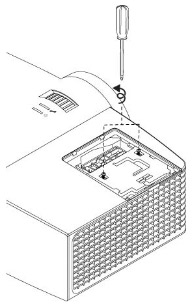
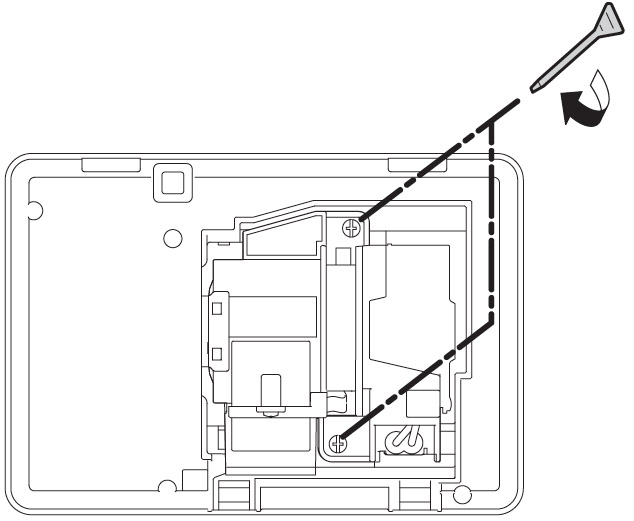
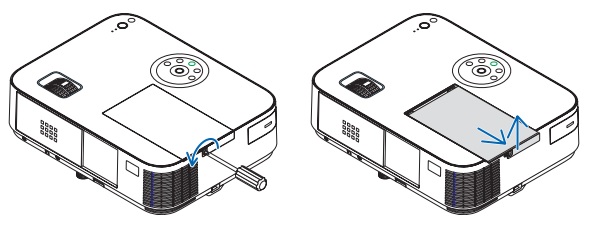 Loosen the NEC M403W lamp cover screw.
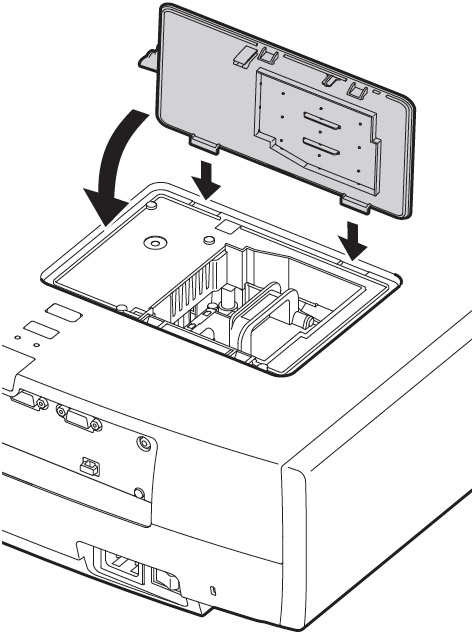
Slide the projector cover off.
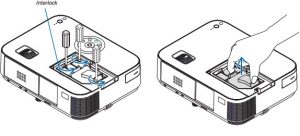
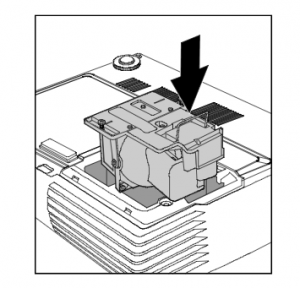
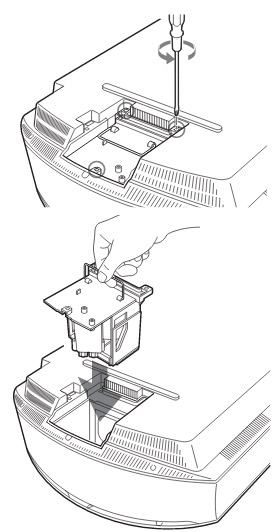
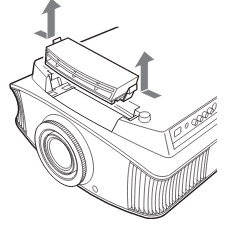
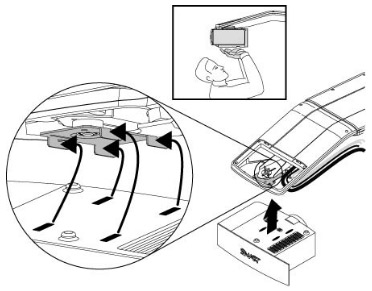
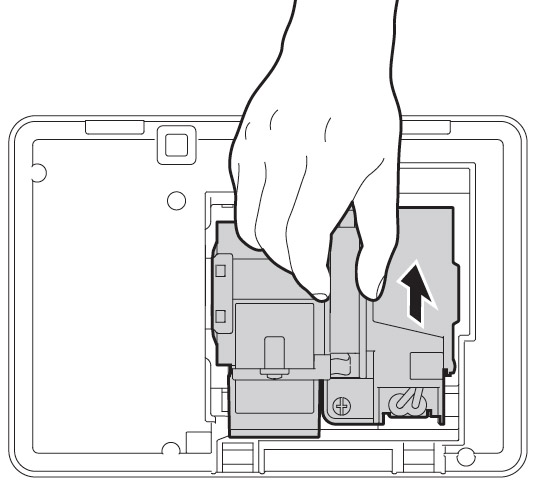
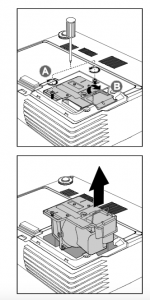
Loosen the two screws holding the NEC NP30LP projector lamp in place.
Remove the projector lamp by holding the indent and pulling up.
NOTE: Your NEC NP30LP projector lamp should be properly recycled and not placed into regular garbage.
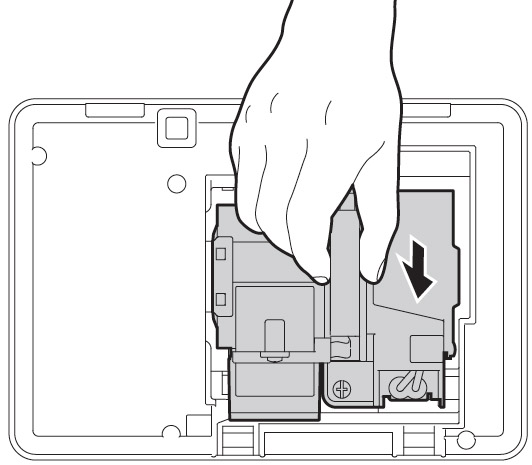
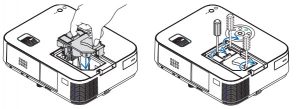 Install a new lamp housing into the NEC M403W projector, gently pressing the projector lamp housing into the socket. . Tighten the screw on the projector lam
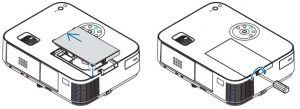 Re-attach the NEC M403W lamp cover by sliding the cover until it snaps into place. Tighten the screw on the lamp cover.
Reset the NEC M403W lamp timer
Once the NEC NP30LP projector lamp has been replaced you will need to reset the lamp timer.
- Plug in the power cored into the wall outlet.
- Turn on the projector.
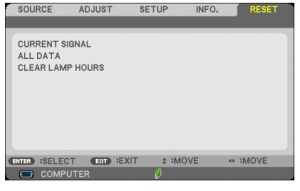
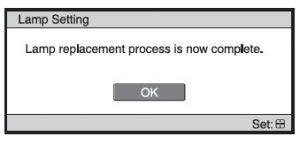
- From the MENU select RESET.
- Choose CLEAR LAMP HOURS.
- A confirmation message appears.
- Select YES.
- Learn more tips to extend the life of the NEC M403W lamp,
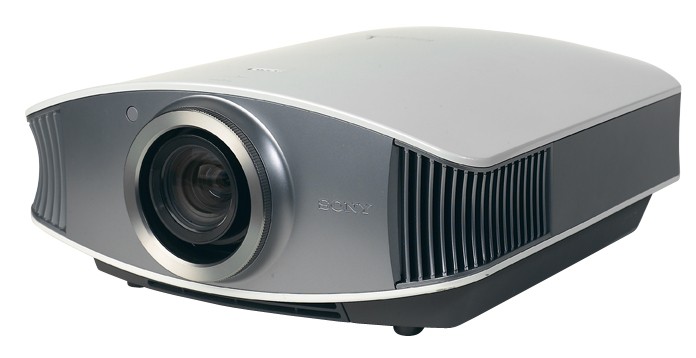
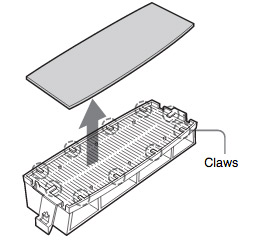 Remove the old Sony VPL-VW60 filter and put it to one side. Attach the new air filter so that is fits into the 10 claws properly on the holder.
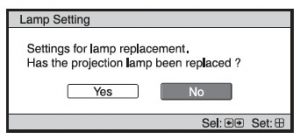


 he projector and without applying pressure, remove the screw holding the cable cover in place. Lift the cover off.
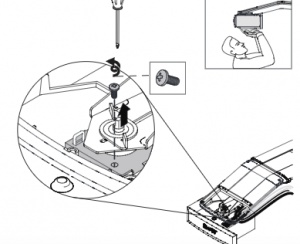 If you need access to the projector locking
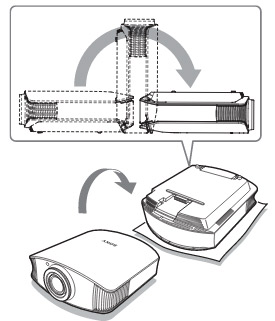
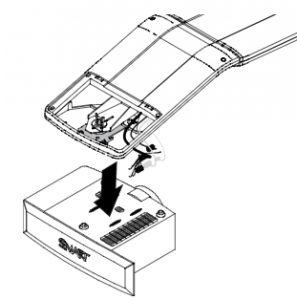 Take care as the projector will be loose once the screw on the mount have been loosened. Have the second person ready to hold the projector.
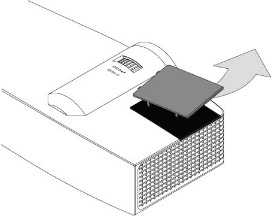
 Pull off the outer lamp cover with the your finger and set it aside.
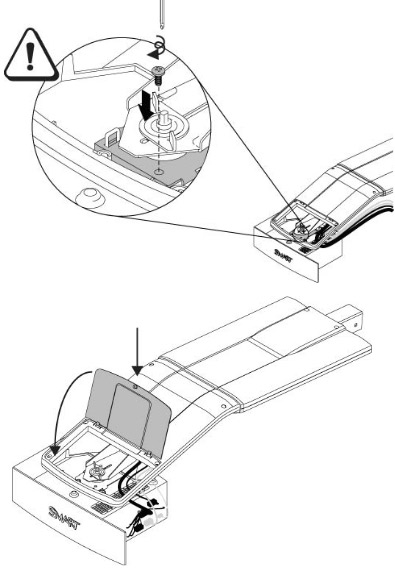


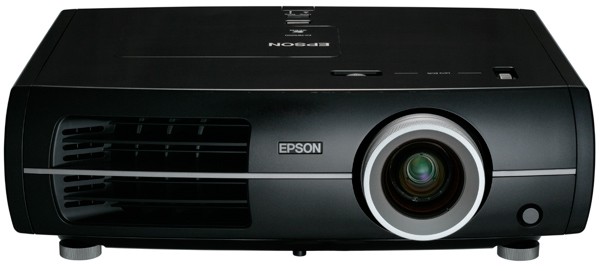


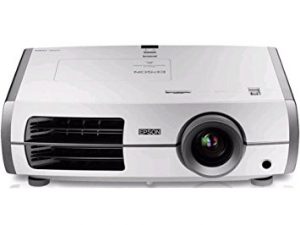 Use this guide to replace your Epson Home Cinema 8345 projector lamp
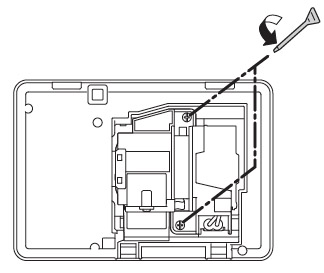
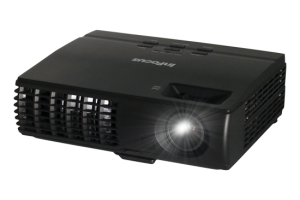 Install a replacement Infocus IN1124 projector lamp using this guide.
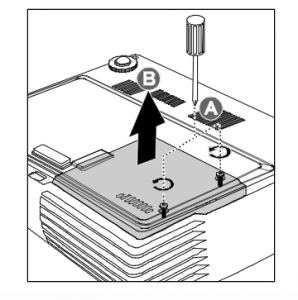
 Remove the two screws from the lamp module.