 LP Lamp and Part Replacement Guides At FixYourDLP.com
|
Advertisement Discount-Merchant.com
OEM DLP lamps, Plasma & LCD parts. Same day shipping, lowest prices on the internet.
|
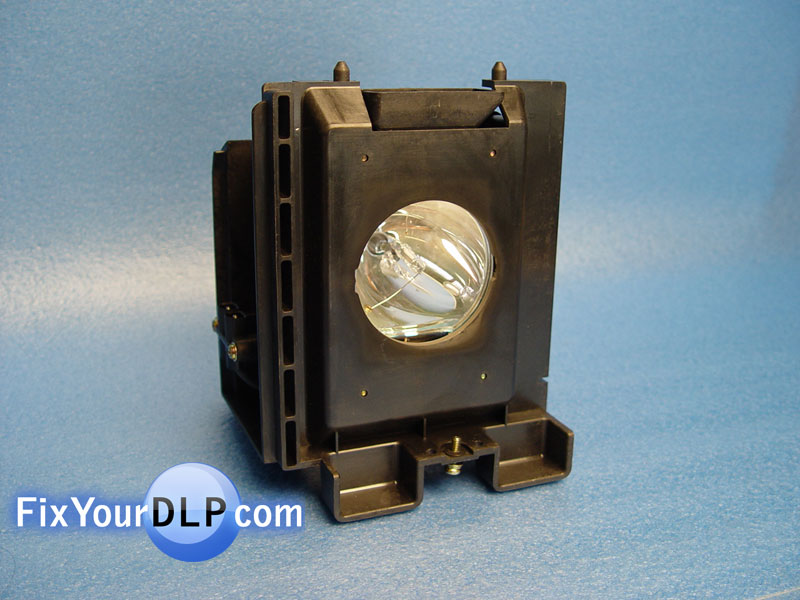
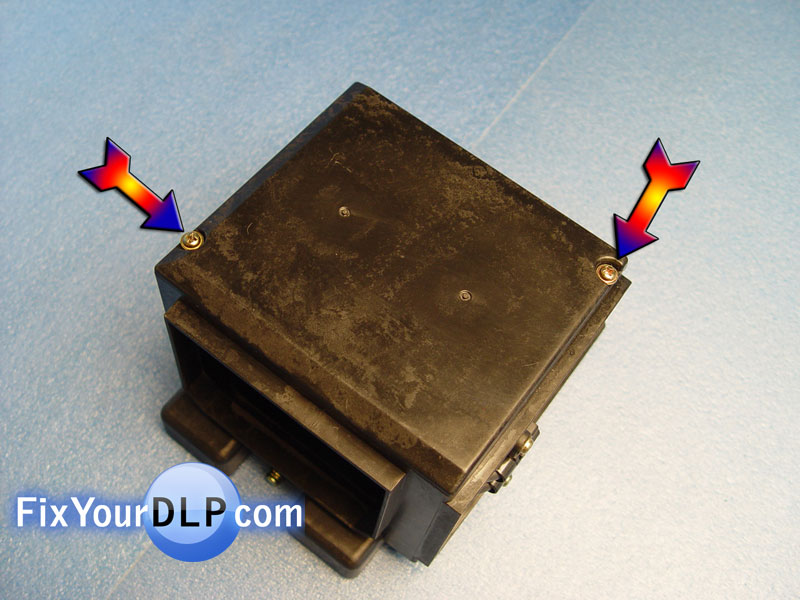
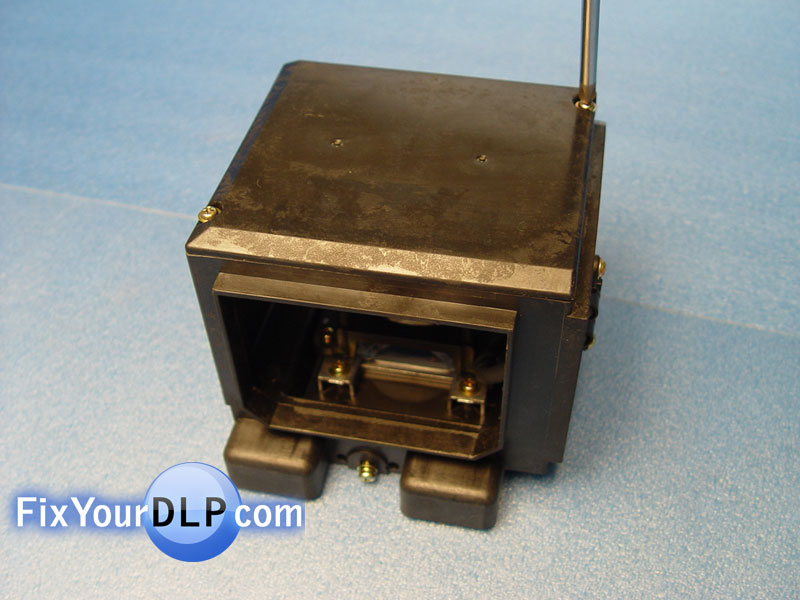
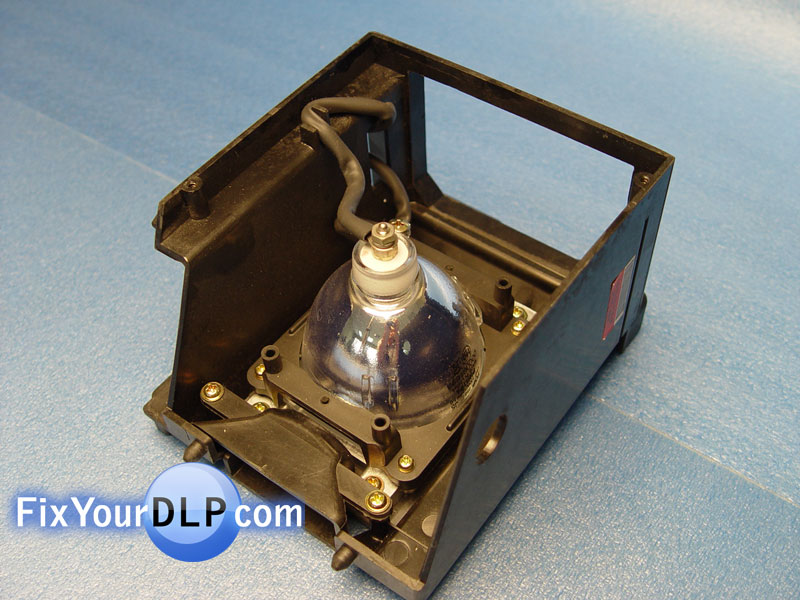
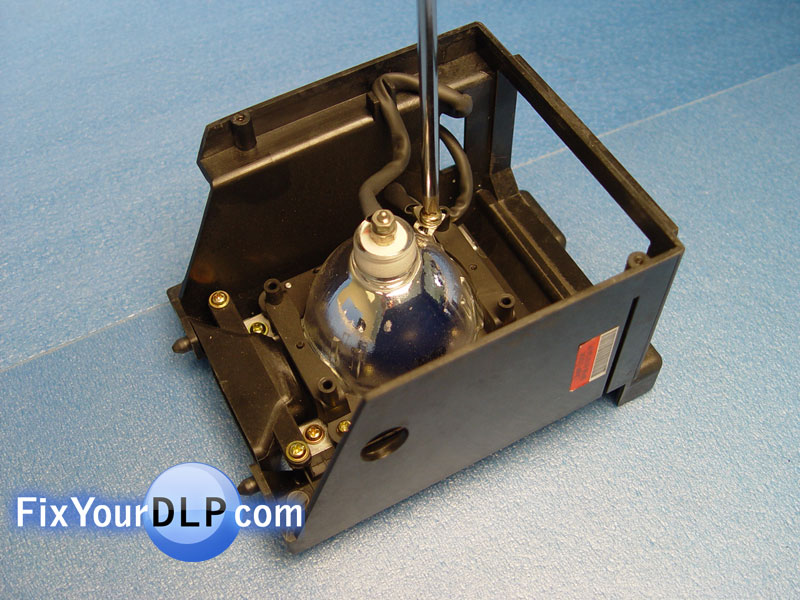
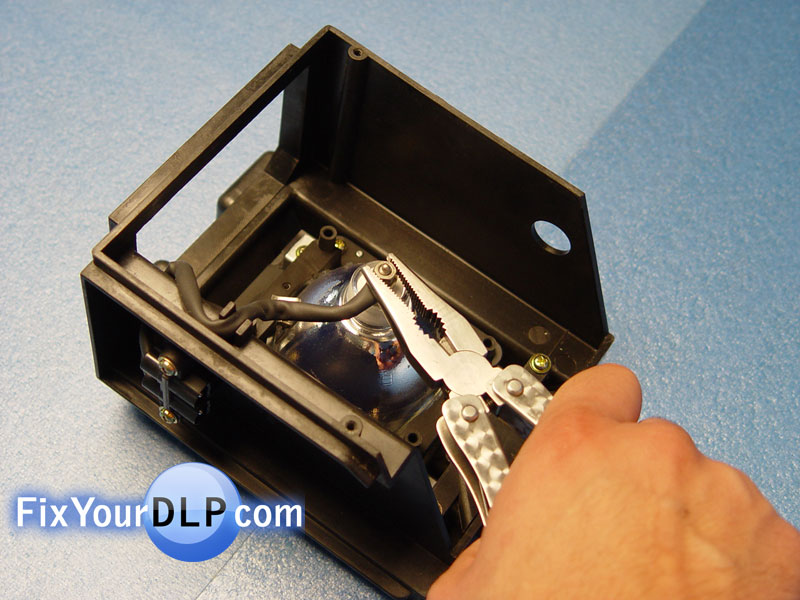
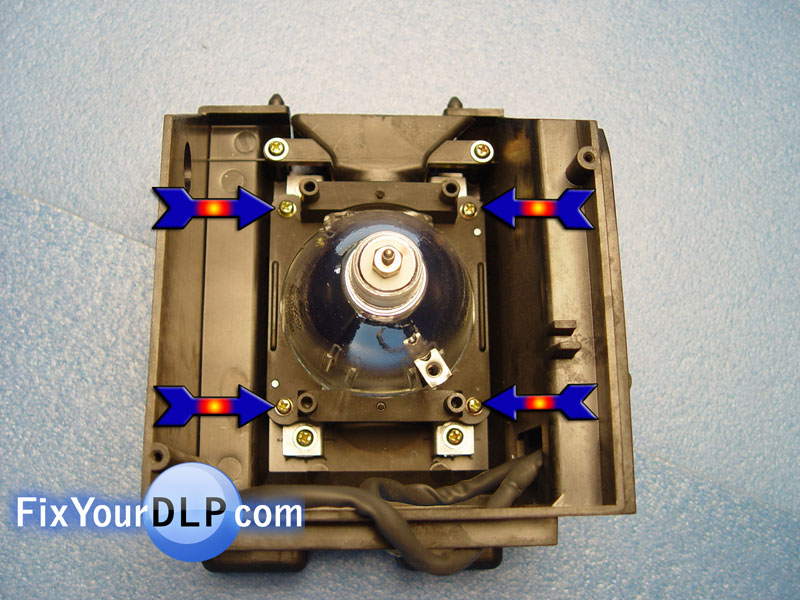
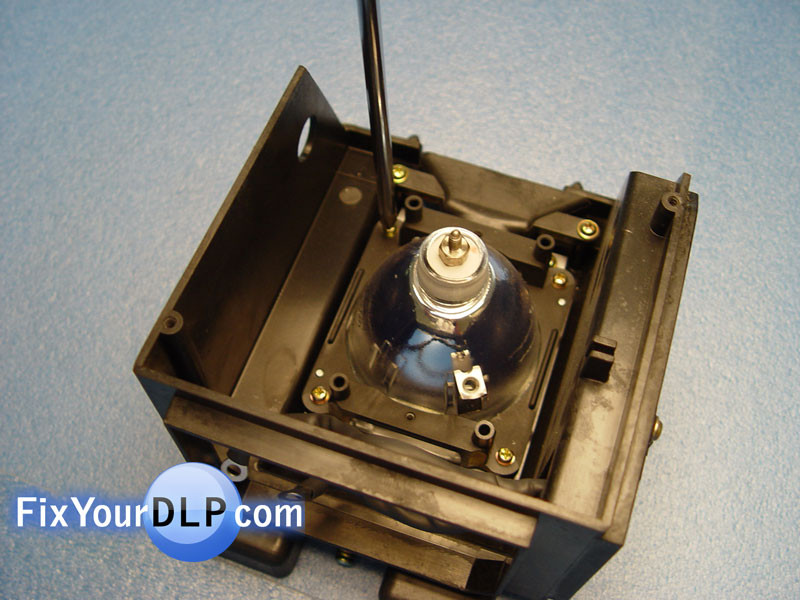
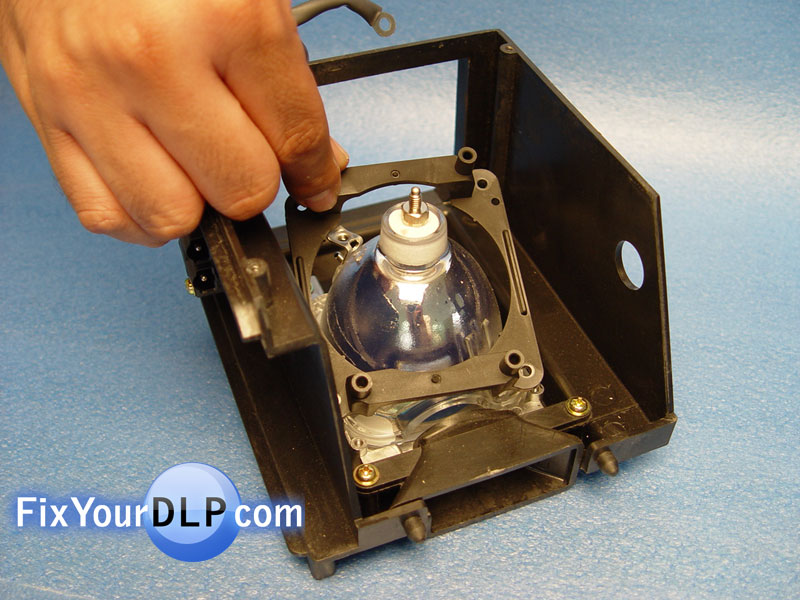
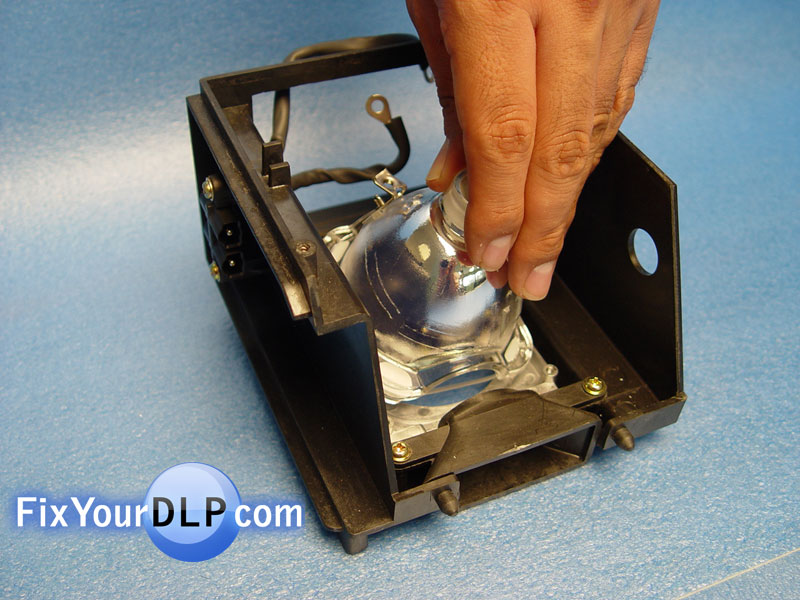
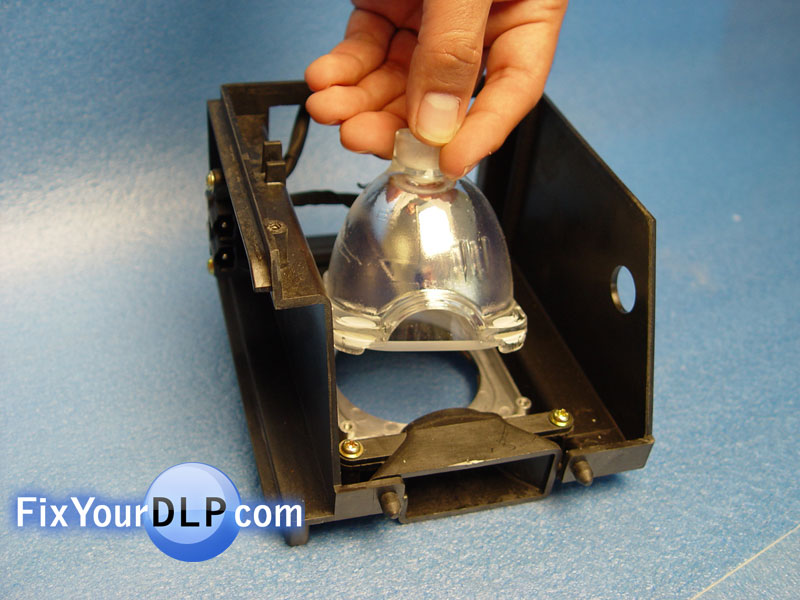
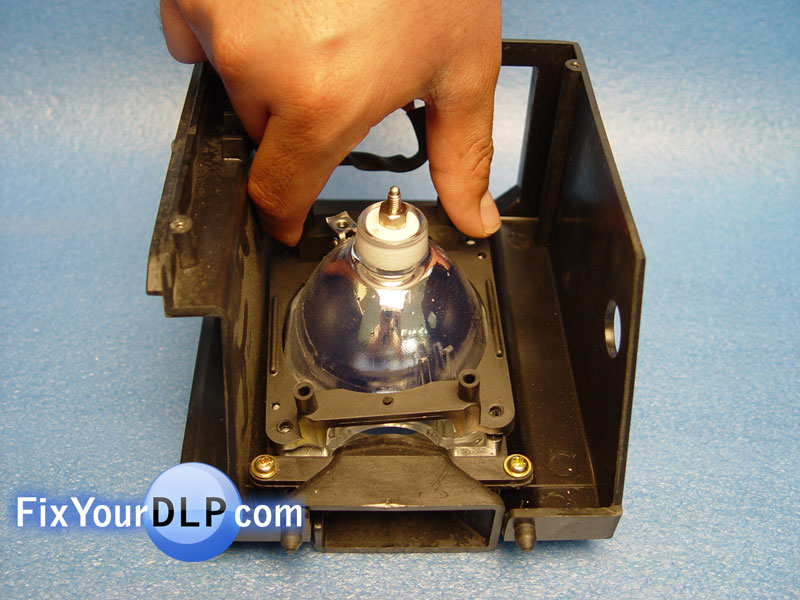
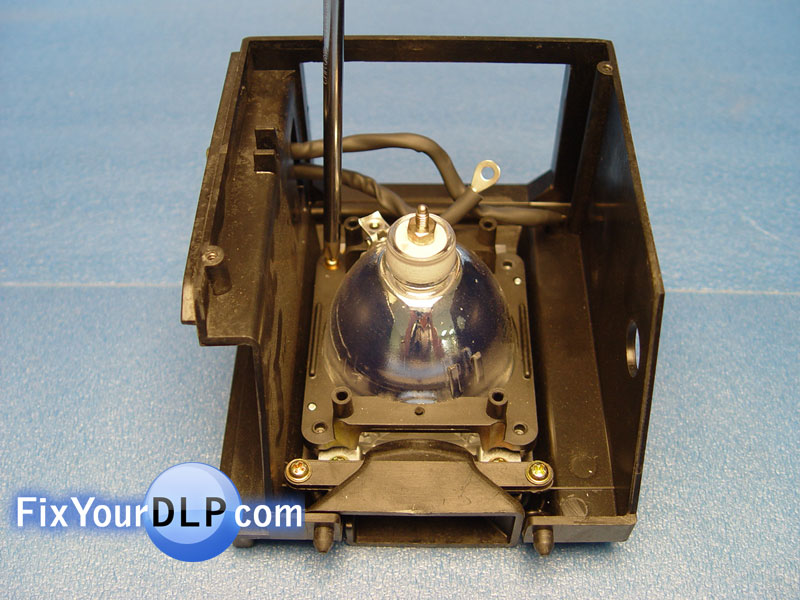
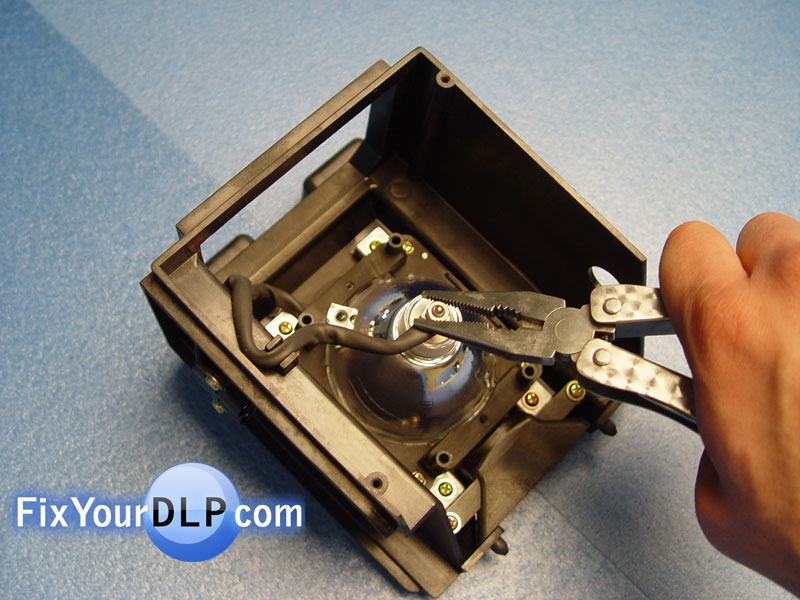
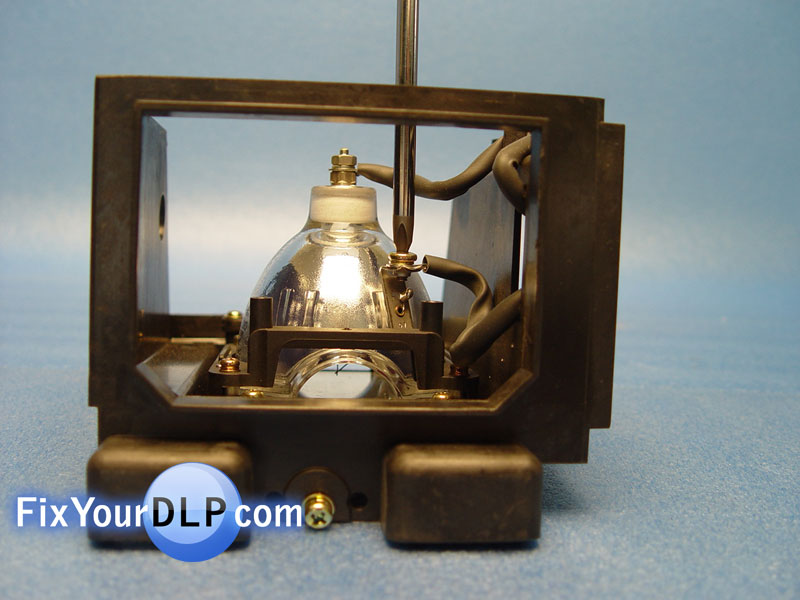
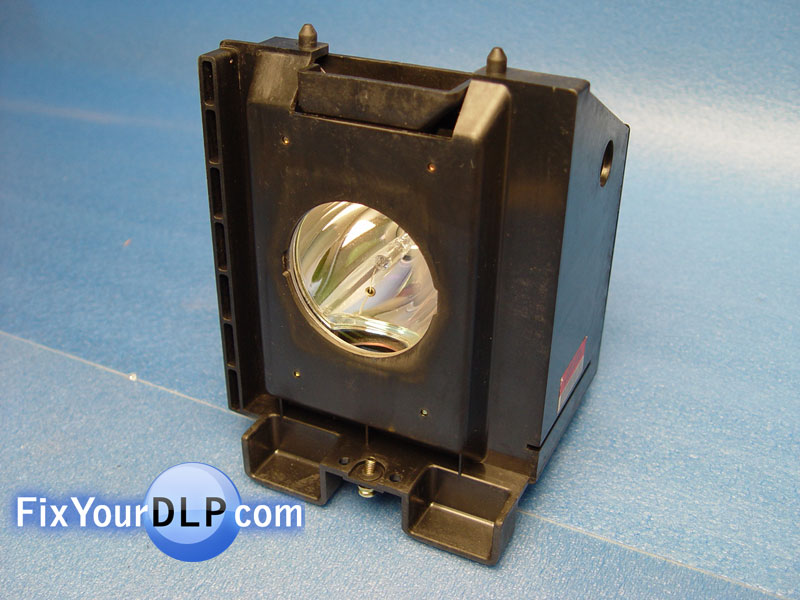
Samsung DLP Lamp BP96-01394A How-To Replacement GuideClick below to buy this lamp now: Compatible TV Models: HLR4667W, HLR4667WX, PT50DL14X, PT50DL14X/SMS, HLR4667WAX. NORMAL DISCLAIMER: Be a smart consumer and shop around, do your research! Discount-Merchant.com promises to be the low price leader in all Projection Lamps they carry…if this is not true, let us know and we’ll fix it! Tools Required: 1 Phililps screwdriver, 1 Pair of Pliers, & A new lamp. Time Required: About 15 minutes. Abstract: This guide is being published to show how easy it is to replace your original SAMSUNG BP96-01394A Lamp. NOTE: We recommend you to use latex gloves when handling the new bulb to avoid any dirt or oil. Our hands are naturally oily…The oil residue from our hands can cause premature failure of the lamp if the front side of the lamp is not wiped down after the installation. It doesn’t hurt to do a final wipe with a clean, non-abrasive, lint-free cloth before reinstalling your lamp…
IMPORTANT: After installing the replacement bulb, you should wipe it with a clean cloth to avoid any dirt or oil. Our hands are naturally oily…this could reduce considerably the life span of the new lamp. Again, Discount-Merchant.com promises to be the low price leader in all Projection TV Lamps they carry…if this is not true, let us know and we’ll fix it
Click below to buy this lamp now:
|


FixYourDLP.com Blog | FixYourDLP.com Forum | Guides
FixYourDLP Flickr | FixYourDLP YouTube
Copyright ©2014 FixYourDLP.com. All content on this website is intended for information purposes only. FixYourDLP.com is not responsible, nor liable for any damage caused by the end-user, faulty lamps or parts. Please, always have a service center or a trained service technician advise you before beginning any repairs on your own.