How to replace the Sanyo PLC-XF35/F35NL/PLC-XF35N projector lamp
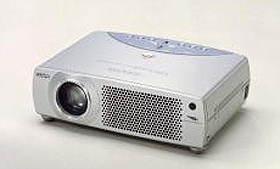
Sanyo PLCX-F35NL Projector
STEP-BY-STEP INSTRUCTIONS FOR PLC-XF35/F35NL/PLC-XF35N LAMP REPLACEMENT
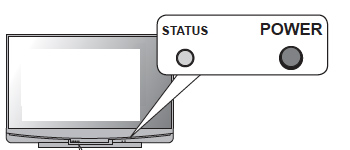
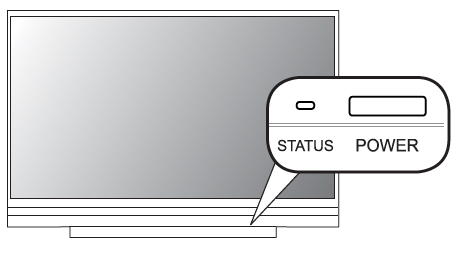
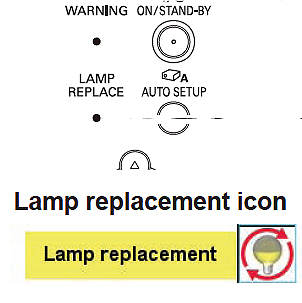
When it’s time to change your lamp on your Sanyo PLC-XF35/F35NL/PLC-XF35N projector, you’ll notice the yellow light blinking on the lamp indicator. 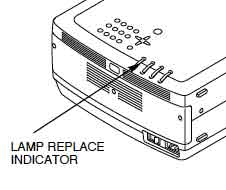
Be sure to buy an authentic Sanyo POA-LMP52 for your replacement lamp bought from a verified source. Buying an authentic replacement lamp will ensure that you’re installing a lamp manufactured with work properly and not damage your projector. Resist the temptation to buy a cheaper counterfeit model as this can damage the sensitive mechanisms in your Sanyo PLC-XF35/F35NL/PLC-XF35N projector.
 Before Installing the Sanyo POA-LMP52 Projector Lamp
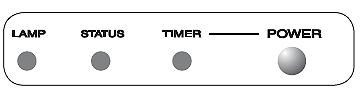
1. Check the number of lamp to be replaced on the Lamp Status Display.
2. Turn off the projector and unplug the AC cord.
3. Allow the Sanyo PLC-XF35/F35NL/PLC-XF35N projector to cool for one hour – it should be cool to the touch. Inside of the projector can be very hot since these machines operator under high temperatures. Without letting the projector cool properly there is burn danger.
Replacing the POA-LMP52 Lamp Assembly
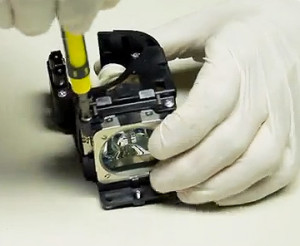
Caution: Don’t touch the screen or the actual bulb with your finger since the oil from your skin can cause a black spot on the bulb.
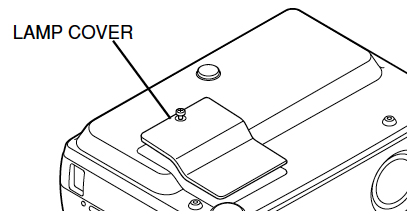
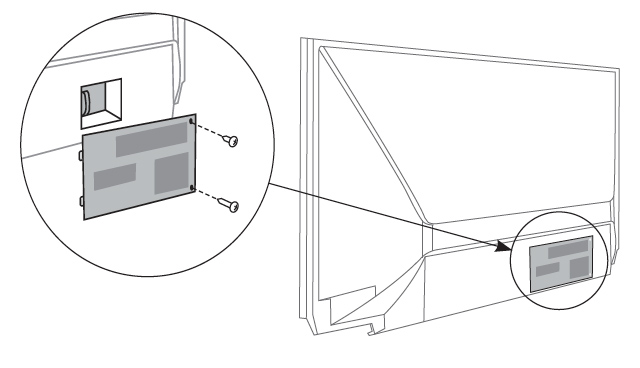
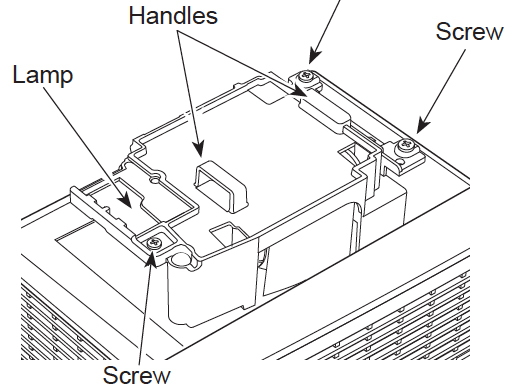
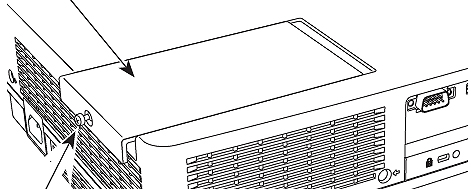
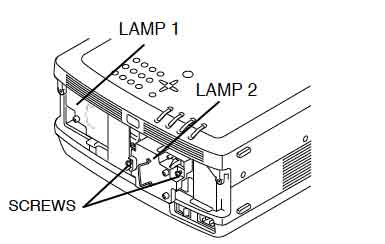
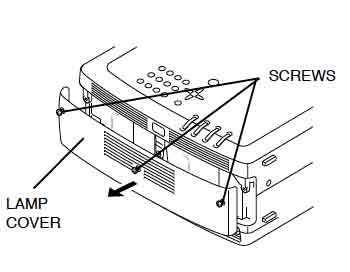 1. At the back of the Sanyo PLC-XF35/F35NL/PLC-XF35N projector you’ll find the Lamp Cover. Using a Philips screwdriver loosen the three screws that hold the cover in place. Put the cover to one side.
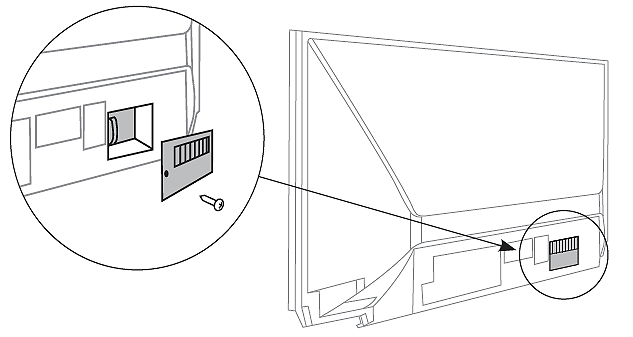
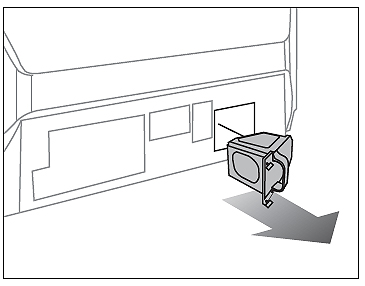
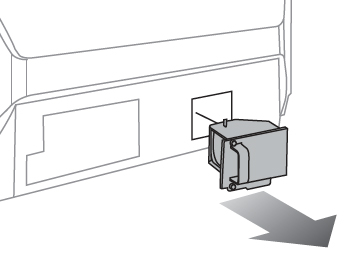
2. Remove the two screws on either side of each of the Sanyo POA-LMP52 lamp. Grab the handle on the lamp cage and gently pull out each lamp. Place those lamps to one side.
3. Take the new POA-LMP52 lamp cage by the handle and gently manuever it into place.
 4. Avoid touching the glass or the bulb. It should slide it easily – don’t force it.
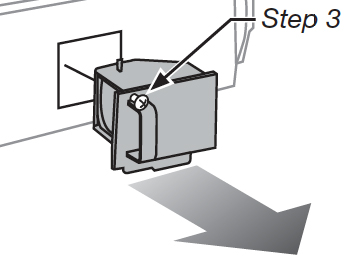
5. Tighten the screws on the Lamp Assembly.
6. Replace and tighten the three screws on either side of Lamp Hazard Cover.
7. Let the projector stand for five minutes so the lamp can stabilize. Re-connect the power cord and turn on the Sanyo PLC-XF35/F35NL/PLC-XF35N projector.
Reset Sanyo PLC-XF35/F35NL/PLC-XF35N Lamp Replacement Counter
Reset the Lamp Replacement Counter only when the POA-LMP52 lamp has been replaced.
Do not operate the projectors while any of the lamps are removed as this may result in malfunctions, fire hazard and other accidents. 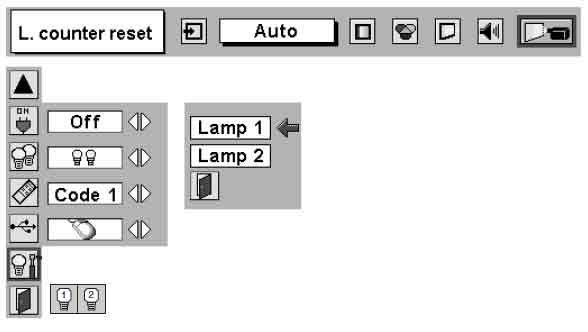
- Turn the Sanyo PLC-XF35/F35NL/PLC-XF35N projector on.
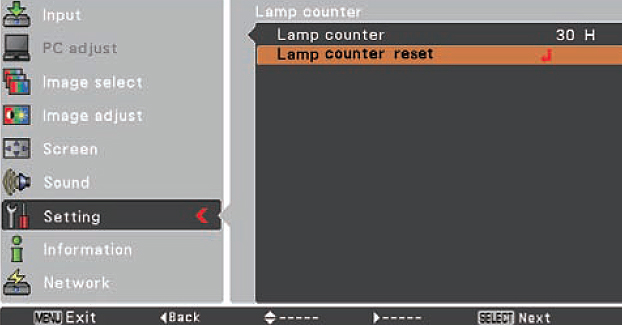
- Press the Menu option so the On-Screen Menu will appear.
- Press Point left/right button(s) to move a red frame poster to Setting Menu icon.
- Press Point Down button to move the red frame pointer to Lamp counter reset.
- Press the Select button.
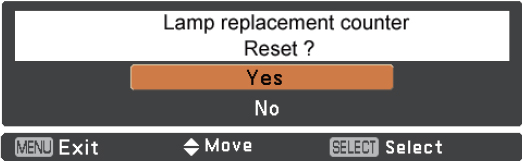
- Move arrow to replace lamp number (Lamp 1 or Lamp 2) and then press Select button. The message “Lamp replace counter Reset?” will be displayed.
- Move the pointer to YES and then press Select button.
- Be sure to reset the correct lamp number otherwise Lamp Replace indicator continues lighting.
- The Lamp box will disappear and the Lamp Replace Dialog box appears.

- Select YES to reset Lamp Replace Counter.
- Do not reset Lamp Replace Counter except after the Projection Lamp has been replaced.
- NOTE: When you reset the Lamp Replace Counter the Lamp Replace indicator stops lighting.
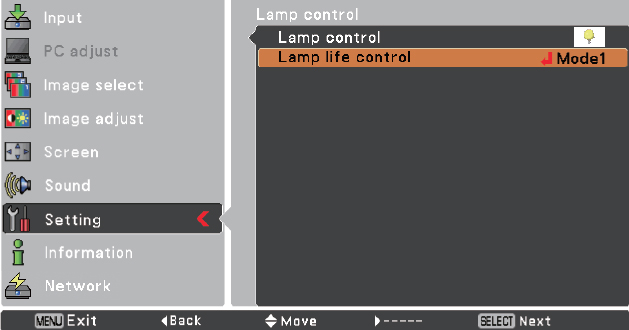
- Choose one of the two Lamp Modes by pressing POINT LEFT/RIGHT buttons. When you switch the Lamp Mode from using 2 lamps mode to using 1 lamp mode the image becomes a little darker. When you switch from using 1 lamp mode to using 2 lamps mode, the image becomes a little brighter gradually.
NOTE: Your old lamp should be properly recycled. These lamps contain mercury and can’t be placed into common garbage.
Prolong the life of your new POA-LMP52 lamp
To maintain the life of your newly installed Sanyo POA-LMP52, wait at least five minutes before turning the Sanyo PLC-XF35/F35NL/PLC-XF35N projector off. Don’t operate the projector continuously without letting it stand for at least one hour turned off every 24 hours. Regular cleaning of the air filter will also prolong lamp life.