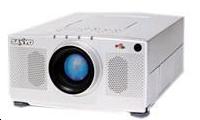
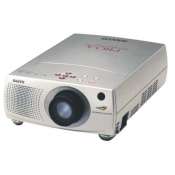
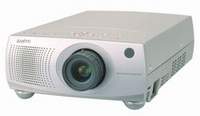
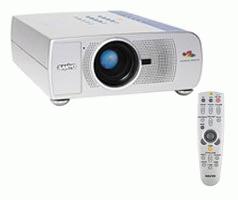
When to replace your Sanyo PLC-XP18 projector lamp

Learn how to replace the Sanyo PLC XP18 projector lamp
Learn how to replace the projector lamp in your Sanyo PLC-XP18 projector using this quick step-by-step guide.
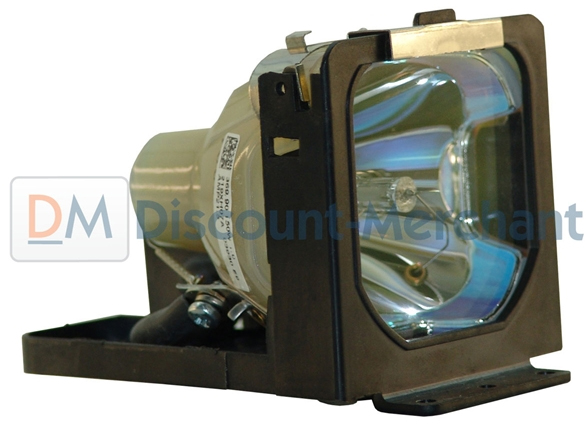
When you see an orange light blinking on your Sanyo PLC-XP18 projector it’s time to replace the projector lamp. The Lamp Replacement Indicator turns orange when your Sanyo projector lamp is nearing its end of life. Replace the lamp immediately with model Sanyo L600-0068 .
Buy this lamp on Amazon sold by these authorized dealers:
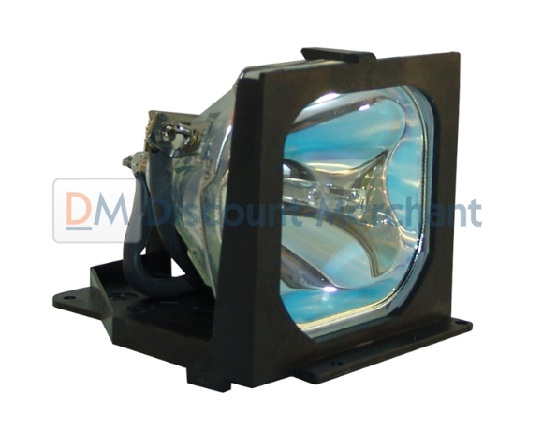
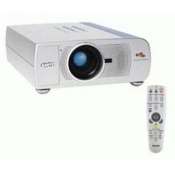
Sanyo PLC-XP18 Projector Assembly with High Quality Original Bulb Inside
STEP ONE: Be Prepared–buying the proper lamp
Stay safe and buy genuine projector lamps.
Avoid knock-offs since they use inferior materials that can damage your projector. If the price of your lamp seems too good to be true–WALK away. The few dollars you save from a generic knock-off are not worth the savings since these lamps don’t last as long as the genuine lamps, can explode inside the projector, void your warranty. That can add up to much more than the few dollars you save buying knock-off projector lamps.
Avoid further hassles and buy from your Sanyo L600-0068 lamp from the original manufacturer who uses quality parts. These genuine lamps have been designed with the correct technology to work in harmony with your Sanyo PLC-XP18 projector.
STEP TWO: Installing the Sanyo L600-0068 projector lamp
Follow this steps for quick and easy installation of your new Sanyo L600-0068 lamp:
- Turn the Sanyo PLC-XP18 projector off. Disconnect the AC cord. Allow it to cool down for at least 45 minutes. The inside of the projector gets extremely hot — don’t attempt to change the lamp with the projector running or you will burn yourself badly.
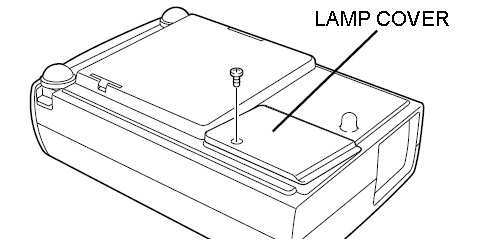
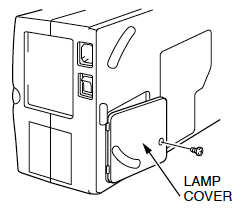
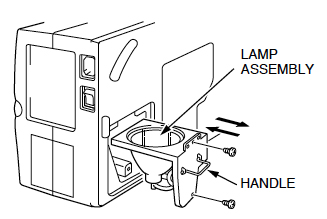
- The lamp cover is on the bottom. Turn the projector onto its side and remove the single screw holding the cover in place. Put the lamp cover to one side.
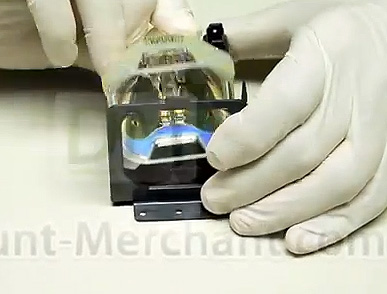
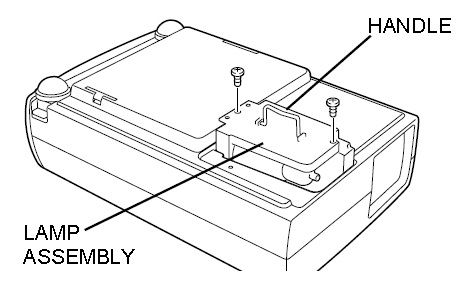
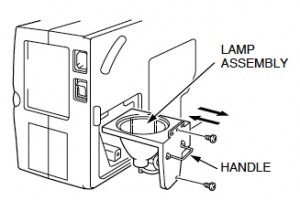
- Remove the two screws holding the lamp assembly in place. Grab the handle and pull out the used Sanyo L600-0068 projector lamp.
- Be sure to send the lamp to your local recycling program. DON’T throw this used Sanyo L600-0068 ) lamp into the garbage since it contains mercury and needs to be properly recycled.
- Take the new Sanyo L600-0068 (service part number lamp out of its box. Avoid touching the actual bulb since any fingerprints leave a black mark on the lamp when it heats up and give you black spots on your images. Using the handle, gently push the lamp into place.
- Tighten the two screws on the lamp assembly.
- Put the lamp cover back in place and tighten the single screw.
- Re-connect the AC cord.
- Reset the Lamp Replacement Monitor Timer following the steps below.
STEP THREE: Resetting the Sanyo PLC-XP18 Lamp Replacement Monitor Timer
In order for the projector to properly track the life cycle of your Sanyo L600-0068 projector lamp you’ll need to reset the Lamp Replacement Monitor Timer.
NOTE: RESET the Lamp Replacement Monitor Timer ONLY WHEN the lamp has been REPLACED.
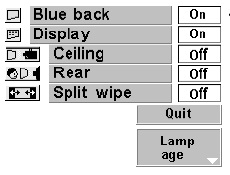
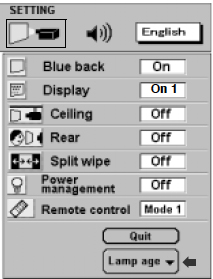
- Press the MENU Button to display the MAIN MENU.
- Press the POINT LEFT/RIGHT button and scroll right to select SETTING.
- Press the SELECT button to display the SETTING DISPLAY menu.
- Press the POINT DOWN button (a red arrow will appear).
- Move the red arrow to the LAMP AGE and then press the SELECT button.
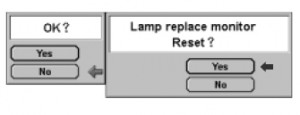
- The message “Lamp Replace Monitor Reset?” appears. Move the arrow down to YES and press the SELECT button.
- The message “OK?” appears. Click on YES.
- Move the arrow to QUIT and press the SELECT button.
The Lamp Replacement Monitor is now reset on your Sanyo PLC-XP18 projector and will track the correct age of your newly installed lamp.
NOTE: DO NOT reset the Lamp Replacement Monitor Timer unless a new lamp has been installed. Otherwise, your projector will not be accurately tracking the lamp life and will extend the life of your current lamp beyond its safety limit.
STEP FOUR: Extending the life of the Sanyo L600-0068 projector lamp
Extend the life of your newly installed Sanyo L600-0068 (service part number 610-282-2755) by following these helpful tips:
- Wait at least five minutes before turning the Sanyo PLC-X18 projector off.
- Don’t operate the projector continuously without letting it stand for at least one hour turned off every 24 hours.
- Cleaning the air filter regularly will also prolong the life of the Sanyo L600-0068 (service part number 610-282-2755) and prevent the Sanyo PLC-XP18 projector from overheating.