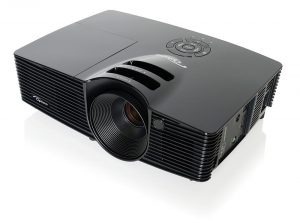
Replace the ASK Proxima C180 projector lamp
How to install a new ASK Proxima C180 projector lamp
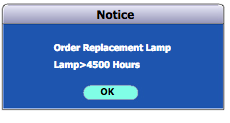
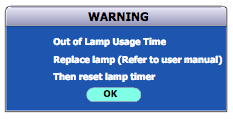
When the LED light is blinking red it’s time to replace the ASK Proxima C180 projector lamp. You may also see a “Replace Lamp” message on the screen. Don’t wait to replace the ASK Proxima SP-LAMP-017. The projector will turn off once the lamp life is approaching end of life.
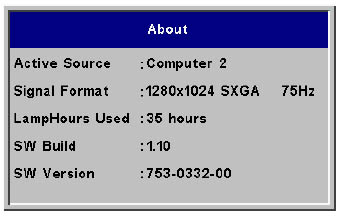
Find out how many hours have been used on the ASK Proxima SP-LAMP-017 through the ABOUT option found on the main MENU.
nbsp
The importance of authentic lamps
Buying authentic guarantees a projector lamp created with genuine, non-hazardous materials by the original manufacturer. These lamps come with money-back guarantee and keeps your warranty entact. It’s worth the few extra dollars to eliminate potential problems and have a lamp built to work properly with your ASK Proxima C180 sensitive mechanisms. Learn more about spotting dangerous projector lamps by reading our article: 7 tips for spotting counterfeits.
Buy this lamp on Amazon from the following authorized dealers:
Aurabeam Replacement Lamp for Ask Proxima SP-LAMP-017 Projector with Housing
SpArc Bronze for Ask Proxima SP-LAMP-017 Projector Replacement Lamp with Housing
Replacing the lamp
- Turn the ASK Proxima /C180 projector off and unplug the AC cord. Wait 60 minutes until the projector is fully cooled. These projectors work under extremely high heat and there is danger of burning yourself if you don’t let the projector cool off.
- Turn the ASK Proxima C180 projector upside down.
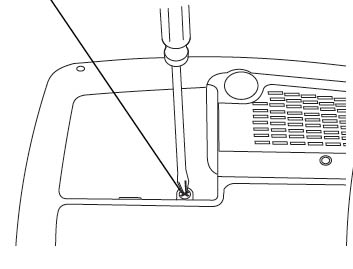
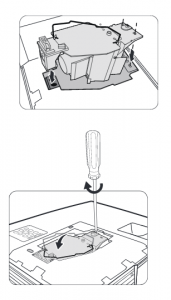
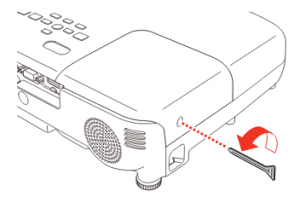
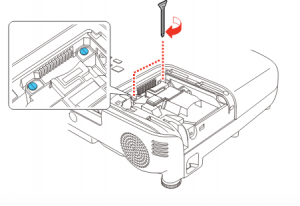
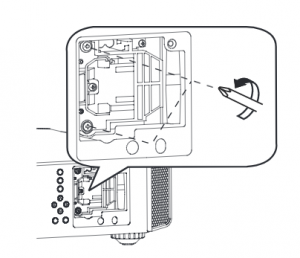
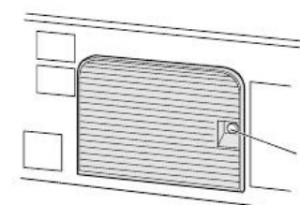
- Loosen the screw holding the lamp cover in place.
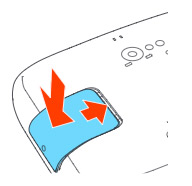
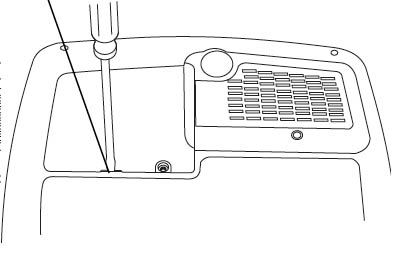
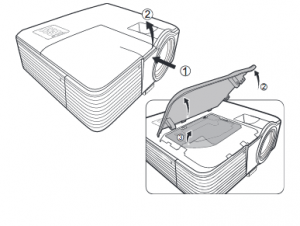
- Pry the lamp door off using the tip of the screw driver.
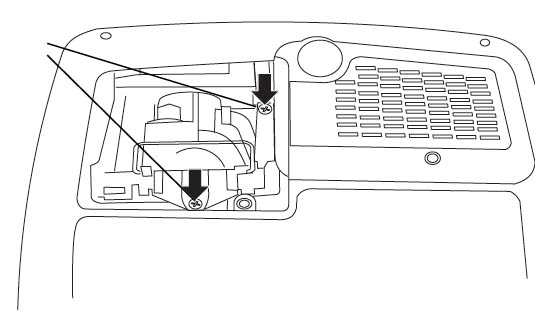
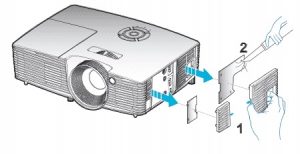
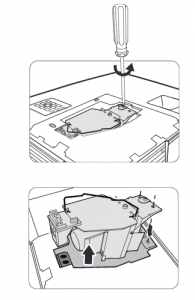
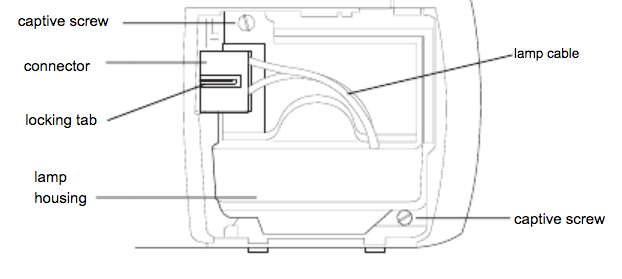
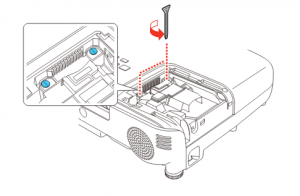
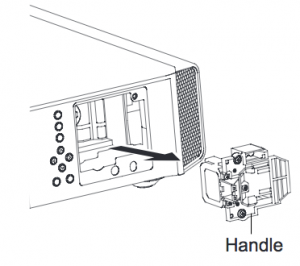
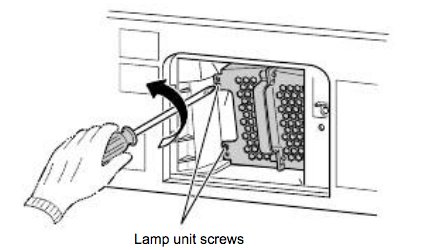
- Remove the two screws on the ASK Proxima SP-LAMP-017 lamp module.
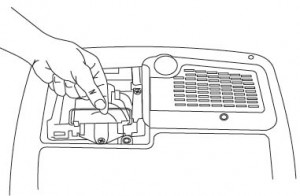
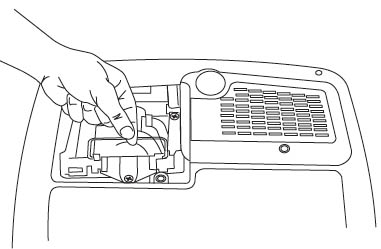
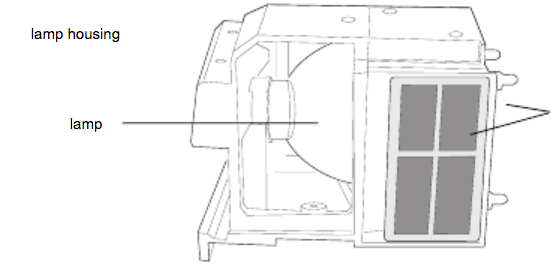
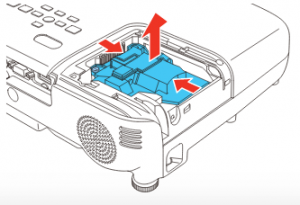
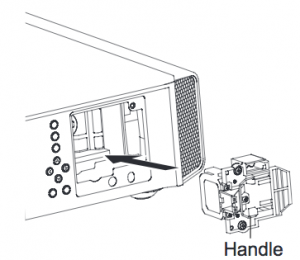
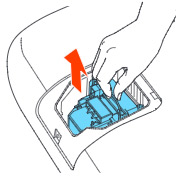
- Grasp the metal wire handle to left the ASK Proxima SP-LAMP-017 lamp module.
Be sure to send the used lamp to a proper recycling facility. Don’t throw the used lamp into the regular garbage.
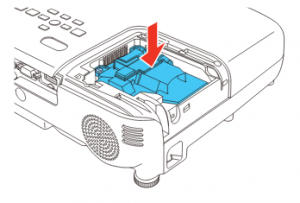
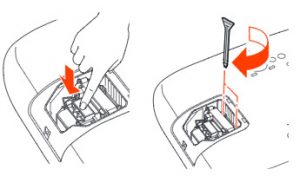
- Put the new ASK Proxima SP-LAMP-017 lamp into the projector making sure it’s properly seated.
- Replace the two screws on the lamp module.
- Replace the door and tighten the screw.
- Plug in the power cable and turn the projector back on. You are ready to reset the lamp timer.
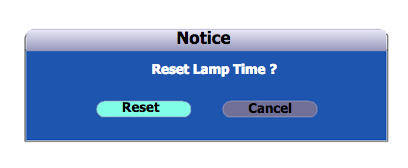
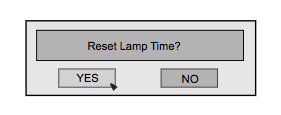
Resetting the lamp timer
Once you have replaced the ASK Proxima SP-LAMP-017 it’s extremely important to reset the lamp timer. You want the the lamp life to properly track the hours left for your ASK Proxima SP-LAMP-017. Otherwise you run the risk of the ASK Proxima C180 suddenly shutting down.
There are two ways of resetting the lamp timer.
Using the projector:
- Press the decrease volume button on the remote first, followed by the increase volume button.
- The LED light will blink green when the lamp hour has been reset.
 Using the menu:
- Open the MAIN menu.
- Navigate to the SETTINGS menu. Press SELECT.
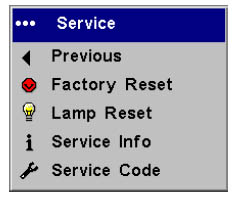
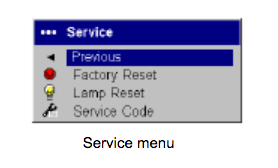
- Scroll down to the SERVICE menu option. Press SELECT.
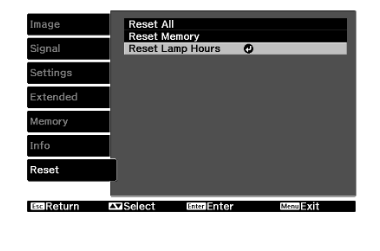
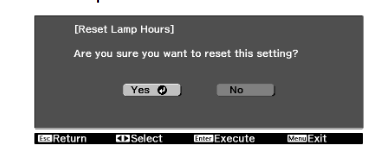
- Scroll down to the LAMP RESET option. Press SELECT.
Learn more with Top tips for extending DLP projector lamp life.
 Installing a new Epson EX7220 air filter is an important maintenance routine


 Why change the Optoma HD141X air filter?
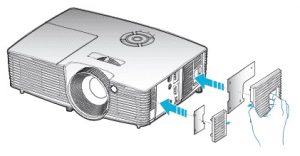
 Third warning: The lamp has been in operation for 5000 hours. It is strongly recommended that you replace the lamp
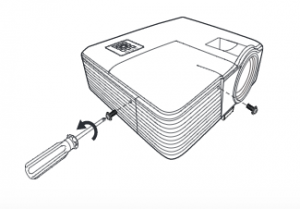
 projector lamp
 Turn the projector on its side so that the lamp door is facing you. Using a
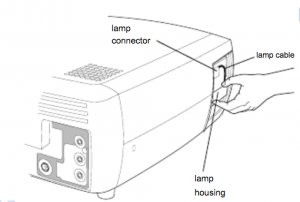
 If the dust filter becomes clogged it will cause high temperatures and premature lamp failure. To maximize lamp life you should clean the screen every 250 hours.
 Loosen the screw holding the Epson EX7220 lamp cover in place.
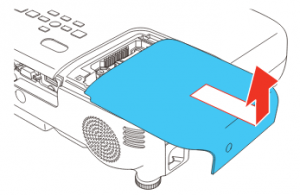

 Review these important projector safety tips


 Replace the JVC DLA-RS55 projector lamp
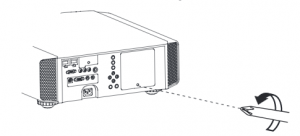
 Place the replacement
 Press the Enter button
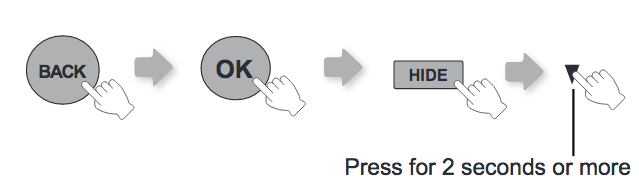
 Replace the Toshiba 50HM66 TV lamp
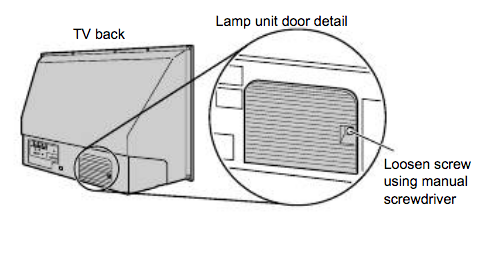
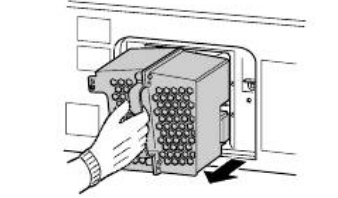 Grasp the lamp unit handle and gently pull the lamp unit straight out of the TV. Set the old lamp unit aside to be properly
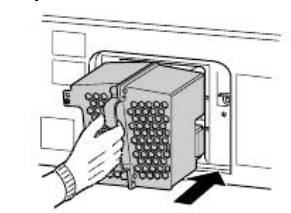

 How to install a replacement Epson EH-TW6000 projector lamp
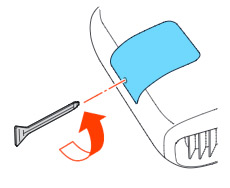 Loosen the screw holding the Epson EH-TW6000 projector lamp cover in place.
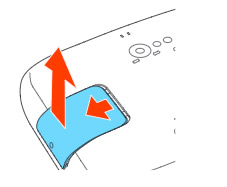 Slide the Epson Epson EH-TW6000 cover off and place it to one side.
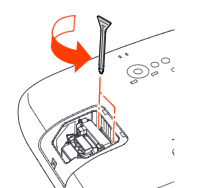
 Slowly insert the