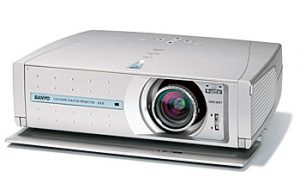
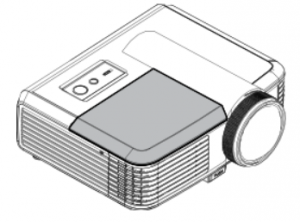
Geha Compact 219 projector lamp replacement
 Use this guide to replace the Geha Compact 219 projector lamp
Go with an authentic Geha Compact 219 projector lamp when it’s time for a replacement.
Buy the right lamp
Always look for the seal of approval before buying your Geha Compact 219 projector lamp. This guarantees you are getting an OEM mnufactured lamp that will keep your projector working at its optimum levels. Othwerise, you run the risk of damaging your projector. The Geha Compact 219 needs a Geha 60-283952 projector lamp.
6 reasons to avoid generic
- susceptible to explosions
- generics have a shorter life
- no safety guards to protect your eyesight
- generics are created with carcinogenic, toxic substitutes posing a health
- putting a generic into your Geha Compact 219 voids your warranty and any tech support.
Find this lamp on Amazon from these authorized dealers:
- SpArc Bronze for Geha 60-283952 Projector Replacement Lamp with Housing
- Original Lamp For GEHA C 219:C 229 Projector
End of life
 When it’s time to replace your Geha Compact 219 projector lamp a warning sign will appear on screen. Replace the lamp immediately when you see this warning. Other warning signs includes a dark image or one with colors that are faded.
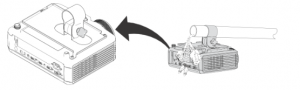
Replacing the projector lamp
The Geha Compact 219 uses the Geha 60-283952 projector lamp Before installation follow these important safety steps:
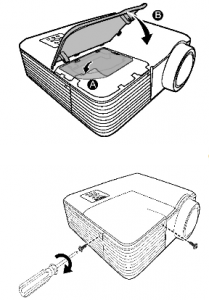
- Turn off the Geha Compact 219 projector and unplug the AC cord.
- These projectors operate under high temperatures and there is a risk of burning if the projector has not cooled enough. Allow the Geha Compact 219 to cool for one hour. It should be cool to the touch.
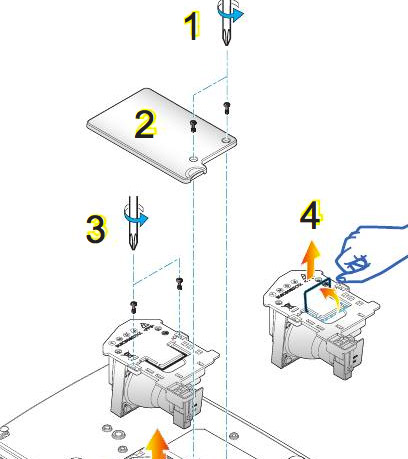
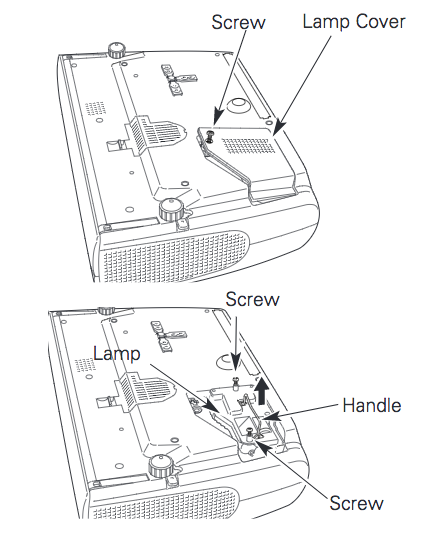
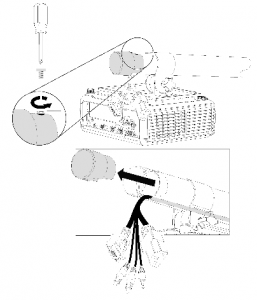
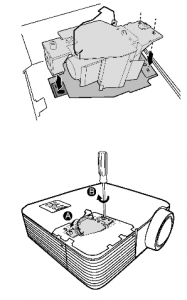
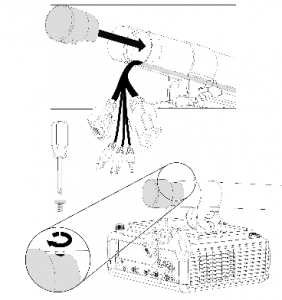
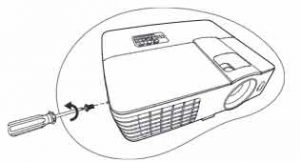
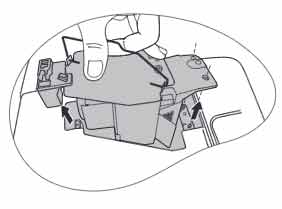
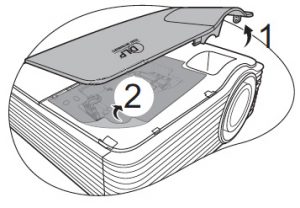
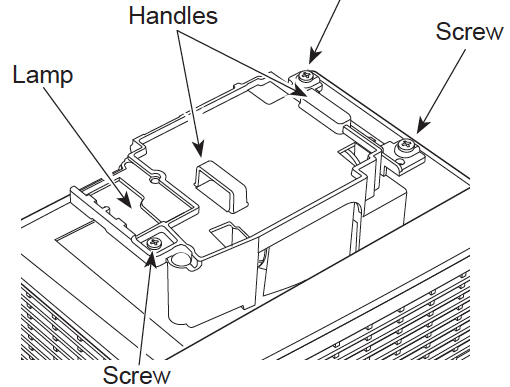
1. Remove the two screws from the cover.
2. Lift the cover off the projector and place it to one side.
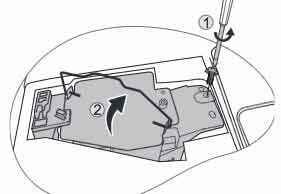
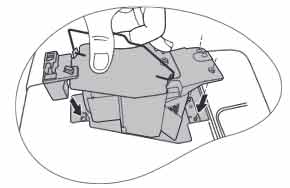
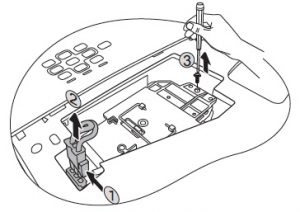
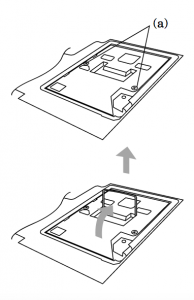
3. Remove the two screws holding the Geha Compact 219 projector lamp in place. screw from the cover.
3. Lift the wire handle on the Geha 60-283952 projector lamp and gently pull the lamp up to remove it.
Don’t throw the old Geha 60-283952 into regular garbage as it contains mercury — send it to a local recycling program.
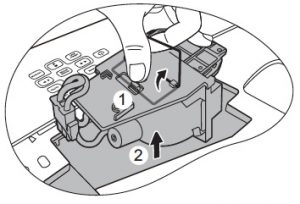
4. Take the new Geha 60-283952 projector lamp using the wire handle. Avoid touching the bare bulb; the oil on your finger can leave a black mark on the lamp affecting the projected image. Tighten the screws on the new Geha 60-283952 projector lamp.
Put the lid back onto the projector. Tighten the screw holding the lid in place. Plug the AC cables back into the projector. Turn the project on so you can reset the lamp timer.
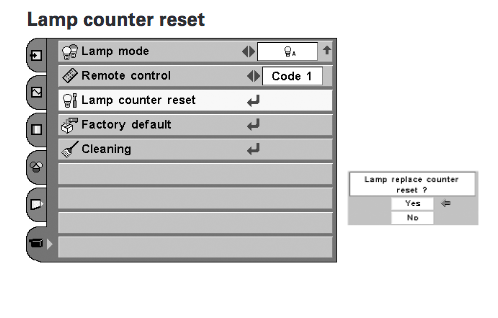
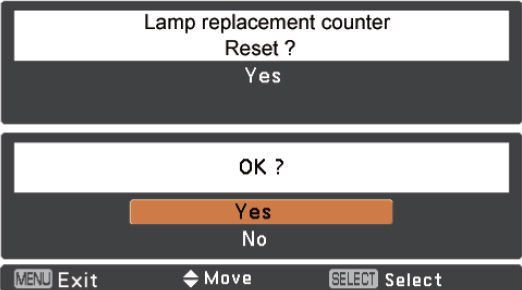
Resetting the projector lamp timer
It’s important to always reset the lamp timer after replacing the projector lamp in your Geha Compact 219 projector. You want the projector to track how many hours the lamp has been used and send out warning messages when the Geha 60-283952 projector lamp reaches end of life.
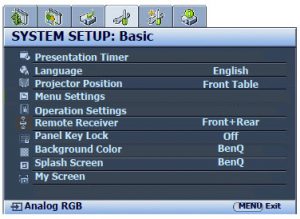
To reset the Projector Lamp timer:
- Turn on the projector
- Press MENU
- Scroll down to OPTIONS
- Choose Lamp Settings. Press ENTER.
- Select Lamp Reset to open an additional dialogue box.
- Select YES. Press Enter
Extending the projector lamp life
- Use the Eco Mode for more lamp hours.
- Keep your air filters clean to avoid overheating the projector.
- Make sure there is enough airflow around the Geha Compact 219 projector.
- Learn more with Top tips for extending DLP projector lamp life
 Install a new Sanyo PLV-Z1X projector lamp using our guide
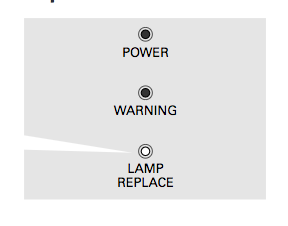
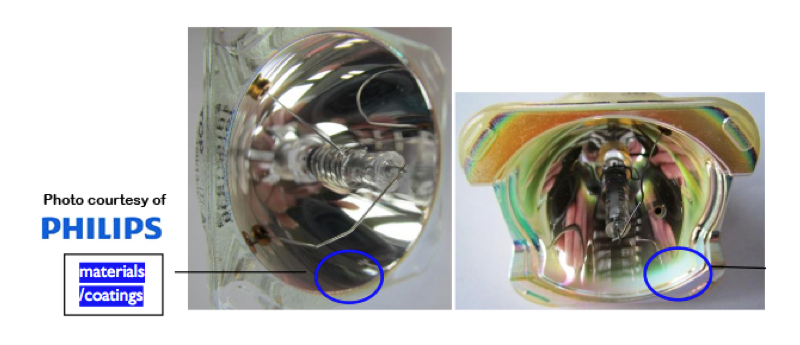
 Authentic projector lamps keep your projector working
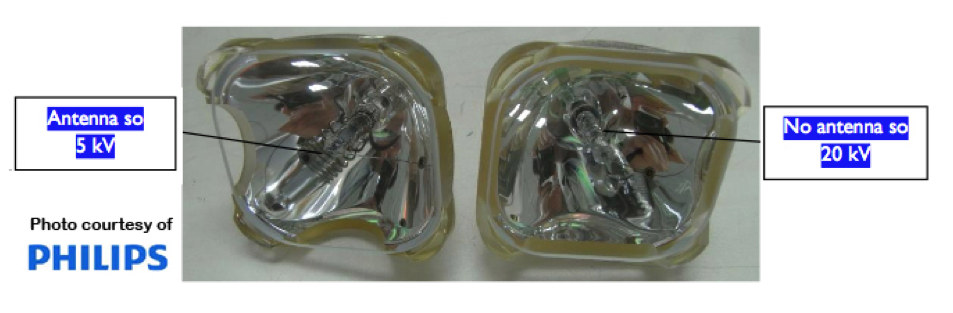 Projector lamps operate with a lamp driver with a 5kV ignition voltage. Lamps with metal antenna in the ignition chamber are 5kV lamps. Some lamps have their antenna in the front while others have the antenna in the rear. Some projectors need high ignition voltage of 20kV so have no antenna. Generic manufacturers often don’t have the specs needed to create the proper antenna for each projector lamp and instead create lamps that faulty antenna that short circuits in the projector.
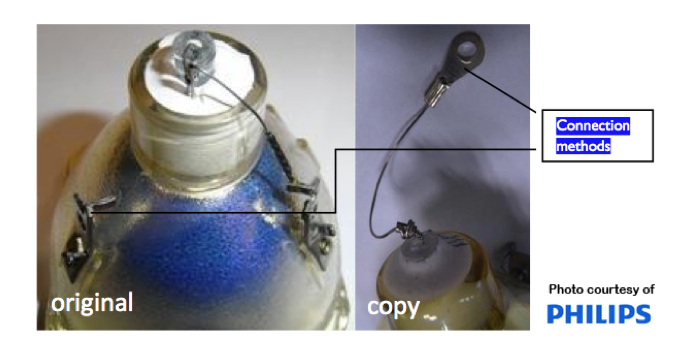
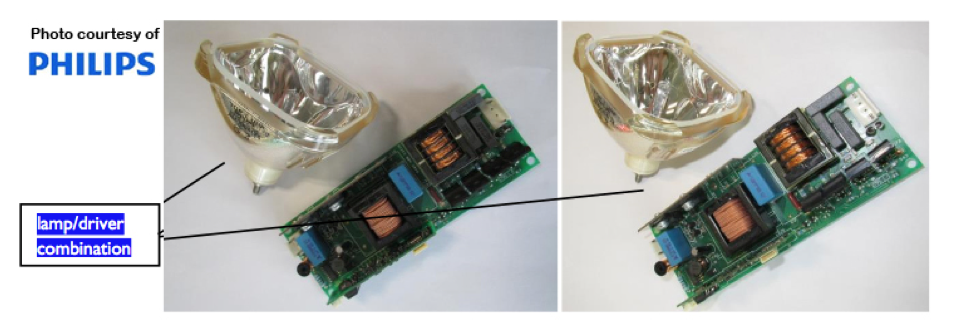 Projector lamps also work with the projector driver to bring the image to the screen. The combination of lamp and driver is unique to each projector model. Only authentic manufacturers know the specifications for each particular brands and how to use those specification to create OEM lamps. Generic lamps can never have the correct combination and installing them creates unbalanced electrical power with danger of explosions.
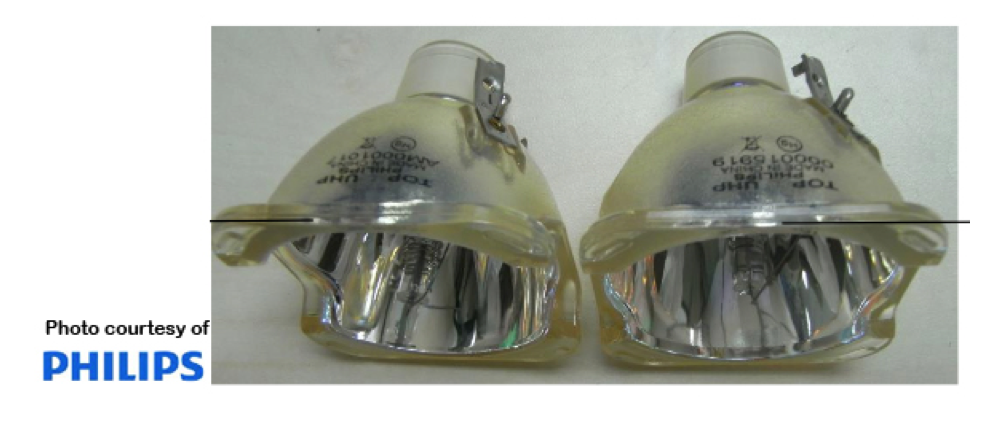 Almost all projector lamps have the same outer shape but the inner shape is dependent on the projector model. Most generics don’t have the correct specifications to create the correct inner shape. It creates a lamp with uneven light output distribution.
 Using the screwdriver, remove the screw from the boom end cap, and then remove and set aside the boom end cap and screw.
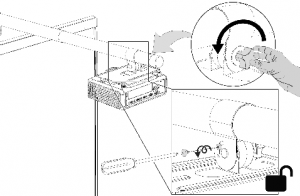
 Slide the projector mounting plate and projector off of the boom.
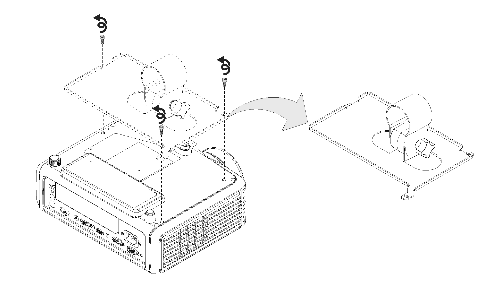
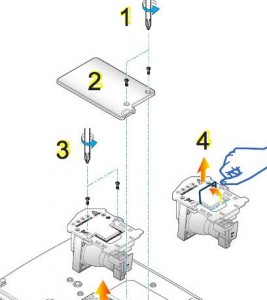
 Using the M3 hex wrench, remove the three screws connecting the projector mounting plate to the projector, and then set aside the projector mounting plate and screws.
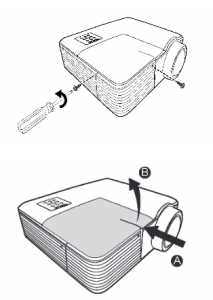 Using the screwdriver, remove the two screws from the lamp cover.
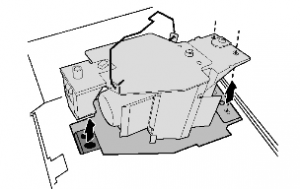
 Place the lamp protection film that came with the new lamp module over the slot.
 Replace the boom end cap. Connect the cables to the projector. Connect the power cable to a power outlet.
 Learn how to replace the BenQ MX710 projector lamp
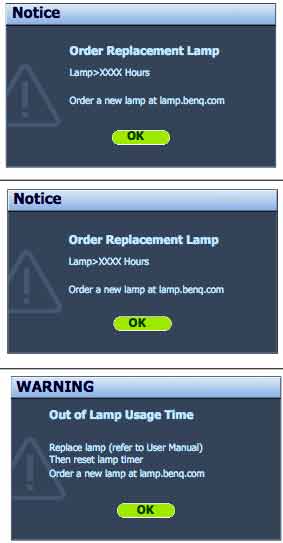

 Insert the new
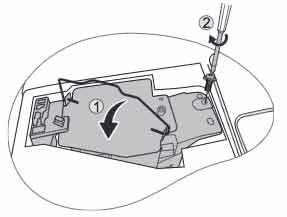
 Save time and money with authentic projector lamps

 Replace the BenQ MW714ST projector lamp
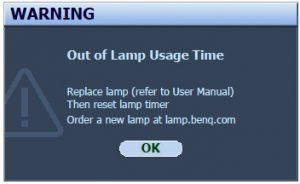 When the BenQ MW714ST projector lamp is reaching end of life, three warning messages will appear on screen. The lamp indicator on the projector will start flashing orange. You may notice the image
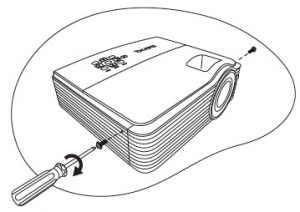

 When the
 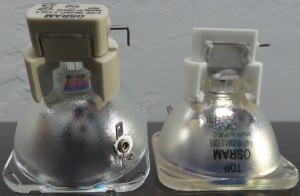 Authentic projector lamps save you time and money
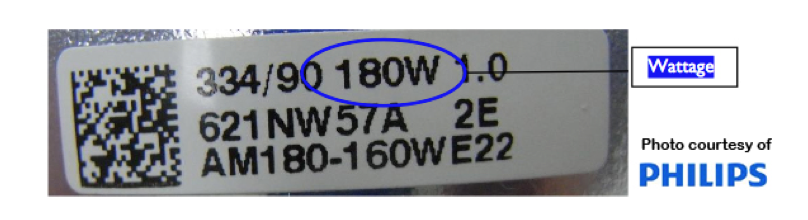 Wattage plays a critical role in lamp power as it supplies the amount of light displayed. Generics usually have higher wattage and when they come in contact with the low wattage ballast/driver (which controls the electrical ignition of the lamp), the projector’s electrodes can be damaged. Since the generic lamp produces too much light, there is often a flickering image, uncontrolled light exposure and overheating of the lamp and projector.
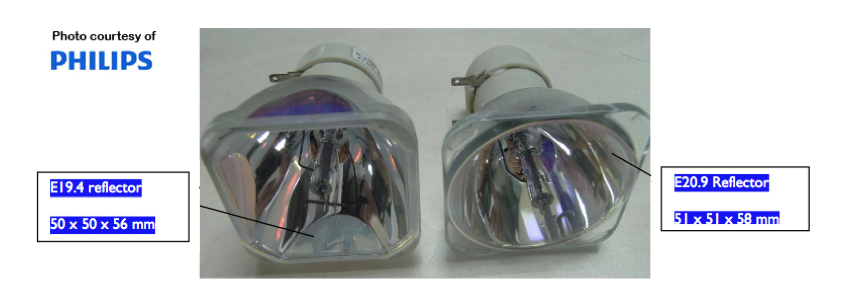 Generics often have a different sized reflector than original OEM lamps, which means they often don’t fit into the projector properly. Bad position of the lamp means the light does not go through the optical elements at the right angle causing damage to the optics and a short circuit of electrical components. This leakage of light can also affect your eyesight by exposing you to high intensity light.
 How to replace the Eiki LC-XBL25 projector lamp
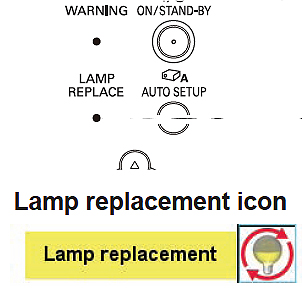
 or the Eiki LC-XBL25 projector. Loosen the screw to remove the cover.
 How to install a replacement Mitsubishi LVP SA51UX projector lamp
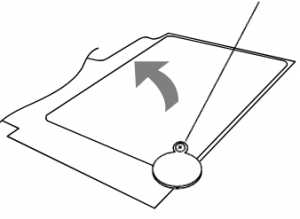
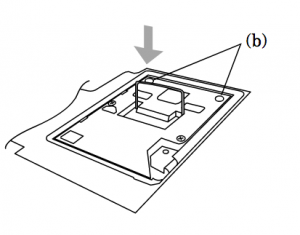
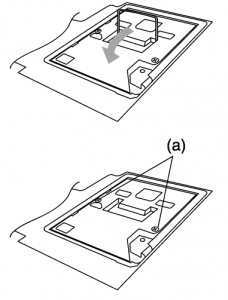
 Remove the lamp cover in the direction of the arrow as indicated. Loosen the two screws on the