
Counterfeit projector lamps wait until you install them into your projector. Then the nightmare begins.
Zombie counterfeits projector lamps can be a real drag!! Buy authentic. Stay safe out there. Beware!
 Zombie problem 1: Brain explodes
After years of research, PHILIPS developed a revolutionary arc tube filled with a mercury-argon mixture creating intense light but less heat. The intense light needed for projectors is created by the two electrodes in the ballast igniting gases in arc.
Zombie counterfeits often have filaments in the ballast too weak to light the gases in the arc. Without this ignition unlit arc tube continues to heat up until it explodes inside the projector. You’ll hear the loud pop and smoke may come pouring out of your projector. You have counterfeit lamp guts in your projector to clean up. Follow these instructions for a safe clean-up
- Turn the projector off immediately. Unplug the AC cord.
- Wait for the projector to cool down.
- Open a window to ventilate the room. Avoid breathing in any dust from the lamp
- Check there are no broken shards or pieces of glass around the projector or coming out from the cooling air circulation vents. Check the interior of the projector
- Use rubber gloves to pick up any shards or broken bits of lamp coming out of the projector. These projector lamps contain mercury so don’t handle any shards with bare hands.
- Place shards in closed containers to avoid generating dust and mercury vapour. Don’t put the container into the regular garbage or down the drain. Send the remains to a hazardous waste facility near you.
- Don’t attempt to clean up the inside of the projector.
- Take the projector into an authorized service station. They will clean the inside of the projector thoroughly with a mercury vacuum cleaner. Never use a regular vacuum cleaner to do this.
- Ask the service technician to do a thorough check of the unit paying attention to the ballast and color wheel
Zombie problem 2: The picture is bad

Unfortunately zombie counterfeits are not made with the same materials as OEM projector lamps. Your colors are not going to be as vivid, your blacks not as rich and the whole picture will look off. Zombie generics simply can’t deliver good picture quality — they haven’t been made with the proper materials that work with the sophisticated optics in your projector. To get the clear, crisp picture with your projector, install an authentic projector lamp.
Nothing can replace an authentic projector lamp.
Zombie scenario 3: Headaches
 The arc tube in counterfeit lamps is usually no filled with the proper gas. Authentic projector lamps use a mercury-argon mixture but this patented technology not available to counterfeit manufacturers. Most counterfeit manufacturers substitute Krypton-85 to achieve the same results.
This is a radioactive gas created by nuclear reactors during the fission between uranium and plutonium. It’s only safe when used in a controlled environment. When the counterfeit lamps explodes, the gas released is dangerous whether the projector is in the home, office or school
Zombie alert! Short-term symptoms of Krypton-85 exposure :
- dizziness
- nausea
- vomiting
- loss of consciousness
Solution: Get rid of your zombie lamp immediately and open windows to clear out this gas. Buy authentic.
Zombie scenario 4: Your eyes hurt
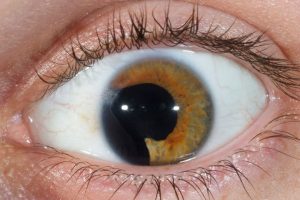 Your projector emits an extremely bright lamp that does have some UV rays. All PHILIPS projector lamps have special coated reflectors to reduce harmful rays and protect your eyes if you do look into the projector. Without this coating, looking into the projector lamps is similar to looking directly into the sun.
Counterfeit lamps either have no reflectors or a non-coated reflector that offers no protection. Prolonged UV exposure eventually damages the retina causing macular degeneration and poor eyesight. Operating your projector with a generic compatible lamp means putting your eyesight at risk. Buy authentic.
Solution: Stop using zombie lamps! Buy authentic.
If you did fall under the spell of a zombie generics, reclaim your projector by installing an authentic lamp. Don’t let the horrors of zombie counterfeit projector lamps haunt you. Buy authentic today.

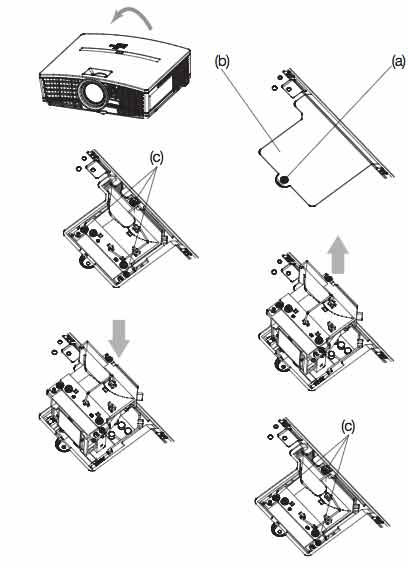

 To finish the installation:
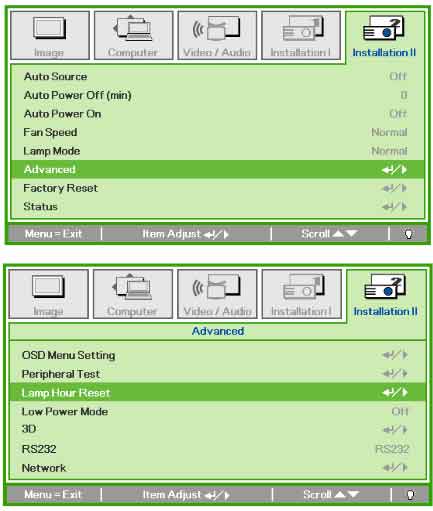 Resetting the projector lamp timer without changing the lamp can make it work beyond its recommended hours and cause harm to your Vivitek D965 projector.
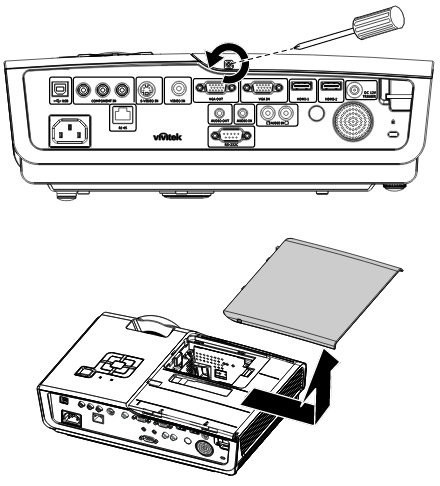
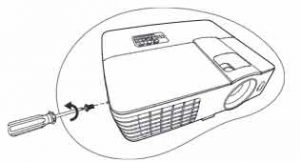
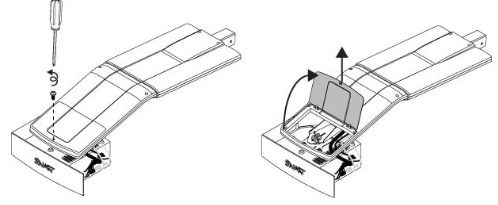
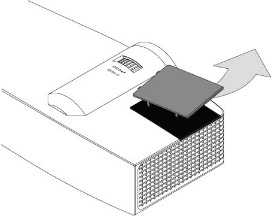
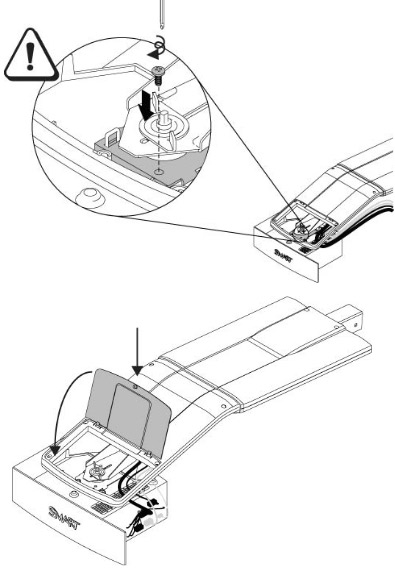
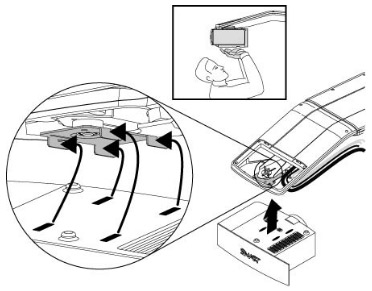
 Loosen the lamp cover screw and slide the 500 projector lamp cover off.
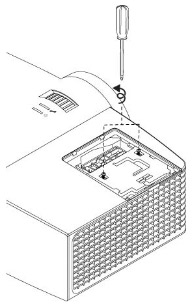
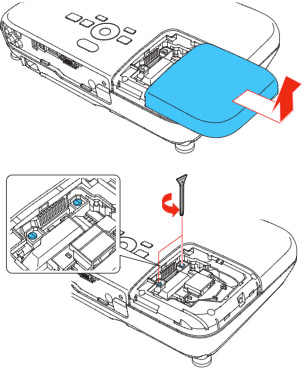 Loosen the two screws holding the
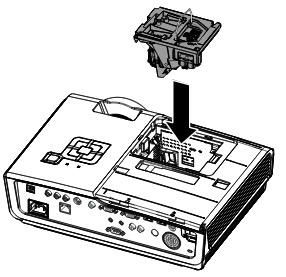
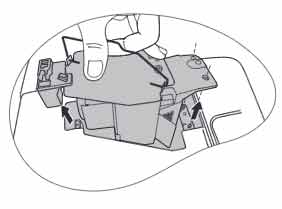
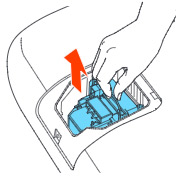
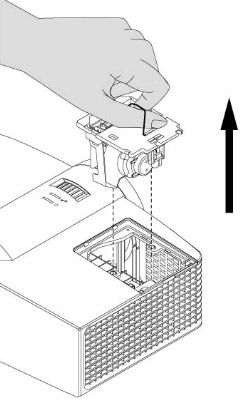
 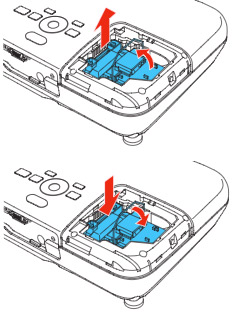 Grab the
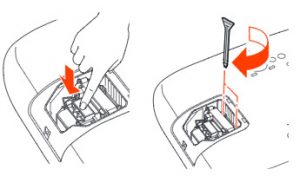
 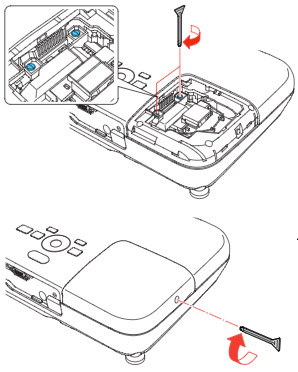 Tighten the screws on the new
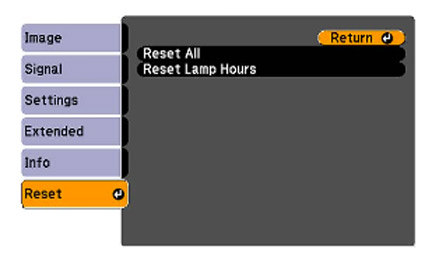

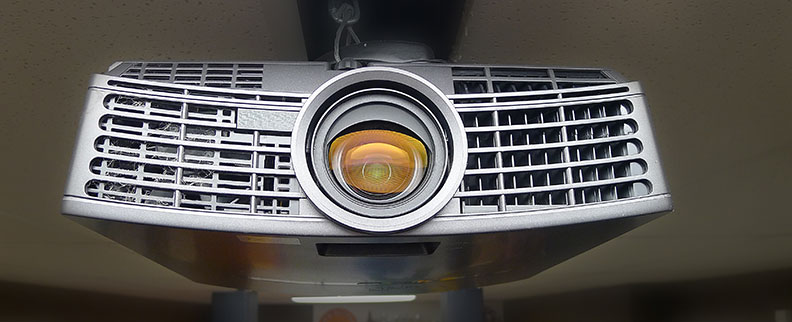
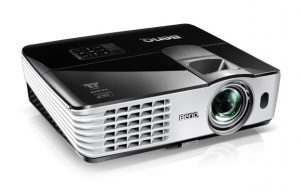 Our guide gives you step-by-step instructions on how to replace the BenQ MX613ST projector lamp.
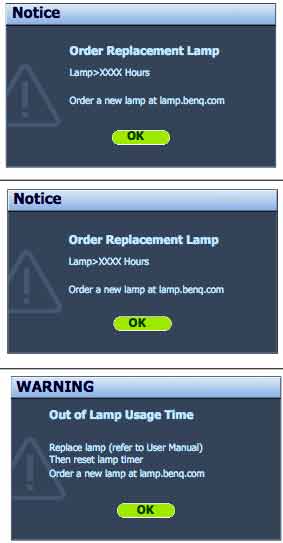
 Q MX613ST projector.
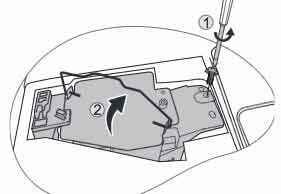
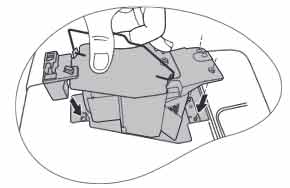 Insert the new
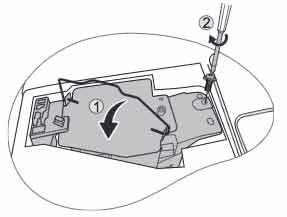
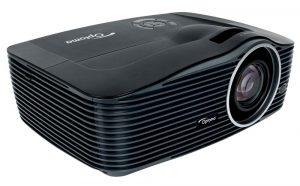 Follow this step-by-step installation guide for installing a new Optoma W501 projector lamp
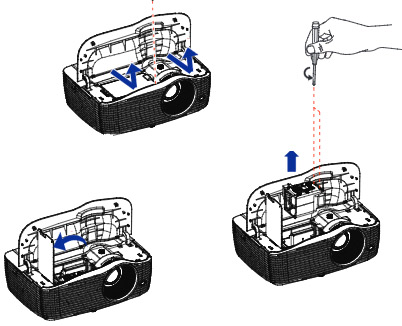
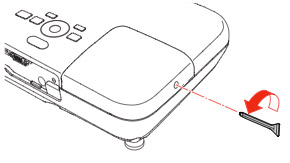
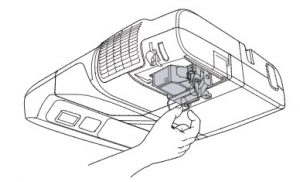
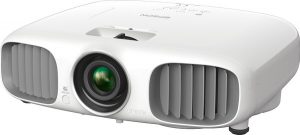 hows how to install a new Epson PowerLite Home Cinema 3010 projector lamp.
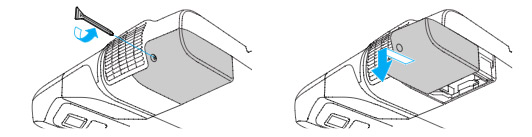
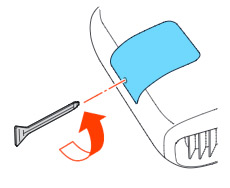 Loosen the screw holding the Epson PowerLite Home Cinema 3010 projector lamp cover in place.
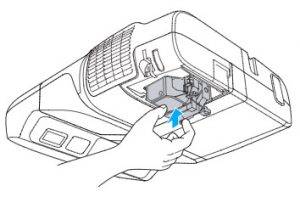
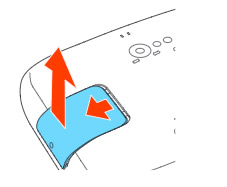 Slide the Epson PowerLite Home Cinema 3010 projector lamp cover off and place it to one side.
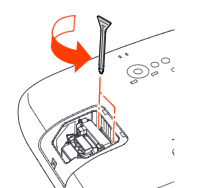
 Slowly insert the
 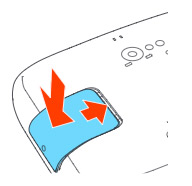 s the oil from your skin will case blackouts.

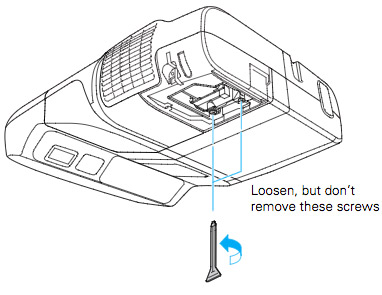
 he projector and without applying pressure, remove the screw holding the cable cover in place. Lift the cover off.
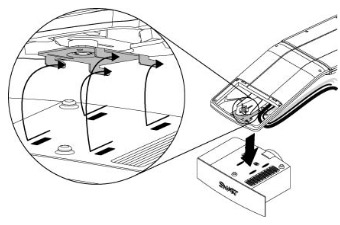
 Gently insert the replacement
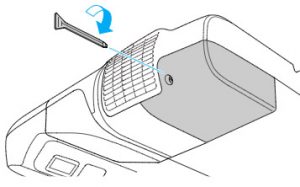
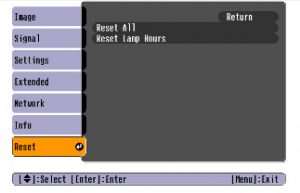
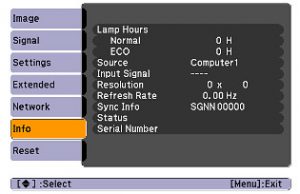 After resetting the Epson PowerLite 460 lamp tracking function, check that the Lamp Hours have been reset to zero: