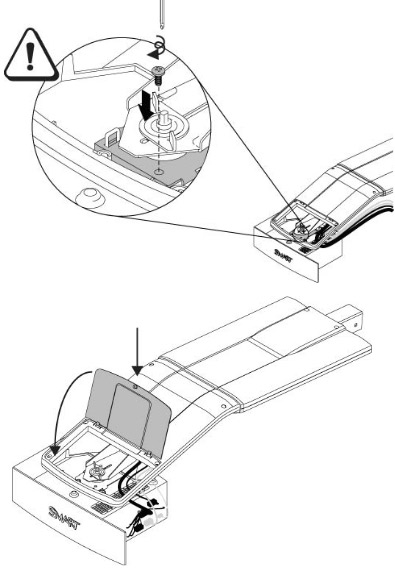
Replacing the Sanyo Promethean PRM20A projector lamp
 Replace the Sanyo Promethean PRM20A projector lamp in three easy steps.
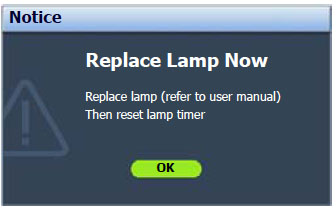
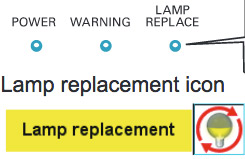
Warning signs for end of lamp life
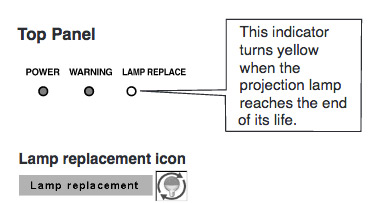 When it time to replace the Sanyo Promethean PRM20A projector lamp the LAMP REPLACE indicator turns yellow light. Replace the lamp immediately. Other indications of end of lamp life can also be a poor picture, darker light or strange colours.
Buy authentic
Be sure to invest in an authentic lamp for your Sanyo Promethean PRM20A projector lamp projector lamp. This projector uses the Sanyo POA-LMP126 projector lamp. Scroll down for more reasons not to buy a counterfeit projector lamp.
Find this lamp on Amazon sold by these authorized dealers:
Projector lamp replacement
BEFORE replacing the lamp:
- Turn off the projector and unplug the AC cord.
- Allow the Sanyo Promethean PRM20A projector lamp tto cool for at least 45 minutes. Don’t open the projector until it is cool to the touch. These projectors operate under high temperatures.

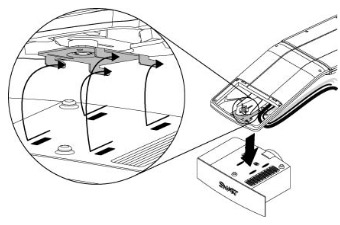
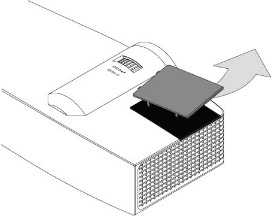
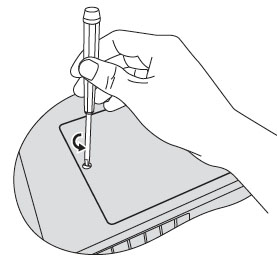
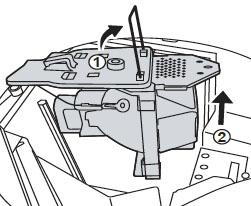
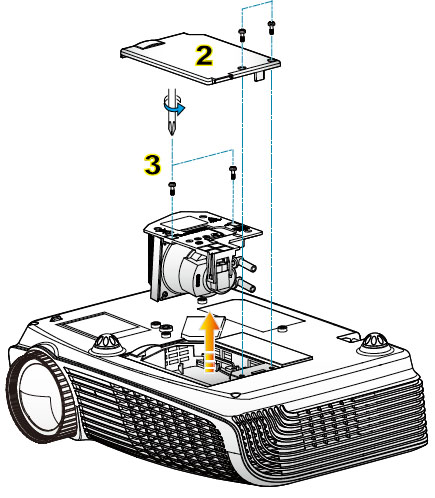
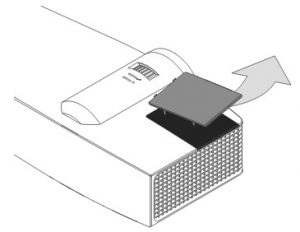
- Place the Sanyo Promethean PRM20A on a soft surface and turn it over. The lamp cover is on the bottom of the projector.
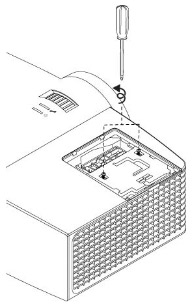
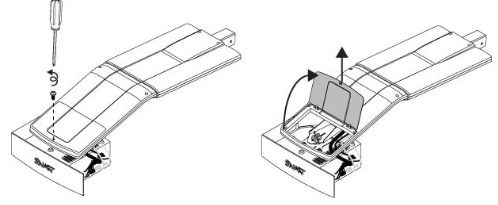
- Loosen the screw holding the projector lamp cover into the projector. Place the cover to one side.
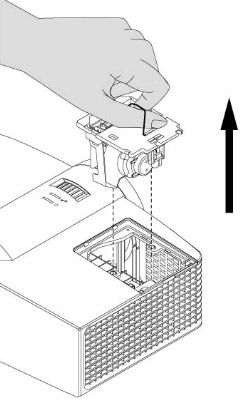
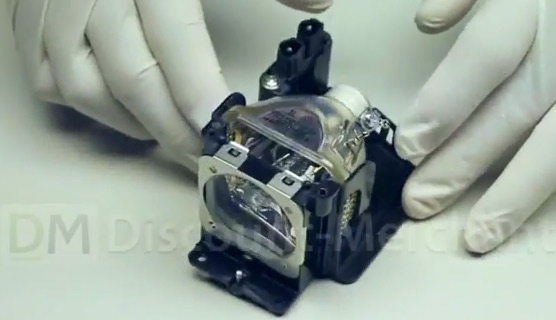
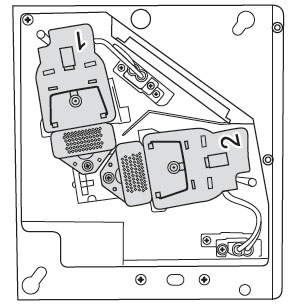
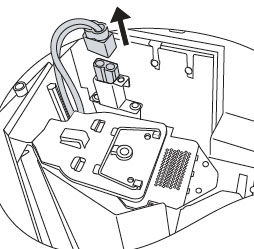
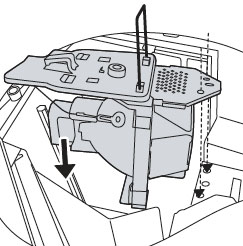
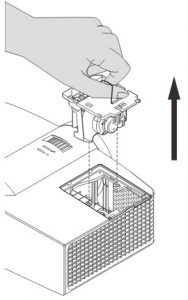
- Loosen the two screws keeping the Sanyo POA-LMP126 projector lamp in place. Grab wire handle and gently pull the lamp out taking care not to hit the lamp.
- NOTE: Your old projector lamp contain mercury and can’t be placed into regular garbage. Recycle this lamp.
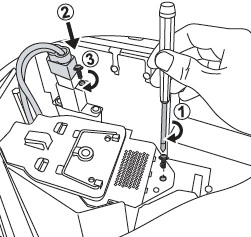
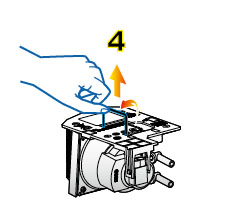
- Take the new Sanyo POA-LMP126 projector lamp cage by the wire handle and gently maneuver it into place. Avoid touching the glass or the bulb since the oil from your fingers may cause black spots on the bulb when the projector heats up.
- Tighten the two screws on the Lamp Assembly for the Sanyo POA-LMP126 .
- Tighten the screw on either side of projector lamp cover. Let the projector stand for five minutes so the projector lamp can stabilize. Re-connect the power cord and turn on the Sanyo Promethean PRM20A projector. You’ll need to reset the Lamp Counter.
Resetting the projector lamp timer
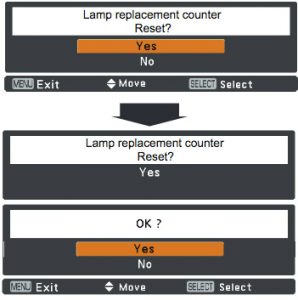
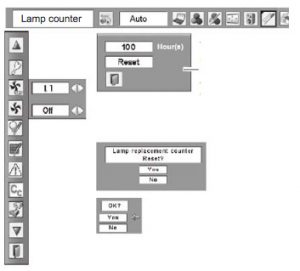 Reset the Sanyo Promethean PRM20A Lamp Control Mode only when Sanyo POA-LMP126 projector lamp has been replaced.
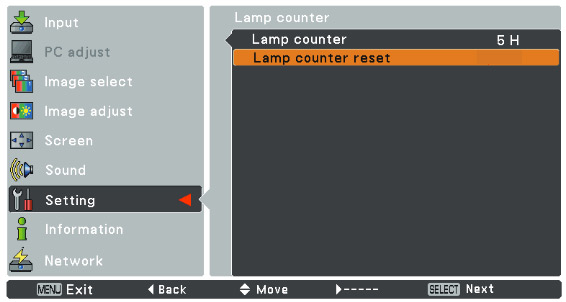
- Turn the projector on
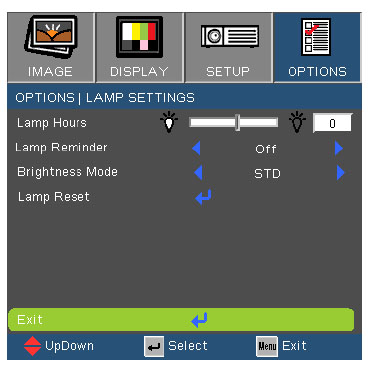
- Press the MENU button to bring up the ON-SCREEN MENU.
- Press the LEFT/RIGHT button to select SETTING and press the SELECT button. to bring up the SETTING MENU.
- Press the DOWN button and a red-arrow icon appears.
- Scroll over to LAMP AGE and then press the SELECT button.
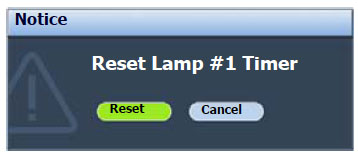
- The message “LAMP REPLACE MONITOR RESET” is displayed.
Select YES to reset the Timer.
Tips for longer projector lamp life:
- Avoid frequent on and offs to avoid power surges.
- Don’t let the Sanyo Promethean PRM20A projector overheat as this puts stress on the lamp. Make sure there is enough airflow around the projector particularly if it’s been permanently mounted.
- Let the projector stand unused for at least one hour ever 24 hours. An average use of four to five hours per day will ensure longer lamp life.
- Keep the air filters clean and free of dust so it can do its job and keep the projector lamp for overheating.
Five reasons to avoid counterfeit projector lamps:
- shorter lamp life than original lamps
- toxic materials and carcinogenic parts including Krypton-85
- prone to explosions
- incompatibility causing damage to the sensitive electronics in your projectors
- no guarantee or refunds
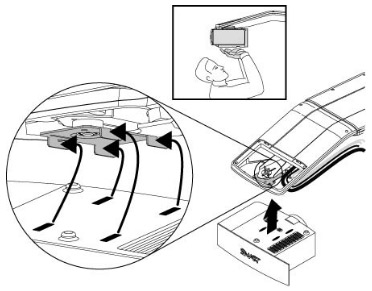
Green your projector
You can save money and reduce waste by recycling the lamp cage in the Sanyo Promethean PRM20A. Our training video shows how. Not as complicated as it sounds.
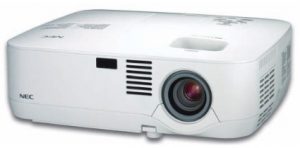 This easy guide shows how to install a replacement NEC NP310 projector lamp
 Loosen the NEC NP310 projector lamp cover screw.
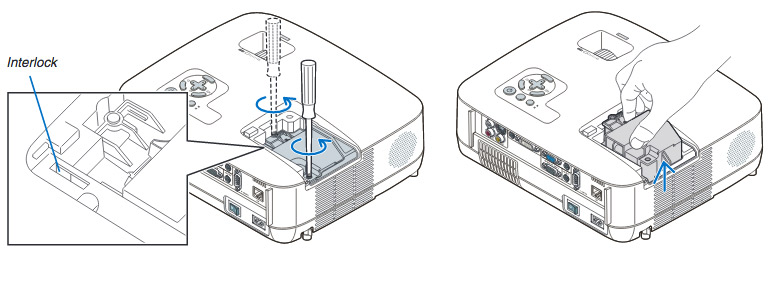
 ve the projector lamp by holding the indent and pulling up. Take care not to knock the bulb against the projector as this may cause it to break.
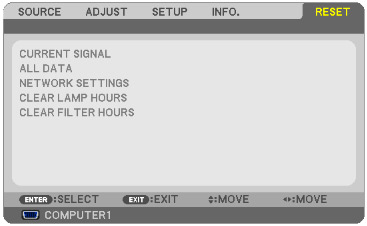 To reset:
 This step-by-step guide shows how to replace the BenQ SP930P projector lamp.
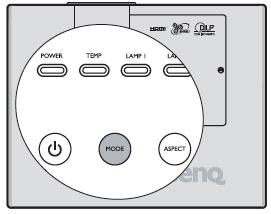

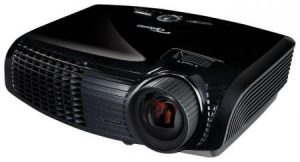 This step-by-step guide shows how to install a replacement Optoma EW533ST projector lamp
 This guide shows how to install a replacement NEC Projector VT480 projector lamp.
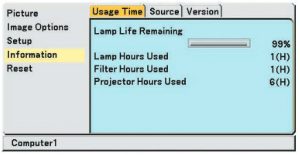 You can expect up to 2000 hours with your NEC VT480 projector projector lamp (up to 3000 hours in Eco mode) or longer. When the projector lamp is reaching end of life, the message will appear on screen: The lamp has reached the end of its usable life. Please replace the lamp.
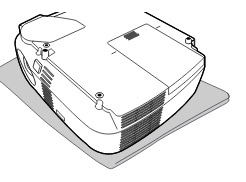
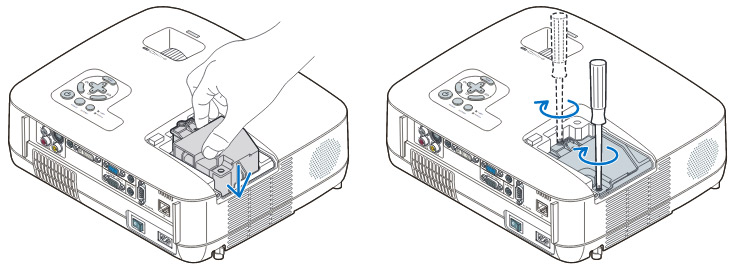
 Place the Loosen the NEC VT480 projector on a soft surface. Turn the projector upside down. The lamp cover is found underneath the projector. Push firmly on the lamp cover and slide it off the projector cover.
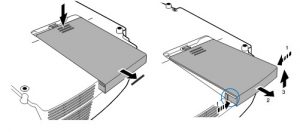
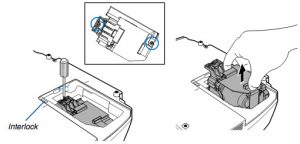 Loosen the two screws holding the
 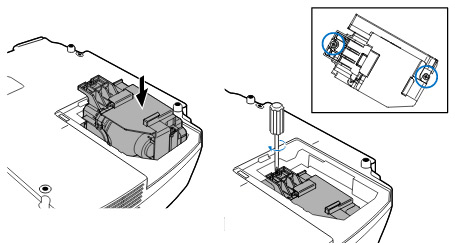 Install a new
 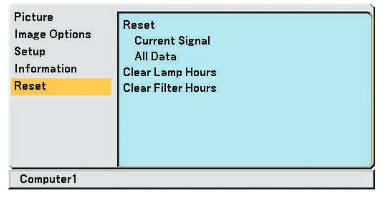 Clear usage hours and reset hours
 Grab the wire handle on the old lamp and gently pull it up out the projector. NOTE: The
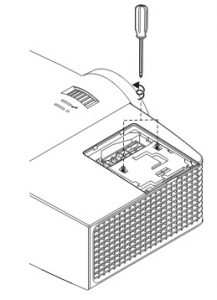
 End of life warning signs
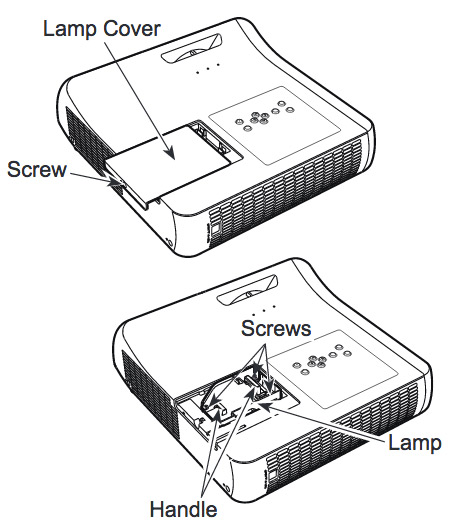
 The Lamp Reset message appears.

 he projector and without applying pressure, remove the screw holding the cable cover in place. Lift the cover off.