
Replace the Dukane I-PRO 8762 projector lamp
 These instructions show how to change the Dukane I-PRO 8762 projector lamp.
Step 1: Recognize the end of life signs
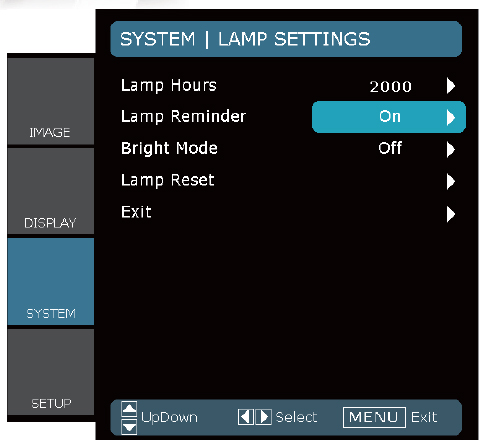
When the Dukane I-PRO 8762 projector lamp has reached 2000 hours of service (or 2500 hours when in Eco mode), the LAMP indicator on the projector will blink red. Replace the projector lamp immediately. An onscreen message will appear: The lamp has reached the end of its usable life. Please replace the lamp. The projector will turn off and go into standby mode after 2100 (up to 2600 hours in Eco mode) hours of service. Change the projector lamp immediately.
Find this lamp on Amazon sold by this authorized dealer:
Lutema 456-8762 Dukane 456-8762 LCD/DLP Projector Lamp (Philips Inside)
Step 2: Buy an authentic lamp
The Dukane I-PRO 8762 projector uses the Dukane 456-8762 projector lamp. To keep your projector working at its best, be sure to install an authentic projector lamp. Look for the seal of approval before purchasing and avoid buying counterfeit lamps. See below for 6 good reasons why to avoid counterfeit projector lamps.
Step 3: Replace the projector lamp
Before installing the new projector lamp, follow these important safety steps:
- Turn the power off on the Dukane I-PRO 8762 projector.
- Disconnect the power cord.
- Allow the Dukane I-PRO 8762 projector to cool down for at least 30 minutes. Trying to change the lamp while the projectors is not cooled down can result in serious burns.
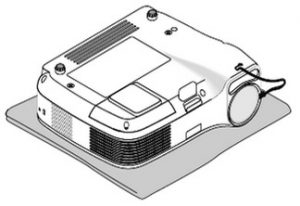
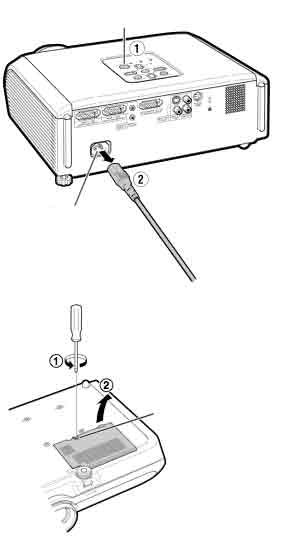
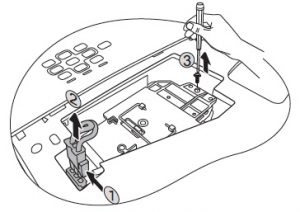
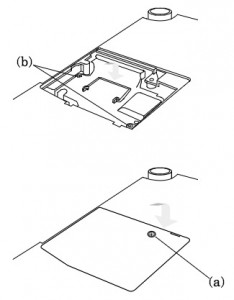
Place the Dukane I-PRO 8762 projector on a soft cloth and turn it over to access the lamp cover on the bottom.
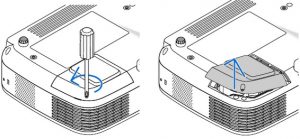 Loosen the screw holding the projector lamp cover in place. Click the cover to remove the cover.
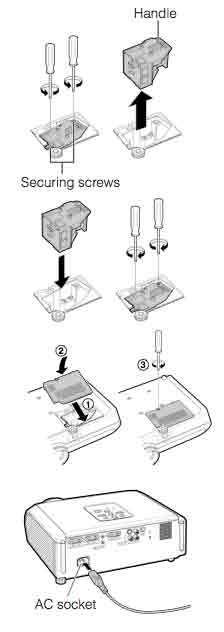
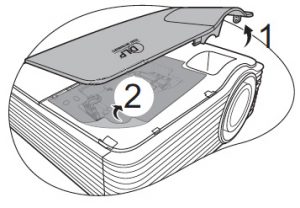
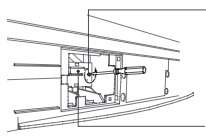
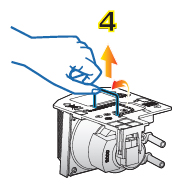
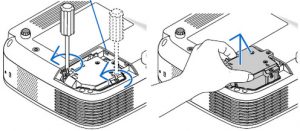 Remove the two screws holding the Dukane 456-8762 projector lamp in place. Using the indents, grab the sides of the Dukane 456-8762 projector lamp to remove the old lamp. Be careful not to bhttp://www.lamprecycle.organg the lamp against the projector as this may case the bulb to break.
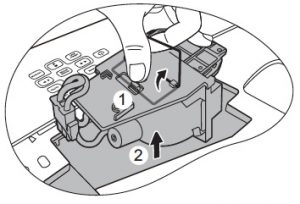
NOTE: The Dukane 456-8762 contains mercury and should be properly recycled.
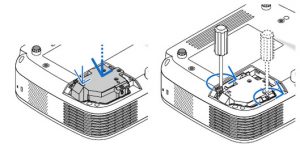
Insert a new Dukane 456-8762 projector lamp into the Dukane I-PRO 8762 projector by pressing the part labeled “PUSH” until the housing is plugged into the projector.
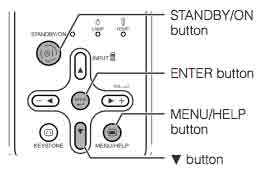
Tighten the two screws on the lamp. Replace the lamp cover and tighten its screw. screws. Reset the lamp timer by pressing the HELP button on the remote control for 10 seconds to reset it back to zero
Tips for a longer lamp life:
- Turning on the Eco Mode to lower power consumption and extend the lamp life by 130%.
- Keep your air filters clean to avoid overheating the projector.
- Turn off the Dukane I-PRO 8762 and let it stand for at least one hour ever 24 hours.
- Make sure there is enough airflow around the projector particularly if it’s been permanently mounted.
- Top tips for extending DLP projector lamp life.
6 good reasons to avoid counterfeit lamps:
- inferior workmanship which translates to an inferior product,
- they don’t last as long and are prone to explosiong
- improperly calibrated so can seriously damage the optics in your Dukane I-PRO 8762
- present a health hazard due to their toxic materials.
- installing a generic lamp will void the warranty
- short cuts with manufacturing means no safeguards to protect your eyesight!
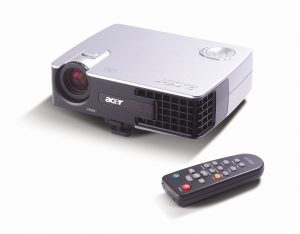 This guide helps you replace the Acer PD322 projector lamp.
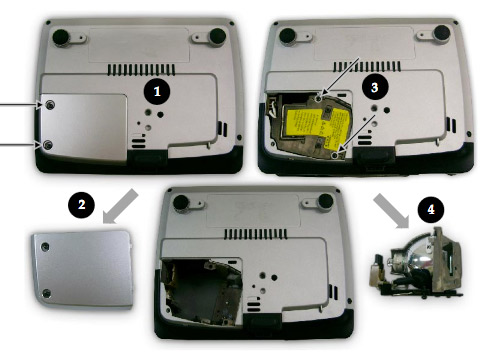
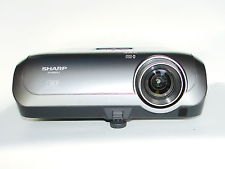 This guide shows you for the quickly replace the Sharp XR-10S projector lamp.
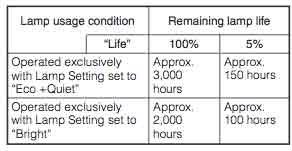
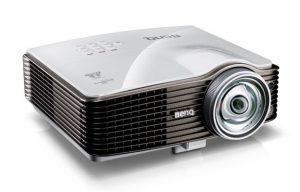 Don’t call the technician. Follow this easy guide to replace the BenQ MW811 projector lamp.
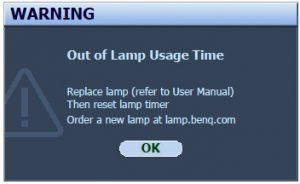 When the BenQ MW811 projector lamp is reaching end of life, three warning messages will appear on screen. The lamp indicator on the projector will start flashing orange. You may notice the image
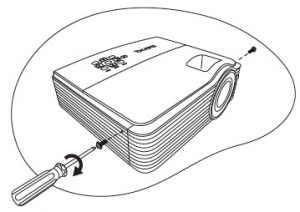

 When the
  Install a replacement lamp in the Panasonic PT-50LC14 TV using this step-by-step guide.
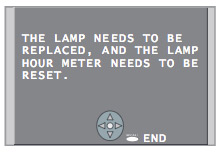 When the Panasonic PT-50LC14 TV lamp has reached end of life, the LAMP indicator light will be lit and a warning sign will appear on screen.
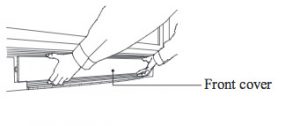 To remove the front cover, please your fingertips under the front cover and gently pull it away from the body of the TV.
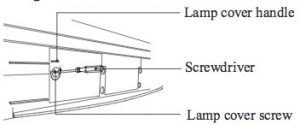
 Loosen the screw holding the
 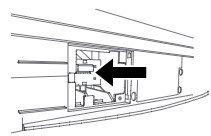 Insert the new lamp unit paying close attention to the direction of the new lamp. Press on the arrow mark making sure insertion is correct. Tighten the lamp unit/cover screw. Reset the lamp timer following the instructions that came with your new lamp.
 Adding multimedia can bring your worship to a new level. Here’s how to find the right church projector for your congregation.
 Lumens
 Resolution
 This guide walks you through installing a replacement Optoma Home Theater HD2200 projector lamp.
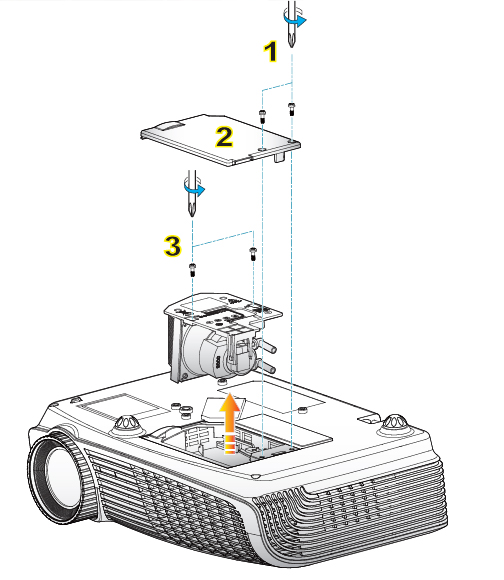
 Learn how to keep a healthy classroom when using a projector.
 Distance and light
 Change the Sharp PG-F150X projector lamp using this step-by-step guide.
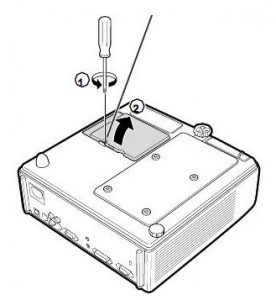 The Sharp PG-F150X projector operates using high temperatures and you can burn yourself badly if you don’t allow the projector to cool down. If should be cool to the touch before installation.
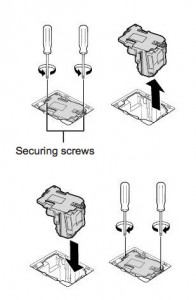 Remove the screws holding the
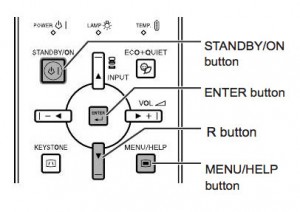
 This guide helps you replace the Mitsubishi LVP-XL1U projector lamp.
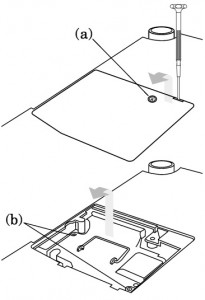 The lamp cover is found underneath the Sanyo LP-Z2 projector. Gently turn it upside, making sure to protect the top of the projector. Using a screwdriver loosen the screw holding the cover in place. Put the cover to one side.
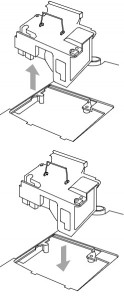
 Once the lamp is in, tighten the screws on the Lamp Assembly.