Install a replacement BenQ MX615 projector lamp
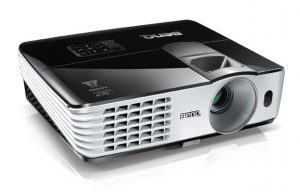 Follow these instructions to replace the BenQ MX615 projector lamp.
Start off with authentic
Save yourself unnecessary headaches by buying an authentic BenQ MX615 projector lamp. Why go authentic? Counterfeit “compatible” lamps may appear to be a bargain but in the long run end up costing more due to their shorter lamp life. They are prone to explosions and can put your eyesight at risk. Due to their substitute toxic materials and carcinogenic parts, the few dollars you will save are not worth it. Protect your health and keep your BenQ MX613ST working at optimum levels. Go with an authentic projector lamp.
Find this lamp on Amazon from the following authorized dealers:
MX660 BenQ Projector Lamp Replacement. Projector Lamp Assembly with Genuine Original Philips UHP Bulb Inside.
End of life warning signs
Your BenQ MX613ST projector uses the BenQ 5J.J3T05.001 replacement projector lamp. When it’s time to replace the BenQ MX613ST projector lamp you’ll see a series warnings appear on screen.
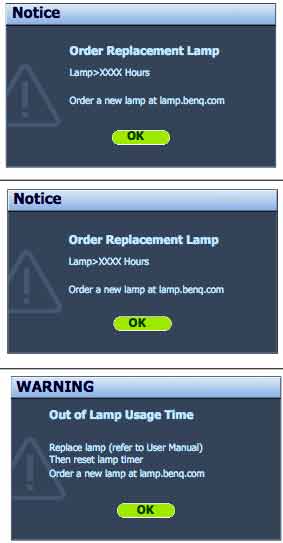
First warning: The BenQ MX615 projector lamp has been in operation equivalent to 4500 hours or for 6,000 hours Econo Mode, you have up to 6000 hours before changing the lamp. You can wait until the second warning to replace the projector lamp. Press MODE/ENTER to dismiss the message.
Second Warning: The BenQ MX615 projector lamp has been in operation equivalent to 4000 hours or 6,000 hours in Econo mode. You should replace the lamp immediately. Press MODE/ENTER to dismiss the message.
Out of lamp: The BenQ MX615 projector lamp has reached its end of life and the projector will shut down until the lamp is replaced. Install a new BenQ 5J.J3T05.00 projector lamp immediately.
Follow these safety instructions before changing the lamp:
- Reduce the risk of electrical shock by disconnecting the power cord on the BenQ MX615 projector.
- Reduce the risk of severe burns by allowing the projector to cool for at least 45 minutes. The projector should be cool to the touch.
Replacing the projector lamp
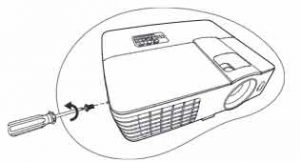
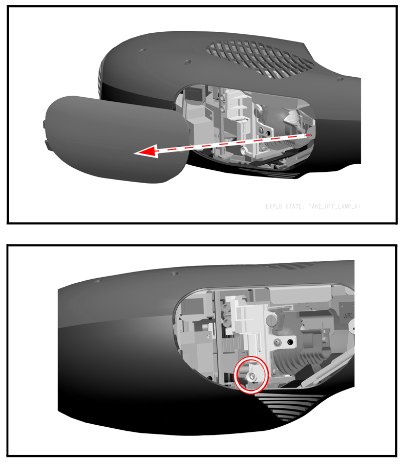
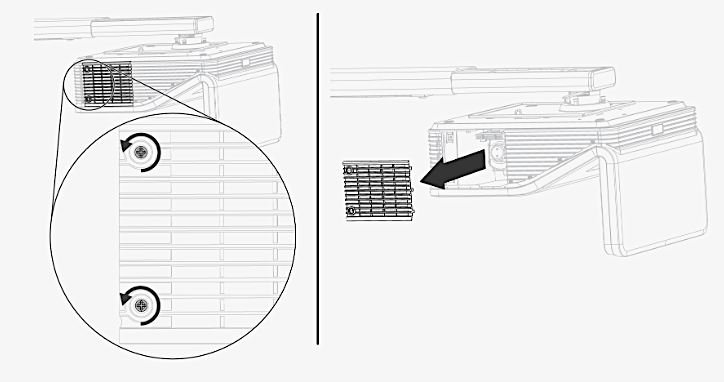
- The projector lamp cover is found on the side of the Ben
 Q MX615projector.
 - Loosen the screw holding the projector lamp cover in place
- Lift up the projector lamp cover.
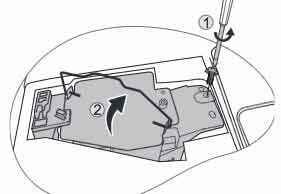
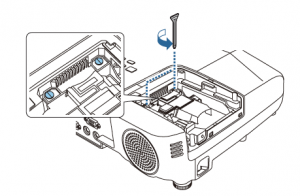
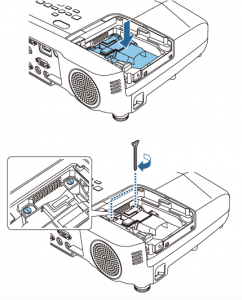
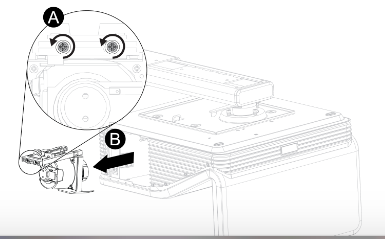
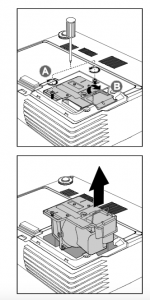
- Loosen the screw that secures the lamp.
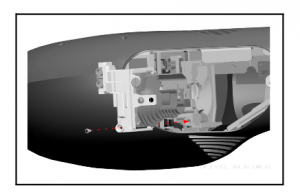
- Lift the handle so that it stands up. Use it to slowly pull the BenQ 5J.J3T05.00 projector lamp out of the projector. Pulling out too quickly may cause the bulb to break.
NOTE: The BenQ 5J.J3T05.00 projector lamp contains mercury and should not be thrown into regular garbage. Recycle your used lamps!
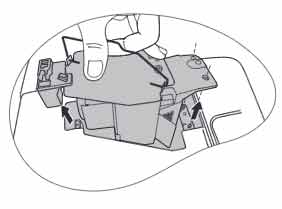
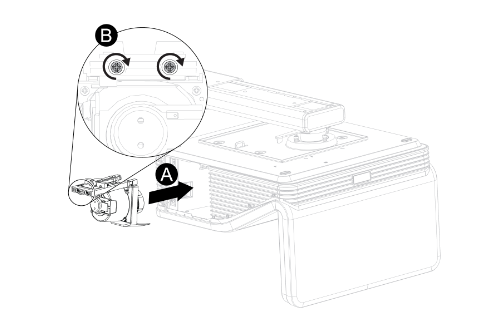
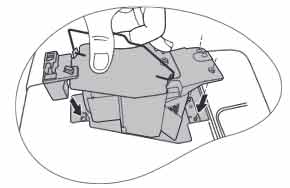 Insert the new BenQ 5J.J3T05.00 projector lamp.
- Tighten the screw that secures the lamp. Loose screw may cause a bad connection,
which could result in malfunction. Do not over tighten the screw.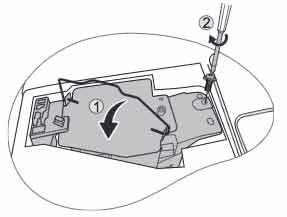
- Replace the lamp cover on the BenQ MX615 projector.
- Reset the lamp timer.
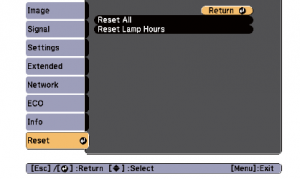
Resetting the lamp timer
Do not reset the BenQ MX615 projector lamp timer if the lamp has not been replaced as this could cause damage. Don’t start the if the lamp cover has not been replaced. To reset the projector lamp timer:
- Plug the BenQ MX615 projector and get it started.
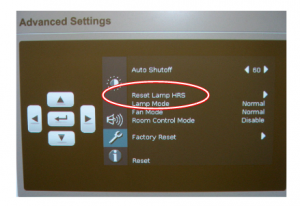
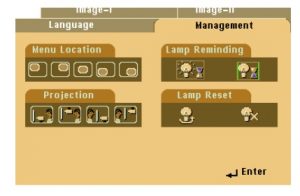
- Open up the menu and scroll over to SYSTEM/SETUP: Advanced. Press ENTER
- Press MODE/ENTER to display the Lamp Settings page
- Highlight Reset lamp timer to display a warning asking it you want to reset the lamp timer.
- Select RESET. Press ENTER.
- Lamp time will be reset to zero.
Extend the BenQ MX615 projector lamp
- Keep your air filters clean to avoid overheating the projector.
- Setting Lamp Power to Eco mode. Using Whisper mode reduces system noise and power consumption. It also extends the projector lamp life. To set Econo mode, go into the Advanced Setup > Lamp > Lamp Power menu.
- Learn more with Top tips for extending DLP projector lamp life.
 When it’s time to replace the Epson EB945 projector lamp follow this guide
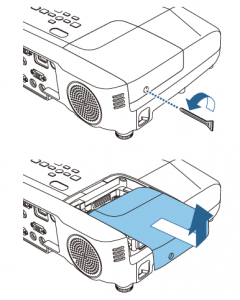
 Remove the two screws on either side of
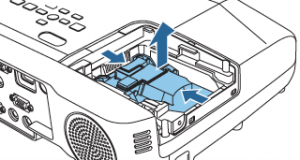
 Remove all packaging from the new
  To replace the Epson EMP-5500 projector lamp follow this guide.
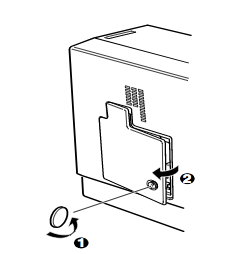 Use the screwdriver provided loosen the screw holding the Epson EMP-5500 projector lamp cover in place. Slide the Epson EMP-5500 projector lamp cover off and place it to one side.
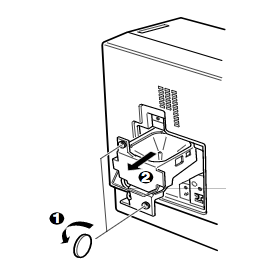
 How to install a replacement Infocus IN1126 projector lamp
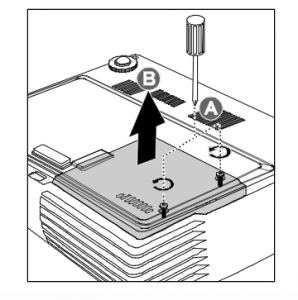
 Remove the two screws from the lamp module.
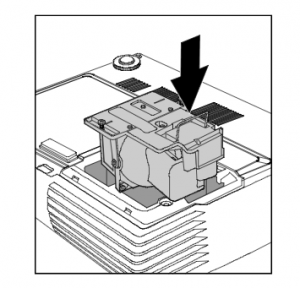
 Follow this step-by-step installation guide for installing a new Optoma W501 projector lamp
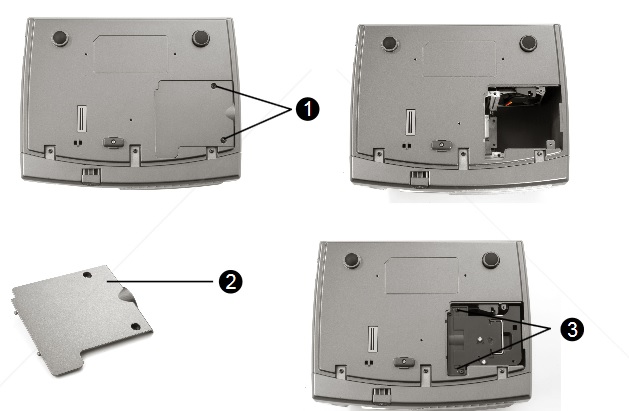
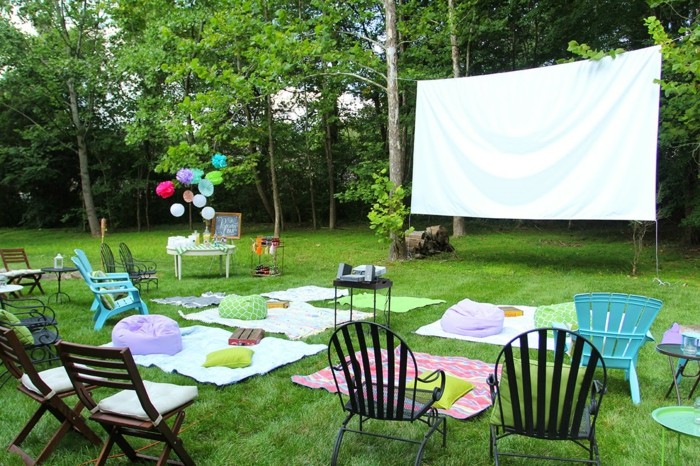
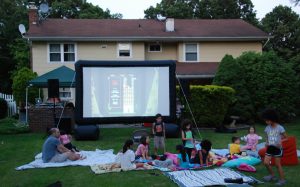
 The screen
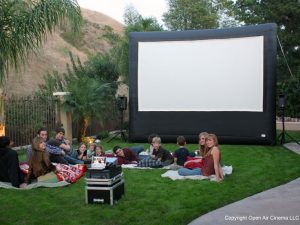

 Stay flexible. Don’t get too hung up on picture quality. You’re not going to get the same resolution as viewing indoors. It’s actually more important to have the image bright and crisp rather than a high resolution. Adjust the focus along with the keystone to compensate for the change in environment.
 Focus on the sound
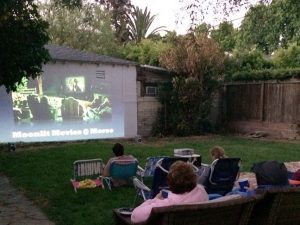
 Relax and have fun!
 Location, location, location
 Protection, protection, protection