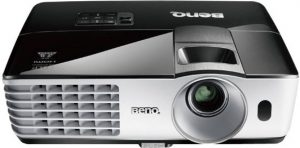
Replacing the BenQ DX819ST projector lamp
 Change the BenQ DX819ST projector lamp
This guide shows how to install a replacement BenQ DX819ST projector lamp.
Check lamp hours
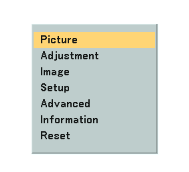
- Press MENU/EXIT and then press the side arrow keys to move to the SYSTEM SETUP: Advanced Menu.
- Press to highlight Lamp Settings and press MODE/ENTER. The Lamp Settings page is displayed.
- You will see the Equivalent Lamp Hour information appearing on the menu.
- To leave the menu, press MENU/EXIT.
- You can also get the lamp hour information on the INFORMATION menu.
- Press MODE/ENTER to dismiss the message
Find this lamp on Amazon sold by:
- BenQ 5J.J9A05.001 Replacement Lamp for MX819ST Projector
- BenQ 5J.J9A05.001 Projector Housing with Genuine Original Philips UHP Bulb
- eWorldlamp BENQ 5J.J9A05.001 Original Bare Bulb for BENQ DX818ST DX819ST MW820ST MX818ST MX819ST
- 5J.J9A05.001 BenQ Projector Lamp Replacement. Projector Lamp Assembly with High Quality Genuine Original Philips UHP Bulb Inside.
End of life warning
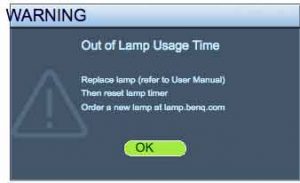 A flashing red light BenQ DX819ST projector lamp is reaching end of life. You’ll see four warning screens on the projector screen. You may also notice the image deteriorating or the color looking off. Change the projector lamp immediately when the final warning screen “Out of Lamp Usage Time” appears or the projector will simply shut down.
Be sure to buy an authentic projector lamp. Counterfeit prices are tempting but they end up more problems. (Scroll down to find out more.)
Replacing the BenQ DX819ST projector lamp
Your BenQ DX819ST projector uses the BenQ 5J.J9A05.001 lamp.
Before changing the lamp:
- Reduce the risk of electrical shock by disconnecting the power cord on the BenQ DX819ST projector.
- Reduce the risk of severe burns by allowing the projector to cool for at least 45 minutes.
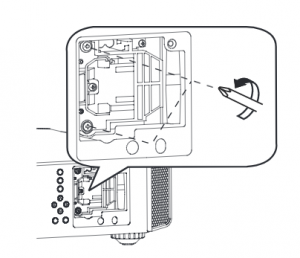
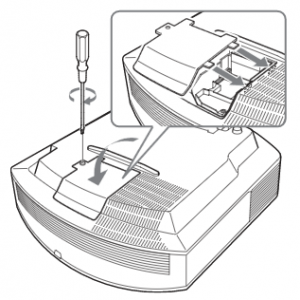
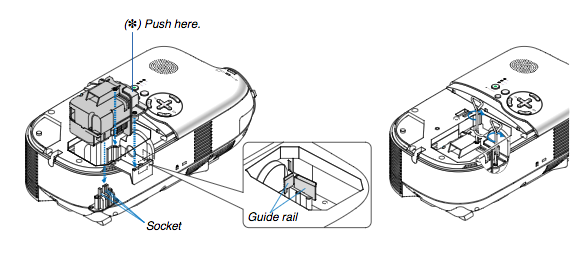
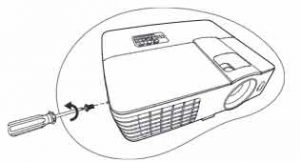
To replace the projector lamp

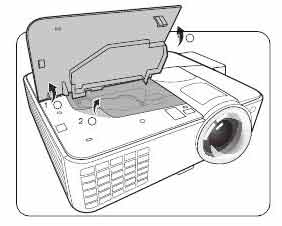
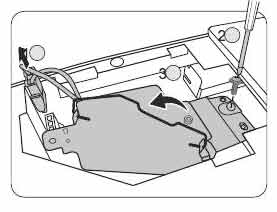
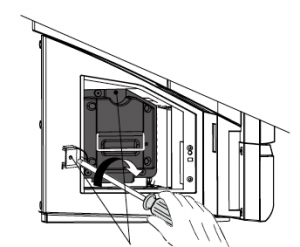
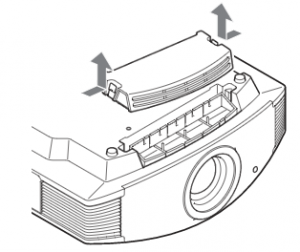
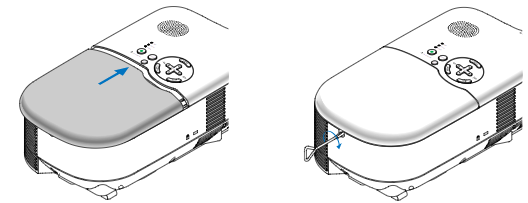
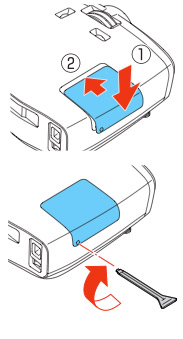
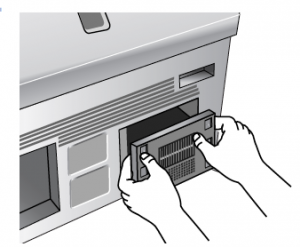
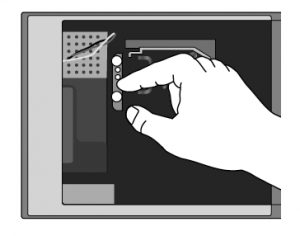
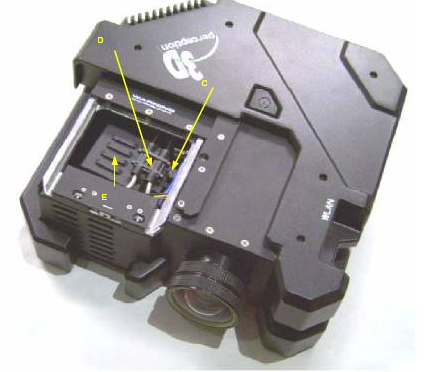
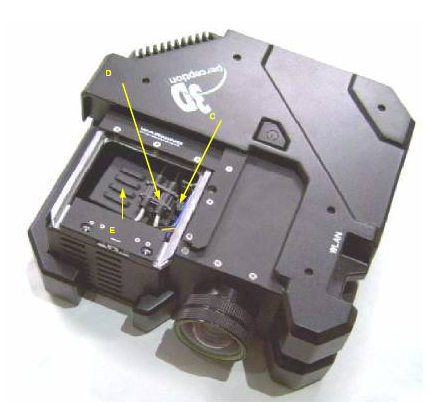
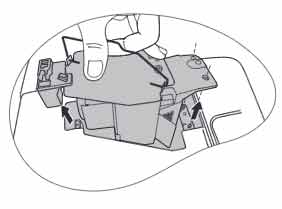
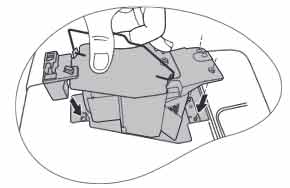
Loosen the screw that secures the BenQ DX819ST lamp cover on the side of the projector until the lamp cover loosens. Remove the BenQ DX819ST lamp cover from the projector. Disconnect the BenQ DX819ST lamp connector. Loosen the screw that secures the lamp in place
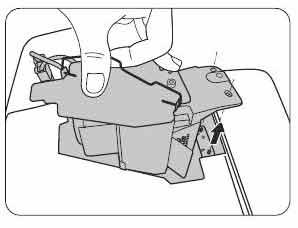
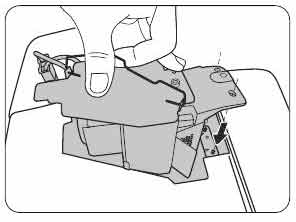
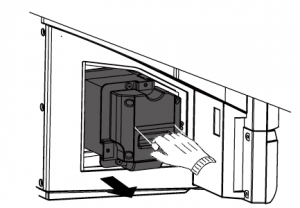
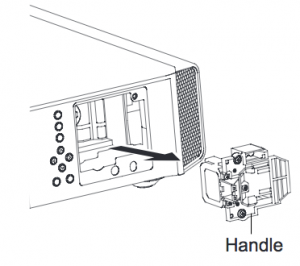
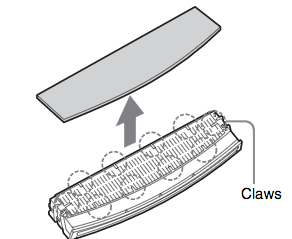
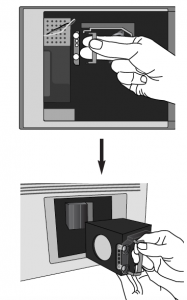
Slowly and gently pull the BenQ 5J.J9A05.001 projector lamp out of the projector. Pulling too quickly can cause the bulb to shatter. Learn what to do should the bulb shatter.
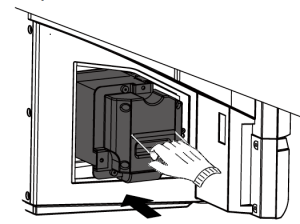
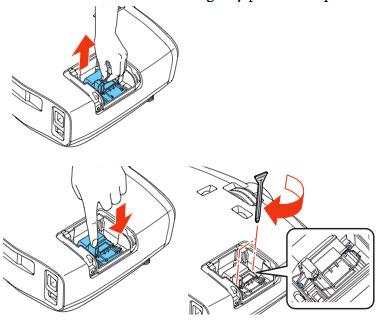
NOTE: The BenQ 5J.J9A05.001 projector lamp contains mercury and should not be thrown into regular garbage. It needs to be properly recycled. Insert the new lamp.
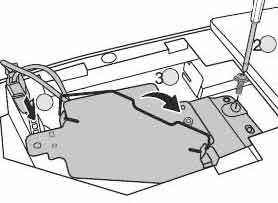
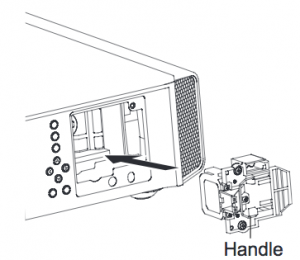
Make sure the handle is fully locked. Re-install the lamp connectors. Tighten the projector lamp screw. If the screw is too loose or too tight, the projector may not turn on. Replace the lamp cover. You are now reacy to reset the lamp timer.
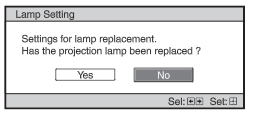
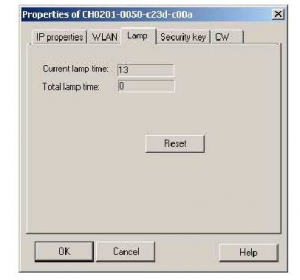
Reset the projector lamp counter
When the BenQ 5J.J9A05.001 projector lamp in the BenQ DX819ST projector has been changed the projector lamp timer must be reset to zero. To reset the lamp timer:
- Turn on the BenQ DX819ST projector.
- After the startup logo, open the On-Screen Display (OSD) menu.
- Go to the SYSTEM SETUP.
- Scroll over to Advanced > Lamp Settings menu.
- Press MODE/ENTER to display Lamp Settings page is displayed.
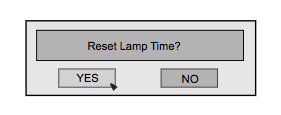
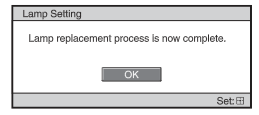
- Highlight Reset lamp timer. A warning message is displayed asking if you want to reset the lamp timer.
- Highlight Reset and press MODE/ENTER. The lamp time will be reset to “0”.
How to extend the life of the BenQ DX819ST projector lamp:
- Keep your air filters clean to avoid overheating the projector.
- Use the Lamp Power option on the BenQ DX819ST projector lamp and set to Economic Mode to reduce the amount of power used but extend lamp life.
- Learn more with Top tips for extending DLP projector lamp life.ows you how step-by-step.
Why buy authentic
Start off on the right foot with an authentic projector lamp. Counterfeit prices are tempting but they end up more problems including:
- shorter lamp life than original lamps
- no safeguards to protect your eyesight
- created with toxic materials including carcinogenic Krypton-85
- prone to explosions
- no calibrated properly so can damage the sensitive optics in your projectors
- no guarantee or refunds – you’re on your own with no technical support or refunds
Protect your health and keep your BenQ DX819ST projector by investing in an authentic projector lamp.
 Replace the JVC DLA-RS40 projector lamp
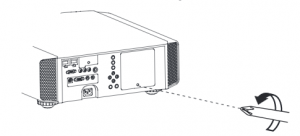
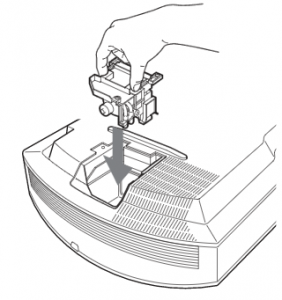
 Place the replacement
 Press the Enter button
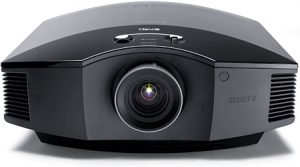 Installing the Sony VPL-HW15 projector lamp
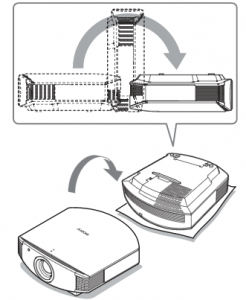 Before installations preparations:
 Loosen the 3 screws on the
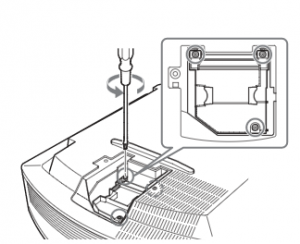
 Use our guide to install a replacement NEC LT180 projector lamp
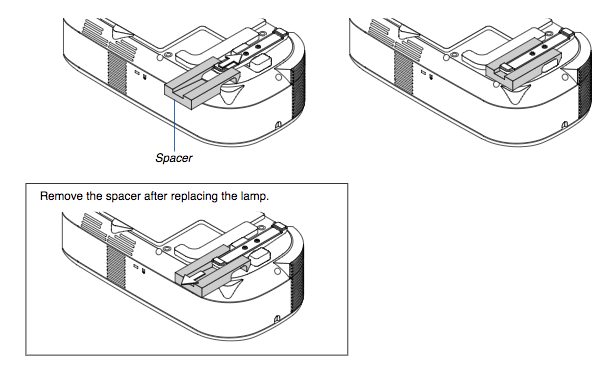

 Once the
  Follow our guide for installing a new Epson PowerLite Pro 6010 projector lamp
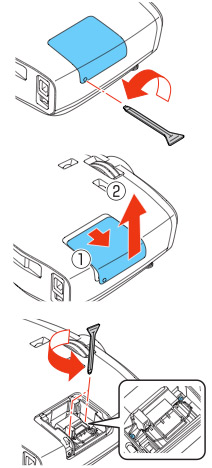
 Replace the Sony VPL-HW10 projector lamp using this guide
 Follow these instructions when it’s time to replace the Samsung HLP4663WX/XAA TV lamp
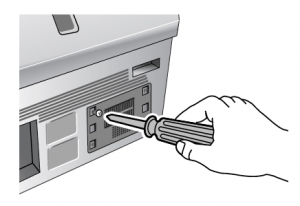
 Consult this guide when its time to change your 3D HMR-15 projector lamp
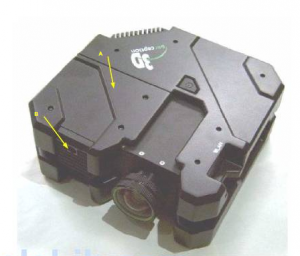
 Replace the BenQ MX660 projector lamp
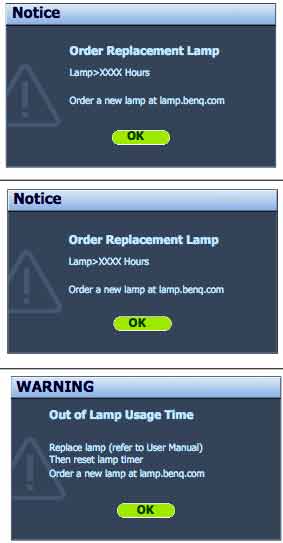
 Q MX660 projector.
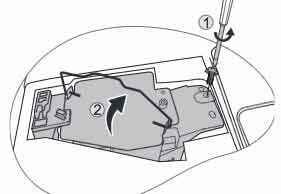
 Insert the new
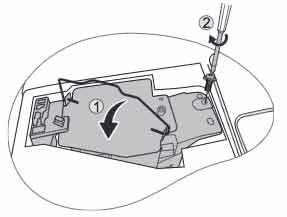
 It’s a breeze to change your Toshiba 42HM66 TV lamp when you follow our instructions.